
MSIX packaging
MSIX is a Windows app package format that provides a modern packaging experience to all Windows apps. The MSIX package format preserves the functionality of existing app packages and/or install files in addition to enabling new, modern packaging and deployment features to Win32, WPF, and Windows Forms apps.
Apptimized Portal allows a user to create MSIX packages with the help of Apptimized Packaging Engine, bulk convert packages to MSIX packaging format within the MSIX bulk conversion, and automatically convert the existing MSIX packages to Virtual Hard Disk files based on MSIX App Attach technology within the MSIX App Attach Converter.
Apptimized Packaging Engine
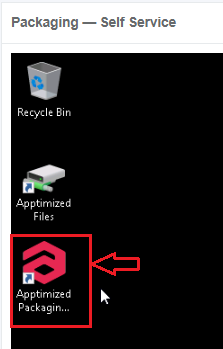
The Apptimized Packaging Engine (APE) launches when double-clicking the Apptimized Packaging Engine icon.
The process may take few moments.

Apptimized shows the Apptimized Packaging Engine (APE) main screen when successful:

Table 1. Apptimized Packaging Engine options
|
Option |
Details |
|
Repackage to MSI, App-V, MSIX, IntuneWin or VSL |
This option is snapshot-based and enables to create a completely new installer. This option is applicable when a user has a non-MSI vendor installer. A user converts it to MSI or App-V or virtualizes MSI installer into App-V. |
|
Transform and edit vendor MSI |
This option enables the transformation or customizing the existing Windows Installer. This option is applicable when a user has an MSI-based vendor installer and needs to produce an MST for it containing changes made during the installation process and/or configuration post-installation settings. |
|
Review and edit result |
This option enables to review the packages. The option becomes available only after a user completed the repackaging or transformation procedure. |
|
Save locally |
This option enables saving the output locally to verify before uploading back to Apptimized. |
|
Upload result to Apptimized |
This option enables uploading verified output back to Apptimized. A user can upload the output generated by Apptimized or select an archive with modified files to be used as an output. |
Repackage to MSI, App-V, MSIX, or VSL
When clicking the Repackage to MSI, App-V, MSIX, or VSL option, the APE will redirect a user to a Wizard. A user needs to provide input at each step.
Capturing installation and configuration
APE will capture all changes made to the system by scanning a file and registry changes, after that converting it to a machine-readable form. Those changes will typically include the installation of the application and the features selection, as well as customization of the application's settings to reflect the desired result as documented during the Discovery step.
VM preparation and prerequisites installation must proceed before packaging. The prerequisites are considered as applications that need to be present for a user’s software or its installer to function, but a user does not want those software products to be included into the package (e.g., because a prerequisite is already installed on the user’s machines or is managed as a separate dependency package).
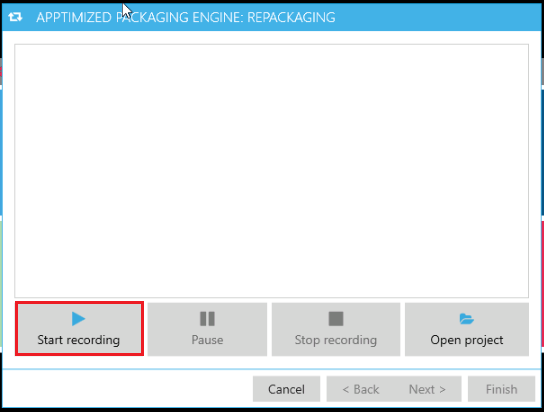
The option to start a recording session is available under the Start recording button.
Note. Any VM activity or inactivity can leave traces in the captured result (including those not relevant to the package or application results). A user needs to confine to the activities needed for packaging and finish the process as quickly as possible).
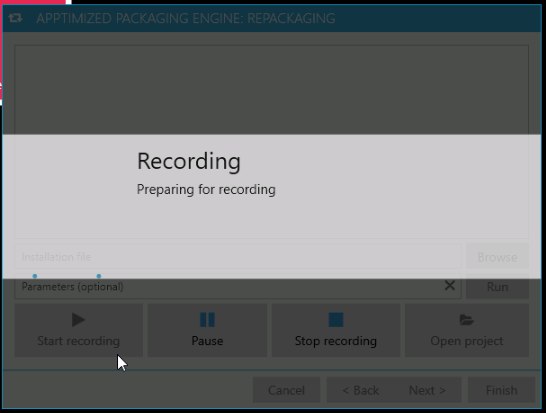
APE shows the following notification when successful:
The option to suspend capturing changes made to the filesystem and registry is available under the Pause button. The option to resume the recording is available under the Pause button (click the Pause button again).

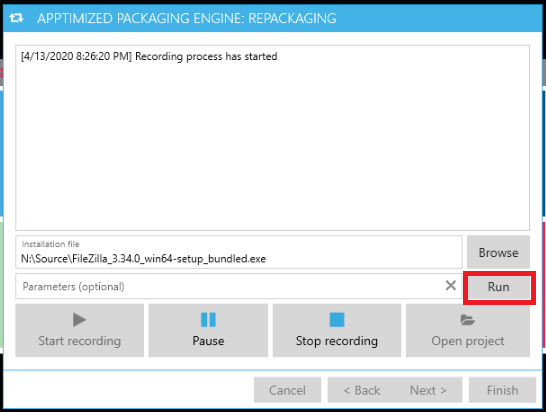
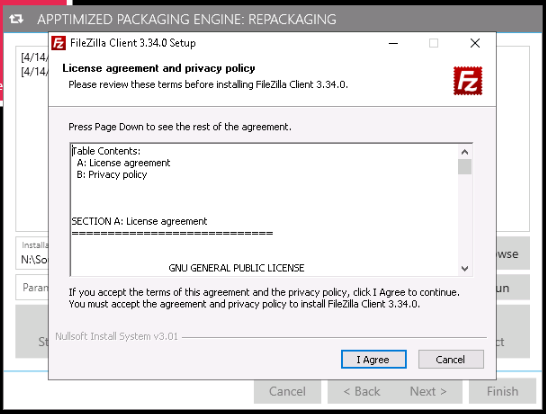
Once the recording has started a user enables a user to browse the path of the installation file (Browse button).
The option to provide the additional parameters (i.e., to specify additional launch arguments) is available under the Parameters (optional) field.

Once the file has been selected, the Run button becomes active.
When the synchronization process is finished, APE shows the following screen:
When the installation and configuration activities are completed, the record must be finished. The option to stop the record is available under the Stop recording button.
This will terminate the recording process and prepare the captured system changes for producing an MSI, MSIX, App-V, or VSL. The terminating process may take few moments (additional post-processing and cleanup will be applied to the output).
Note. Apptimized applies advanced logic and filters to keep the snapshot result clean from unneeded or dangerous files and registry keys. However, typically captured results require manual review and adjustments to achieve the desired result or to apply further cleanup from the captured system or user activity.
The processing file system changes may take few moments:

When successful APE shows the screen:

Editing Application Metadata
A user can review and adjust the application metadata if required.
The default values generate from the portfolio metadata provided during the file import process and do not need to be changed in most of the cases.
If the installation session consisted of more than one installer, select the primary installer to extract the metadata.
Review captured content
The option to the recorded content for the files, registry entries, services, and other system items that were modified or created during the installation is available under the Review recorded content button.

APE shows the snapshot editor screen when successful: 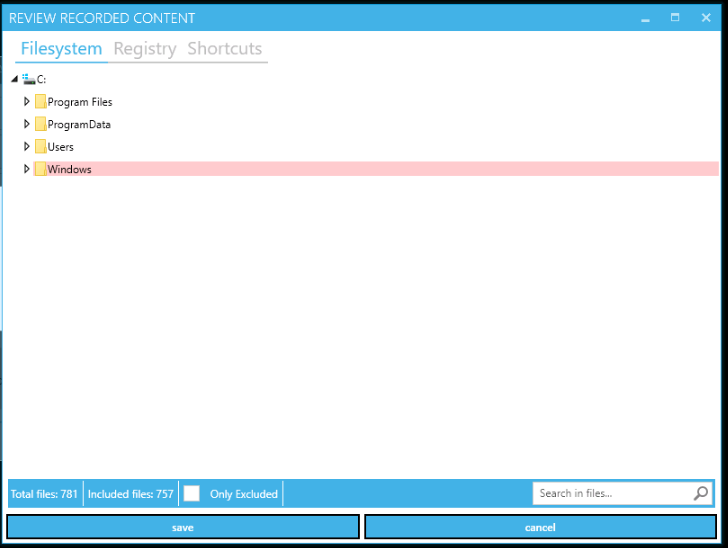
- Filesystem;
- Registry;
- Shortcuts;
- Drivers;
- Services;
- Certificates;
- Environment;
- Registry ACL;
- Filesystem ACL;
- Firewall Rules.
Filesystem and Registry tabs are presented in a tree structure view.
Shortcuts, Environment, ACL, Services, and other tabs are presented in a table-based view.
The Filesystem tab shows captured changes to the filesystem (file & folders).
The Registry tab shows captured changes to the Windows registry.
The Shortcuts tab shows captured shortcuts.
The Drivers tab shows captured drivers.
The Services tab shows all services which were created during source installation.
The Certificates tab shows all changes which were added to the Certificate Stores.
The Environment tab shows captured environment variables created during the source installation.
The Registry ACL tab shows captured permission changes in the Windows registry.
The Filesystem ACL tab shows captured changes to filesystem ACLs. An Access Control List (ACL) is a list of Access Control Entries (ACE). Each ACE in an ACL identifies a trustee and specifies the access rights allowed, denied, or audited for that trustee.
The Firewall Rules tab shows firewall rules created during the source installation.
Due to the nature of the recording process, unwanted resources, also known as system activity or noise, might be captured into the recording result. These happen because the system is altered by the installation (or by the application, by the user, by the other applications, and by the operating system itself) during packaging in areas that are unrelated to the application and are not needed in the package. Those unwanted resources might negatively influence the installation or uninstallation of the package, or other applications and the operating system's stability, or, at least, create unneeded bloat. System activity traces and noise cleaning is required to receive good-quality packages.
When recording completed, APE applies a default exclusion list, which filters most of the unwanted system changes from the package (which need to be removed from the package).
A user can additionally exclude unwanted resources or re-include resources that were automatically excluded from the list. Such actions should only cover specific scenarios involving changes to the operating system.
The option to exclude the files from the package is available under the context menu or using the keyboard shortcuts Ctrl+E or Del.
The option to include the files to the package is available under the context menu or using the keyboard shortcut Ctrl+I.

Captured resources that are intended to exclude from the package are shown with a red overlay.
Captured resources that are intended to include the package are shown with no overlay.

The status bar with the total number of files and the number of included files is available in the footer of the Review recorded content window.
The option to search files or folders by name is available under the Search in files field available in the footer of the Review recorded content window.

The screenshot below shows the tab interface with table-based view (i.e., Shortcuts tab):
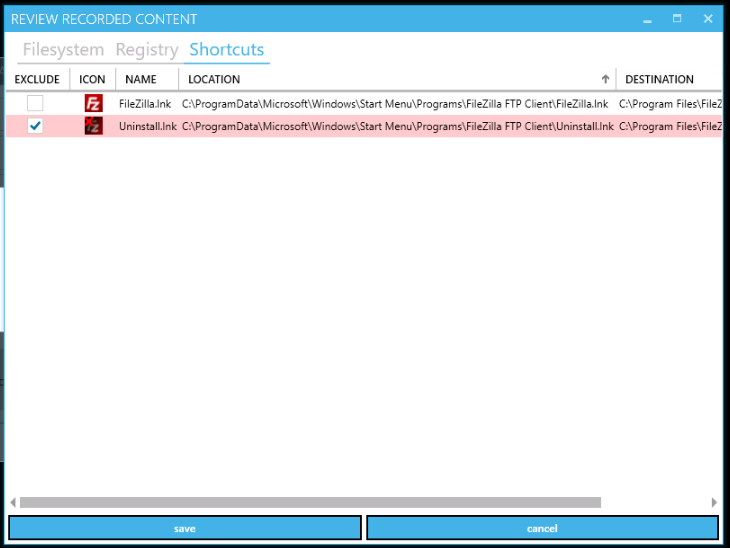
To exclude the item, tick the checkbox in front of its name.
Table 2. Shortcuts tab structure
|
Column name |
Details |
|
Exclude |
This column provides the option to include or exclude entities. |
|
Icon |
This column provides the shortcut icon. |
|
Location |
This column provides details on the shortcut location (i.e., a physical location of the shortcut file). |
|
Destination |
This column provides details on the shortcut’s target (usually target is an executable file). |
To exclude the item, tick the checkbox in front of its name.
Table 3. Filesystem ACL tab structure
|
Column name |
Details |
|
Exclude |
This column provides the option to include or exclude entities (i.e., detected file or folder ACL). |
|
Review |
This column provides the option to open the Permission properties for the selected file or folder. This dialogue window enables a user to Set, View, Change, or Remove permissions for the current item. Permissions are set recursively, so to set permissions onto a folder, its subfolders and files only configure permission changes on the parent folder level. The option to set permissions for a group or user that does not appear in the Group or user names box is available under the Add button (Type the name of the group or user > OK button). The option to remove permissions for a group or user that appears in the Group or user names box is available under the Remove button (Type the name of the group or user > OK button). The options to allow or deny permission are available under the Permissions for <User or Group> box (Select the Allow or Deny column > Check / Uncheck the box). The option to set the special permissions or advanced settings is available under the Advanced button. |
|
Path |
This column provides details on file or folder with detected, modified or created permissions. |
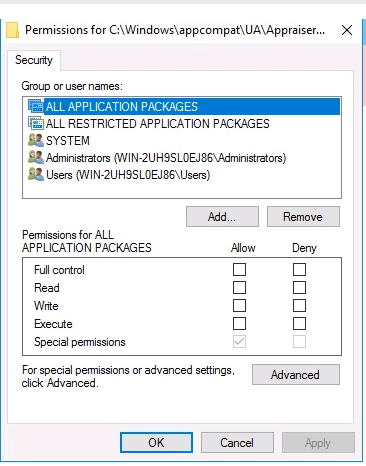

Table 4. Drivers tab structure
| Column name | Details |
| Exclude | This column provides the option to include or exclude entities (i.e., detected driver file). |
| Name | This column indicates the name of the driver file name. |
| Location | This column provides details on the driver location (i.e., a physical location of the driver file). |
| Add ARP entry | This column provides an option to add ARP (Add-Remove Program) entry which is based on ARPSYSTEMCOMPONENT property value. |
| Remove on uninstall | This column provides an option to automatically delete the driver during the uninstallation process. |
The option to apply the changes to the recording result is available under the Save button.
Analyze for common issues
The option to review the most common issues which might lead to a non-working or incomplete installation is available on metadata reviewing screen under the Analyze for common issues button.

APE shows a screen when successful:
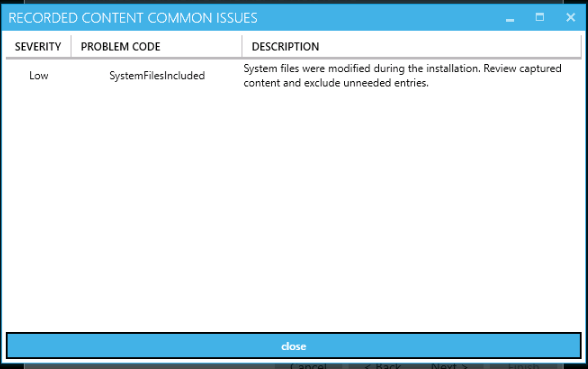
This will show the severity of problems, problem codes, and issue description, both with the recommendations on how to reduce the risk.
Table 5. Possible values of the analyzer
|
Severity |
Problem code |
Description |
|
High |
DriversInSnapshot |
The installation driver is not supported in repackaging mode. It won't be included in the final package. |
|
Medium |
ServicesInSnapshot |
Installation services are detected. This can lead to problems with App-V or AppX packaging formats. |
|
EnvironmentalVariablesChanged |
The environmental variables change is detected. A user must sure this won't overwrite existing entries during installation. |
|
|
Low |
MSIExecLaunched |
MSI installation is detected. It's recommended to use transformation instead of repackaging until a user converts the installer to the not MSI format. |
|
AutoStartDetected |
Auto-start modification is detected during the installation. |
|
|
DllHostDetected |
COM registration is detected. An application may not work when packaged in App-V or AppX formats. |
|
|
SystemFilesIncluded |
System files were modified during the installation. A user must review captured content and exclude unneeded entries. |
When the review of the common issues is finished, click the Close button.
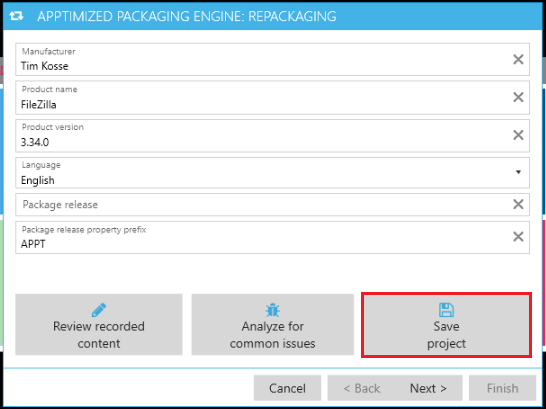
Save project
The option to save settings and apply them in the future is available under the Save project button.
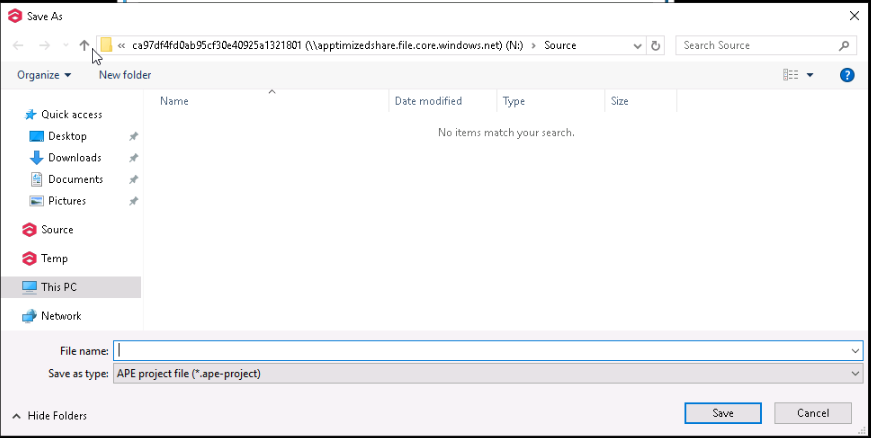
APE shows the following window (Choose the root to save project > Save button):
When the metadata review completed, the option to proceed to the next step is available under the Next > button.
Adjust Format Details
The following screen shows the default values for package formats:

The adjustment of the format-specific settings is available. These settings are typically pre-defined by Apptimized project administrator in the project settings in accordance with the appropriate Packaging Standards.
Before overriding any of pre-defined settings, a user must ensure the feasibility and correctness of provided changes.
The option to exclude or to include the package formats is available under the switch in front of their names.
When the package format review is completed, the option to proceed to the next step is available under the Next > button.
When the packages build, the log information is written to the console. In case of a failure this log may be requested by Apptimized support:
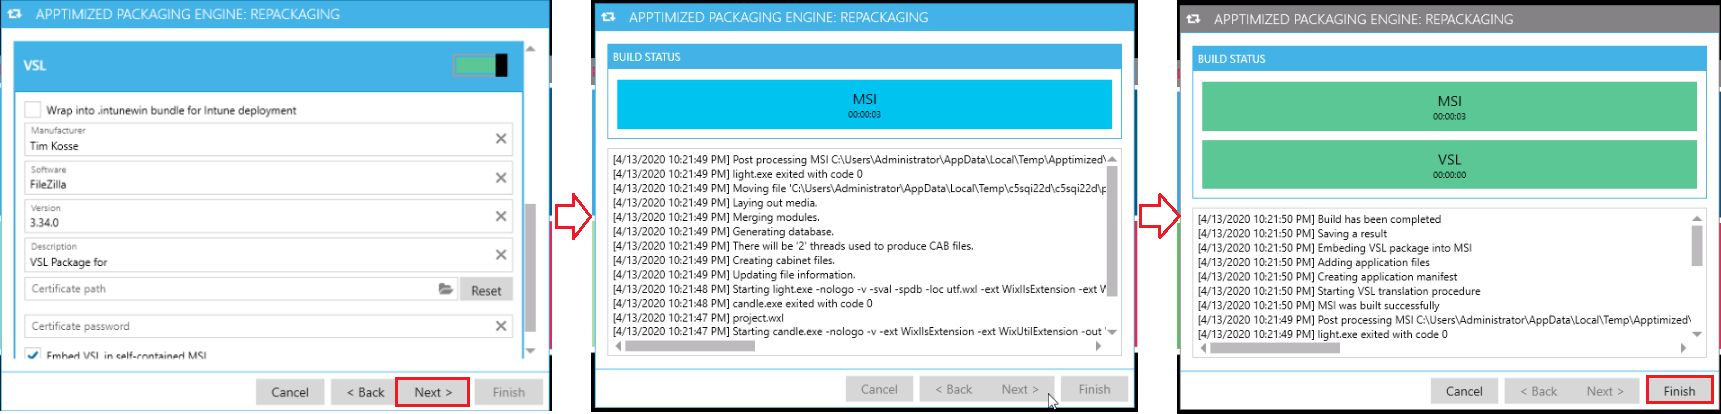
The blue background indicates that the build process is still in progress. When it turns to a green background the package type/format has been successfully built.
The build time will depend on the number and size of the captured files and may take few minutes.
The APE finalizes when clicking the Finish button.
MSIX bulk conversion
MSIX bulk conversion is one of the Apptimized products that provides a flexible and automated application packaging conversion system.
Bulk convert MSI and EXE to MSIX
Apptimized Platform provides silent conversion of the existing MSI packages and EXE files to MSIX within the MSIX bulk conversion.
The MSIX bulk conversion is available under the Project menu > MSIX bulk conversion:
.png)
The option is disabled by default.
Enable MSIX bulk conversion
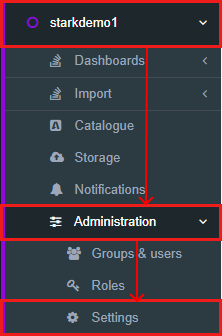
The MSIX bulk conversion is available under the Project menu > Administration > Settings:
Apptimized provides the following screen when successful:
To continue enabling MSIX bulk conversion, click:
- Workflow > Packaging – Self Service.
.png)
- General > MSIX button.
.png)
The option to enable MSIX bulk conversion is available under the MSIX bulk conversion button. Yes and No options are available. The default value is No.
.png)
The MSIX bulk conversion option becomes active when switched on and once the required settings are completed.
To apply the settings, click the Save button.
.png)
Apptimized provides the following notification when successful:

MSIX bulk conversion interface
The option to start conversion process Projects > MSIX bulk conversion:
.png)
Apptimized provides the following screen:

The screen above shows the default MSIX bulk conversion interface when no applications are added.
The packaging data is performed in 2 blocks:
- Information block – this block contains detailed information about packages.
- Action block – this block provides options to configure the package conversion process (see the Package conversion)
.png)
Manage applications in MSIX bulk conversion
Add application
The option to add the package to the conversion list is available under the Select from portfolio button:
.png)
Apptimized shows the modal window when successful:

Note. If the application is not packaged, there will be no options available.
|
Field |
Details |
|
Search |
The Search field allows finding the application from the portfolio. There is no default value for this field. |
|
Select |
The Select field allows selecting the application from the portfolio.
There is no default value for this field. There is an option to select all applications. |
.png)
.png)
To apply the settings, click the Save button. Cancel – revers to the general Silent conversion section.
Apptimized shows the following notification when successful:

When a user adds the application to the MSIX bulk conversion list, Apptimized shows the following screen:

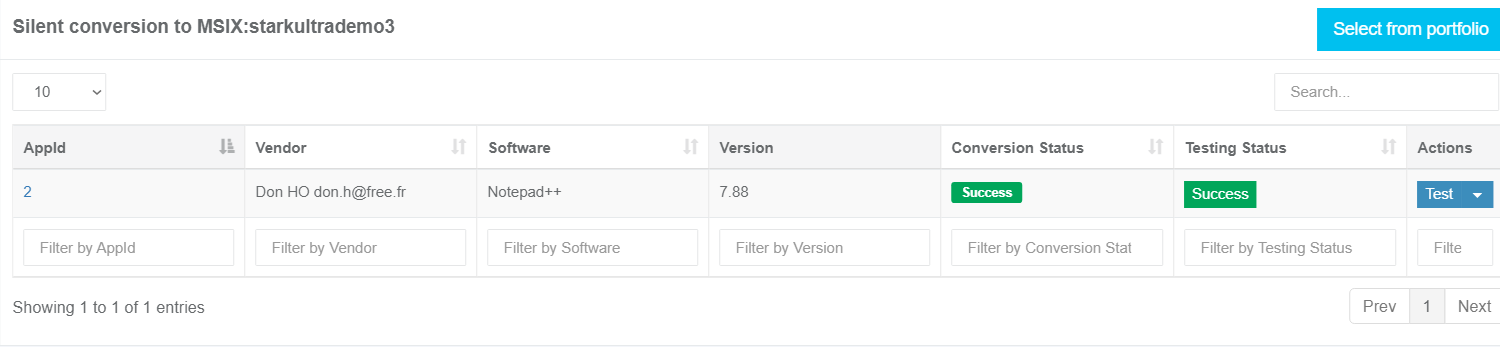
Silent conversion data is grouped into the following categories:
- App ID
- Vendor
- Software
- Version
- Conversion Status
- Testing Status
.png)
|
Column name |
Details |
|
App ID |
This component indicates an ID of the application that will be available to a user for the conversion. |
|
Vendor |
The component provides a user with information about the vendor of the application. |
|
Software
|
This component indicates the name of the application. |
|
Version |
This component provides a user with information about the version of the application. |
|
Conversion Status |
This component indicates the state of conversion of the application. The following statuses are provided:
|
|
Testing Status |
This component provides the state of testing of the application. The following statuses are provided:
|
Package conversion
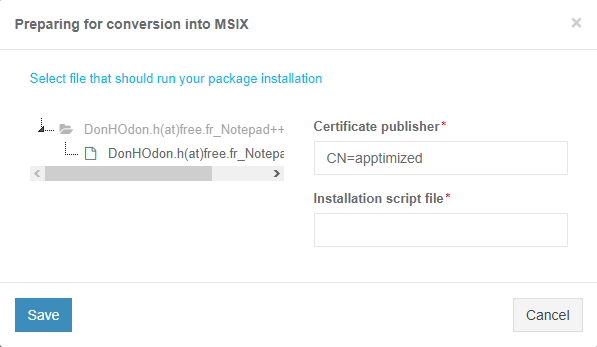
The option to convert a package into the MSIX format is available by clicking Prepare button.
.png)
Apptimized shows the following modal window, by clicking Prepare button:
|
Field |
Details |
|
|
Package conversion options |
The field allows selecting an installation file of the application to convert it. For every application to convert, the installation file must be selected. The installation file can be in MSI, EXE, or BAT formats. |
|
|
Certificate publisher |
The field allows setting a publisher for the future package.
The information is automatically filled in with the information of the publisher of the package. There is no default value for this field. |
|
|
Installation script file |
The Installation script file field allows setting the installation file of the application to convert. It is set after selecting the file in the Package convert options field. The installation file can be in MSI, EXE, or BAT formats. There is no default value for this field.
|
|
.png)
.png)

To apply the settings, click the Save button. Cancel – refers to the general Silent conversion section.
To continue Package conversion configuring, select the installation file of the application to convert.
.png)
To apply the settings, click the Save button. Cancel – refers to the general Silent conversion section.
Apptimized shows the following notification when successful:

To start the conversion process, click Convert.
.png)
Apptimized provides the following notification when successful:

Note. The conversion won’t be done immediately. The processing time depends on the size of the package.
To stop the conversion process, click the Stop button.
.png)
Apptimized provides the following modal window:
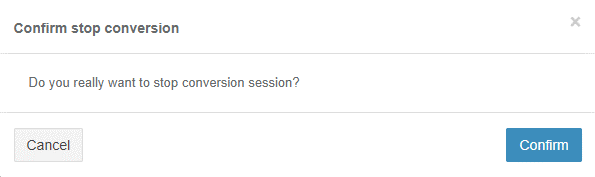
To stop conversion, click Confirm. Cancel – refers to the general Silent conversion section.
Apptimized shows the following screen when the conversion process finishes:

Test package
To test the package, click the Test button in the Actions tab:
.png)
Apptimized provides the following screen:
.png)
Apptimized provides the VM to test the package. After testing, click the Terminate button to get the results of testing:
.png)
Apptimized provides the following screen when successful:
.png)
To continue, click the Result button. Restart option allows to restart VM and return to testing.
.png)
Apptimized provides the following modal window when successful:

To enter the Testing result section, click Result. Cancel – refers to the VM testing section.
Apptimized provides the following screen when successful:
.png)
The Result field indicates the state of testing. There are 2 options available:
Success – indicates, that testing was successful.
Failed – indicates, that testing was unsuccessful.
.png)
To apply the settings, click the Save button. Retest – refers to the VM testing section.
.png) Apptimized provides the following screen when successful:
Apptimized provides the following screen when successful:
Delete application
The option to delete the application from the Silent conversion tab is available in the Actions tab by clicking  button > Delete.
.png)
Apptimized shows the following modal window when successful:
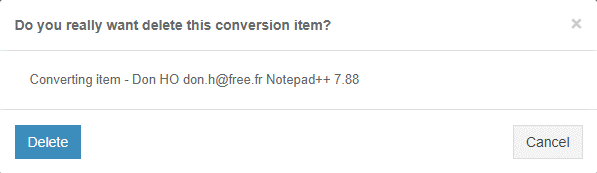
To delete the application from the conversion tab, click Delete. Cancel - refers to the general Silent conversion tab.
Apptimized shows the following notification when successful:
.png)
Download the application
To download the converted package, click button > Download.
.png)
The download process will start immediately.
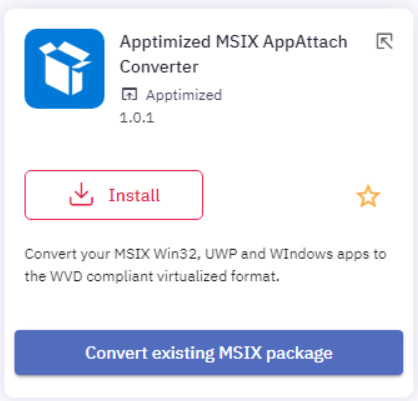
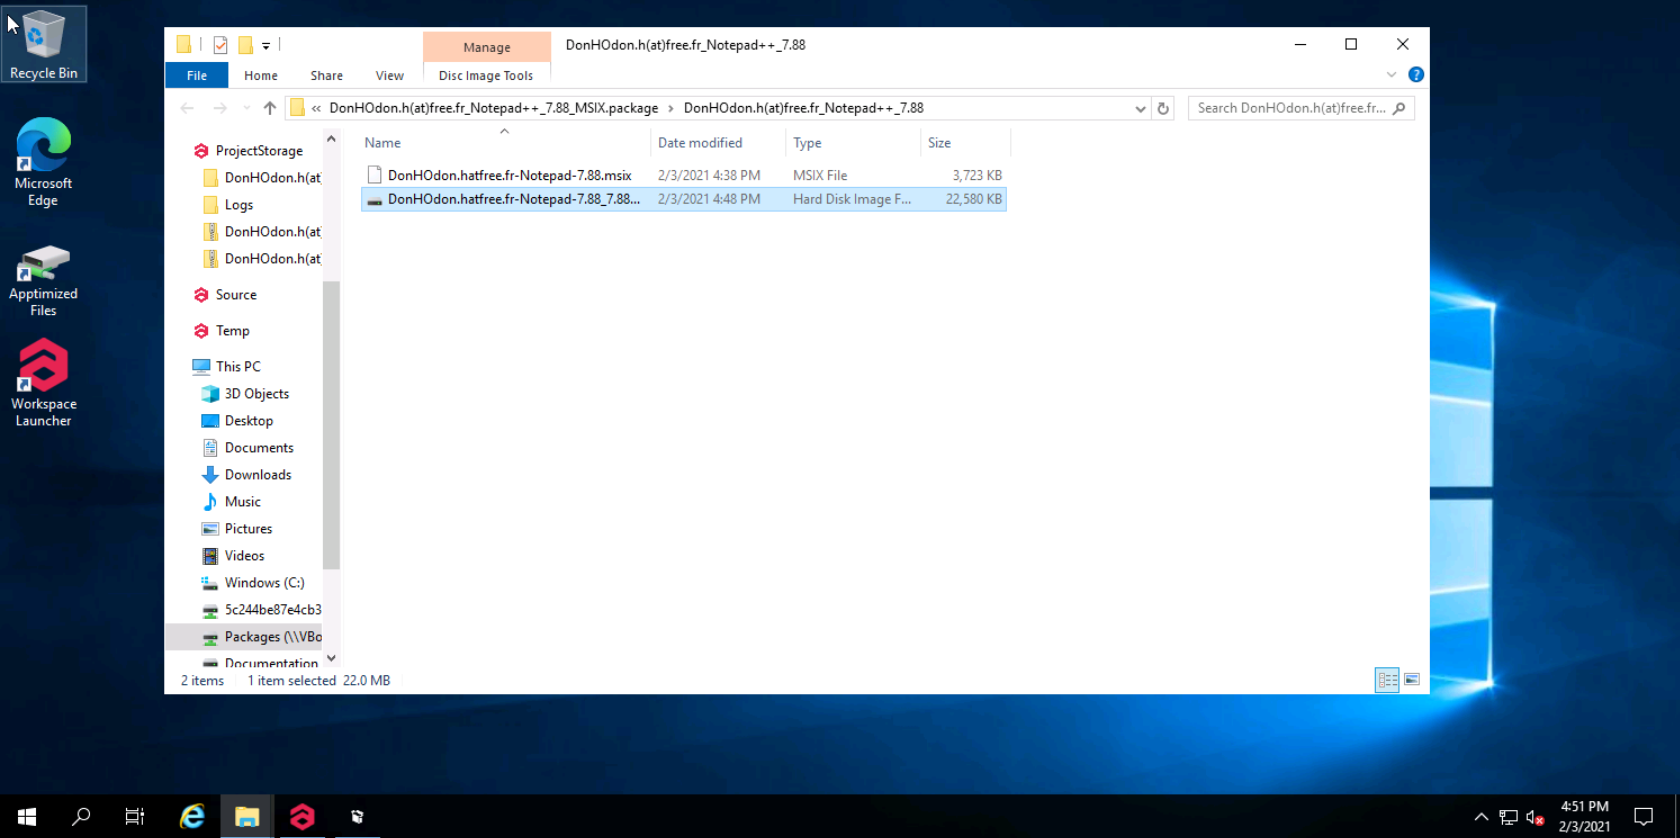
Apptimized MSIX AppAttach Converter
General Overview
MSIX App Attach is a way to deliver MSIX applications to both physical and virtual machines. A Microsoft technology allowing to make MSIX packages compliant for virtualized desktop environments such as Windows Virtual Desktop.
The Apptimized MSIX AppAttach Converter is a tool that allows to automatically convert the existing MSIX packages to VHD (Virtual Hard Disk) files based on MSIX App Attach technology.
The tool is available in the Workspace Launcher (see the Workspace Launcher).
The option to install the application is available under the Install button (see the Application installation).
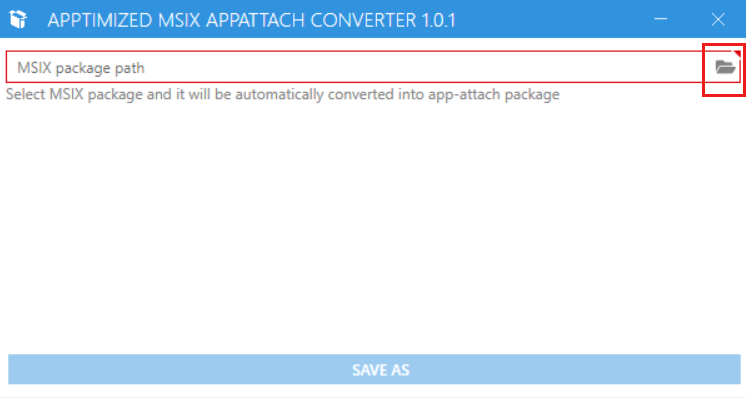
Convert existing MSIX package
A user can convert the existing MSIX package into MSIX app attach package. This option is available under Convert the existing MSIX package button.

Apptimized shows the following screen when successful:
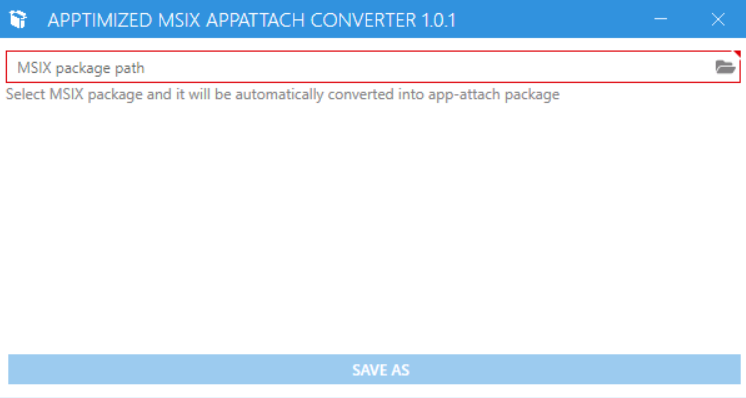
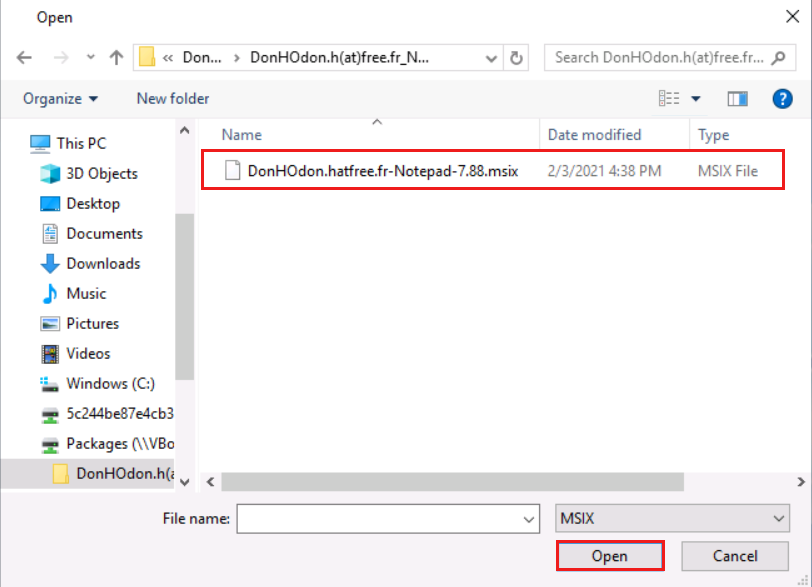
A user can select the existing MSIX package by clicking the Folder icon.

A user can select an MSIX file that will be automatically converted to the app-attach package and click the Open button to start the converting process.
Apptimized shows the following screen when successful:
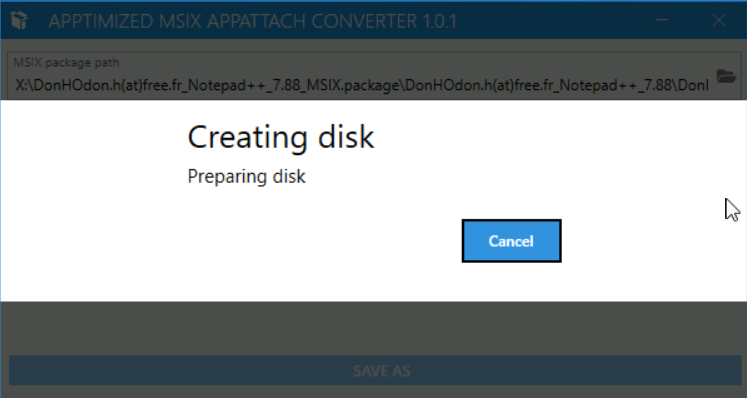
The creation process may take few moments. Cancel - stop the VHD file creation.
After completing the creation a user can save the app-attach package (VHD file by clicking the Save button.

The process may take few moments.
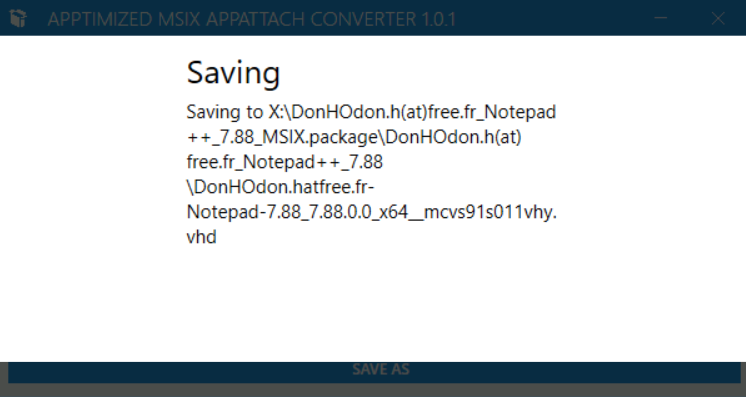
Apptimized shows the following screen when successful:
Apptimized MSIX PSF Tool
General overview
Package Support Frameworks is an open-source kit that helps apply fixes to the existing desktop application without access to the source code. It can run in an MSIX container.
Apptimized MSIX PSF Tool allows applying fixups semi-automatically to a Win32 application in existing MSIX files.
The tool is available in the Workspace Launcher (see the Workspace Launcher)

The option to install the application is available under the Install button (see the Application installation)
Run Apptimized MSIX PSF Tool
A user can apply the fixes in existing MSIX files. The option is available under Run Apptimized MSIX PSF tool button.

Apptimized shows the following screen when successful:
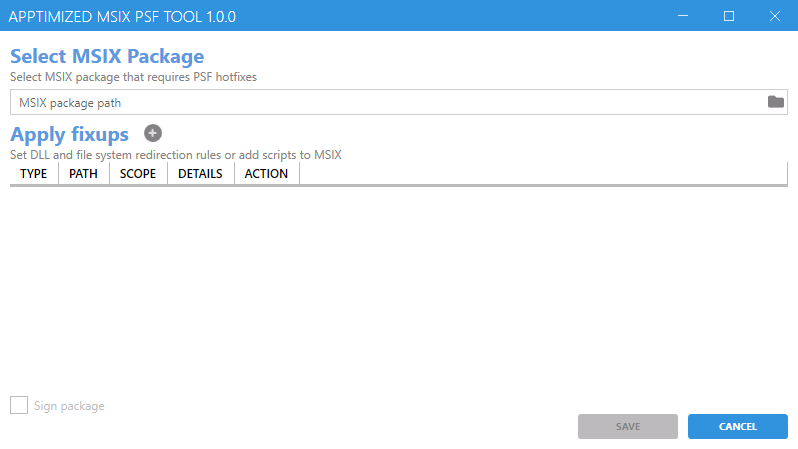
Select MSIX package
A user can select the existing MSIX package by clicking the Folder icon.
.png)
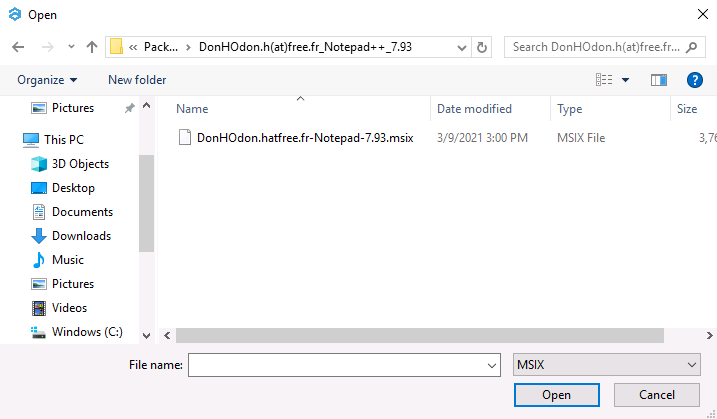
A user can select an MSIX file to automatically check for errors and all the appropriate fixes for them and click the Open button to start the checking process.
.png)
Apptimized shows the following screen when successful:
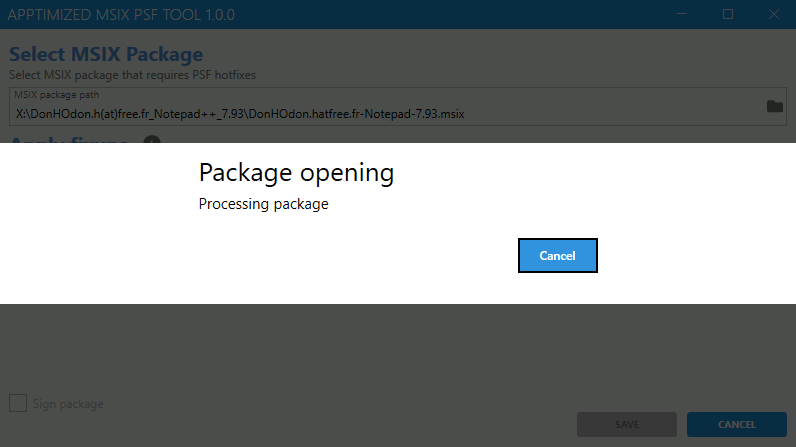
The opening process may take a few moments. Cancel – stops the package opening.
Apptimized shows the following screen after successfully opening:

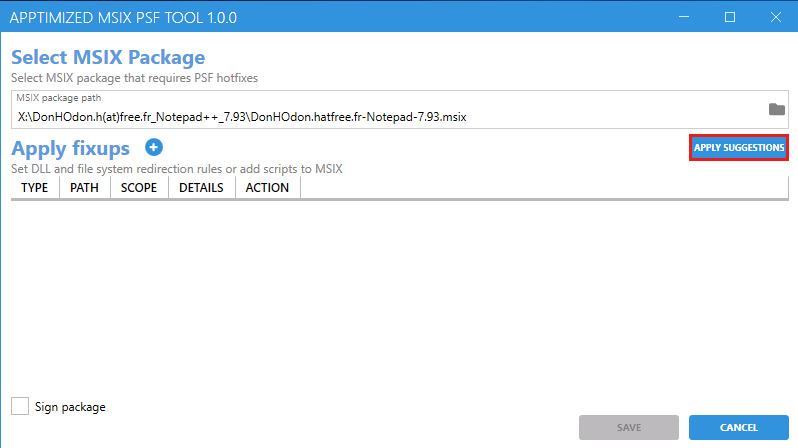
Fixup suggestions are automatically provided after the package opens. They can be manually added, by clicking the Apply suggestions button.
To create default fixups based on package content, click Create. Cancel – reverts to general Apptimized MSIX PSF Tool section.
Apptimized shows the following screen when successful:

Apply fixups
Fixup suggestions will be provided in the general Apply fixups section. Apply fixups allow setting DLL and file system redirection rules or setting command-line arguments to the MSIX package.
.png)
The fixups data is performed in 2 blocks:
- Information block – this block contains detailed information about fixups.
- Action block – this block provides options to configure the fixups.
.png)
Fixup's data is grouped into the following categories:
- Type
- Path
- Scope
- Details
.png)
|
Column name |
Details |
|
Type |
This field indicates the type of provided fixup |
|
Path |
This field provides the file system path to the place fixup effects |
|
Scope |
This field indicates the target application (file.exe or regular expression pattern) |
|
Details |
This field shows the redirect options (files pattern, dll name, etc.) patterns of the fixup |
Fixup’s actions are grouped into the following categories:
- Edit fixup
- Delete fixup
- Make copy
To apply fixups provided by the Apptimized MSIX PSF Tool, click the Save button.
.png)
Apptimized provides the following screen:
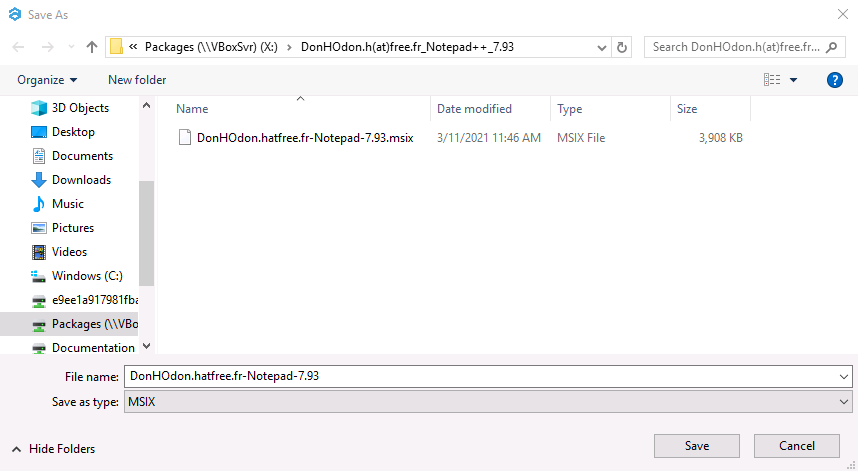
A user can save an MSIX file with all the provided fixes by clicking the Save button to start the saving process.
.png)
Apptimized provides the following screen when successful:

To cancel implementing the fixups, click the Cancel button.
.png)
Apptimized provides the following modal window when successful:
.png)
Click OK to continue cancelling process. Cancel – refers to Apply fixups section.
Apptimized provides the following screen when successful:
Edit fixup
To edit fixup, click ![]() button in the Action tab or double click the Fixup row.
button in the Action tab or double click the Fixup row.
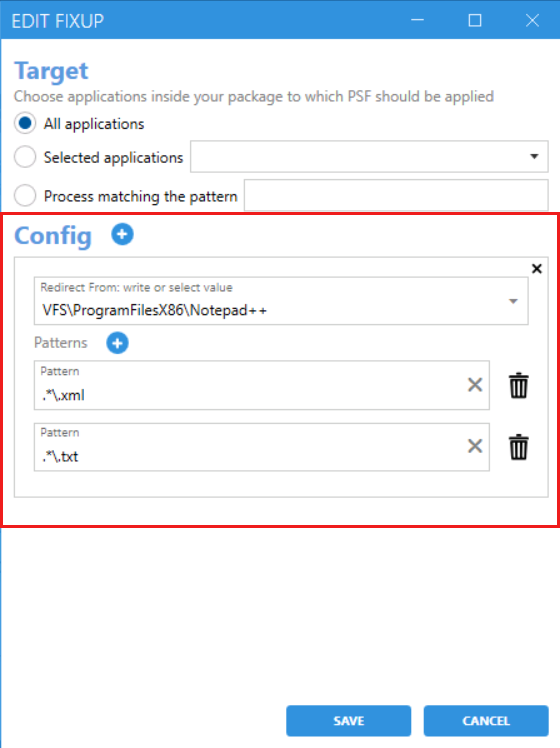
Apptimized shows the following screen when successful:

Edit section is divided into 2 blocks:
- Target – indicates the applications as a target for fixups;
- Config – allows to change the path and add patterns for fixups.
Target section provides three options to change:
- All applications – fixup affects all applications inside of the MSIX package. This option is selected by default;
- Selected applications – allows to choose the optional application for fixup to be provided;
- Process matching the pattern – allows to set up fixup pattern as a regular expression target;
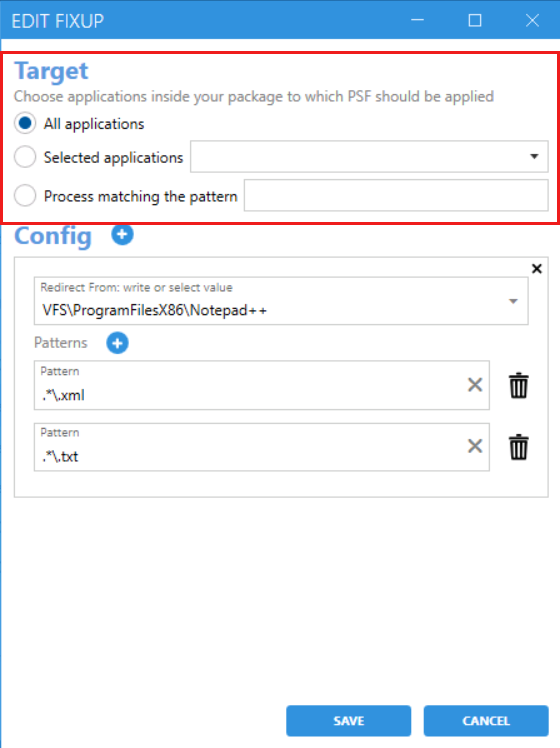
Config section is divided into two fields:
- Path field – allows to change the path of the fixup;
- Patterns – allows to set up patterns for the fixup;
Delete fixup
To delete fixup, click ![]() button in the Action tab.
button in the Action tab.
Apptimized provides the following modal window:
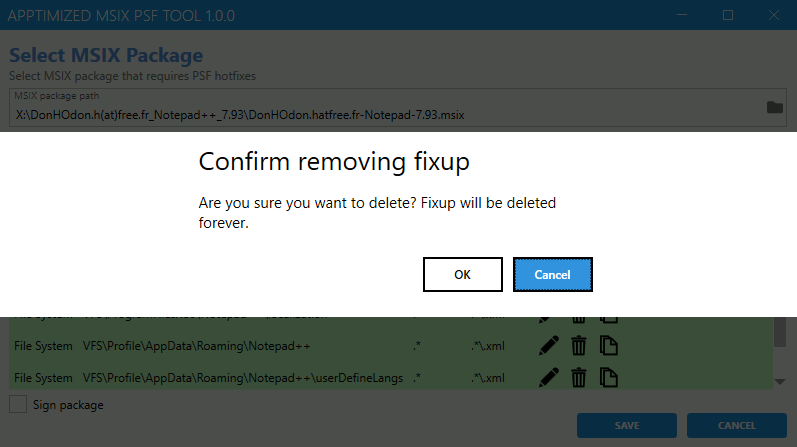
To confirm removing fixup, click Ok. Cancel – refers to the general Apptimized MSIX PSF Tool menu.
Make a copy
To make a copy of a fixup, click  button in the Action tab.
Apptimized shows the following screen when successful:
.png)
Sign package
To sign a package with a PFX certificate, check the box next to the option name.
.png)
Apptimized shows the following screen when successful:
.png)
Sign package section contains the following fields:
- PFX certificate – allows to set up the path of a PFX certificate to be provided;
- Password – allows to set up the password for a PFX certificate;
- Timestamp server – allows to set up a timestamp server for a PFX certificate.
No comments to display
No comments to display