
SafeBox management
SafeBox overview
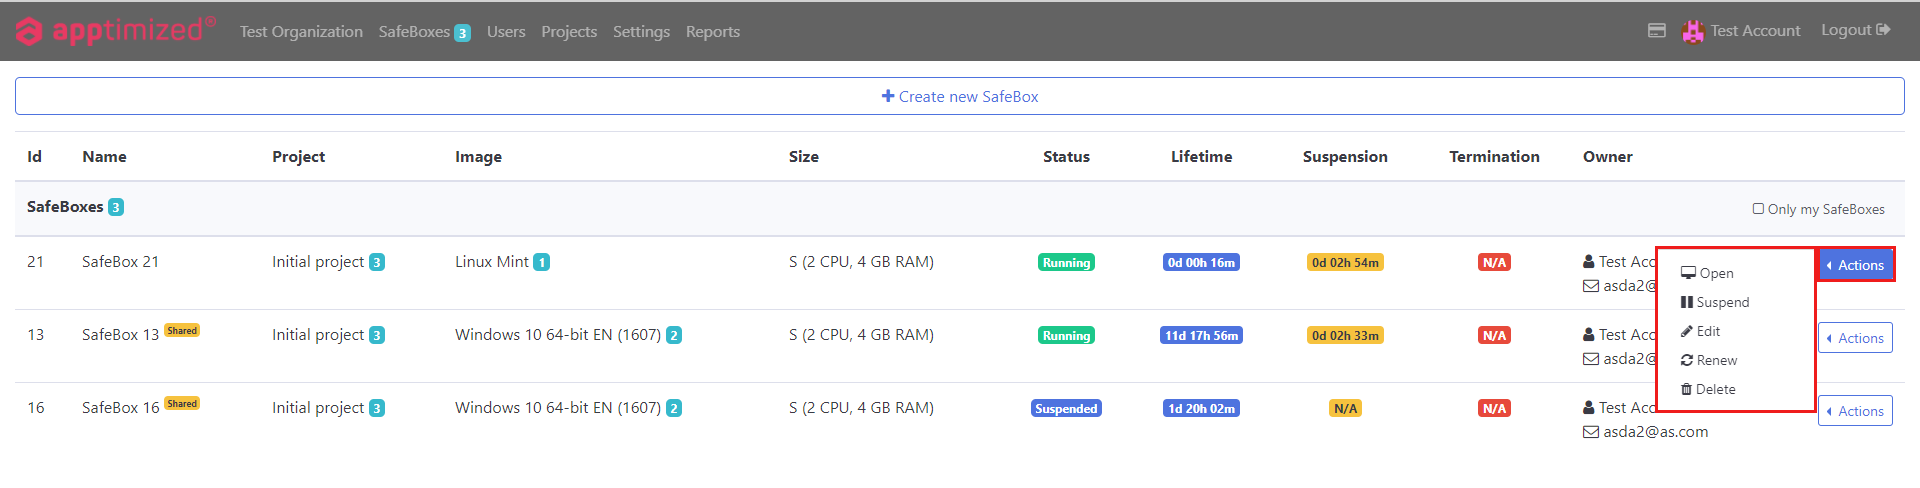
The following scenarios to open the SafeBox general section available:
- Header > SafeBoxes tab;
- [Organization name] dashboard > SafeBoxes tile > See more;
- Project dashboard > SafeBoxes tile > See more.
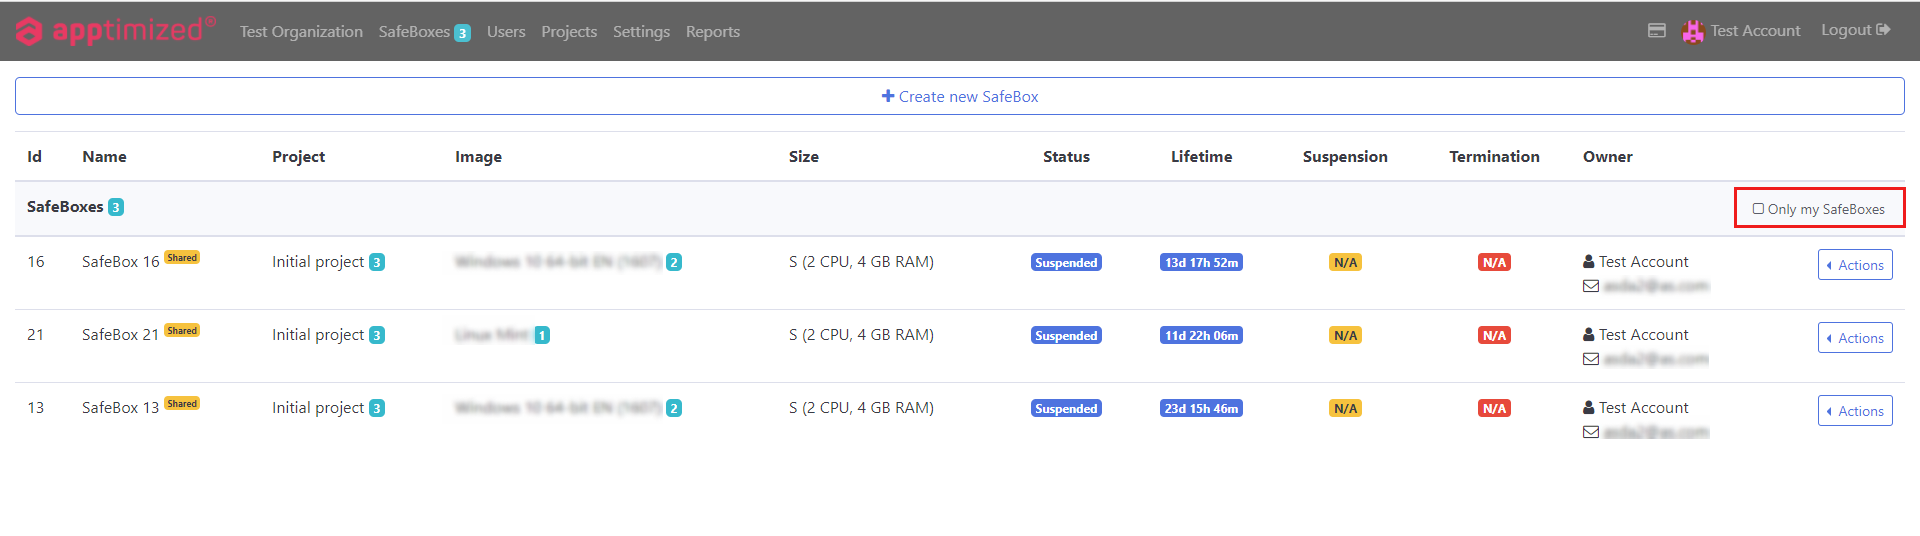
Apptimized shows the following screen when successful:
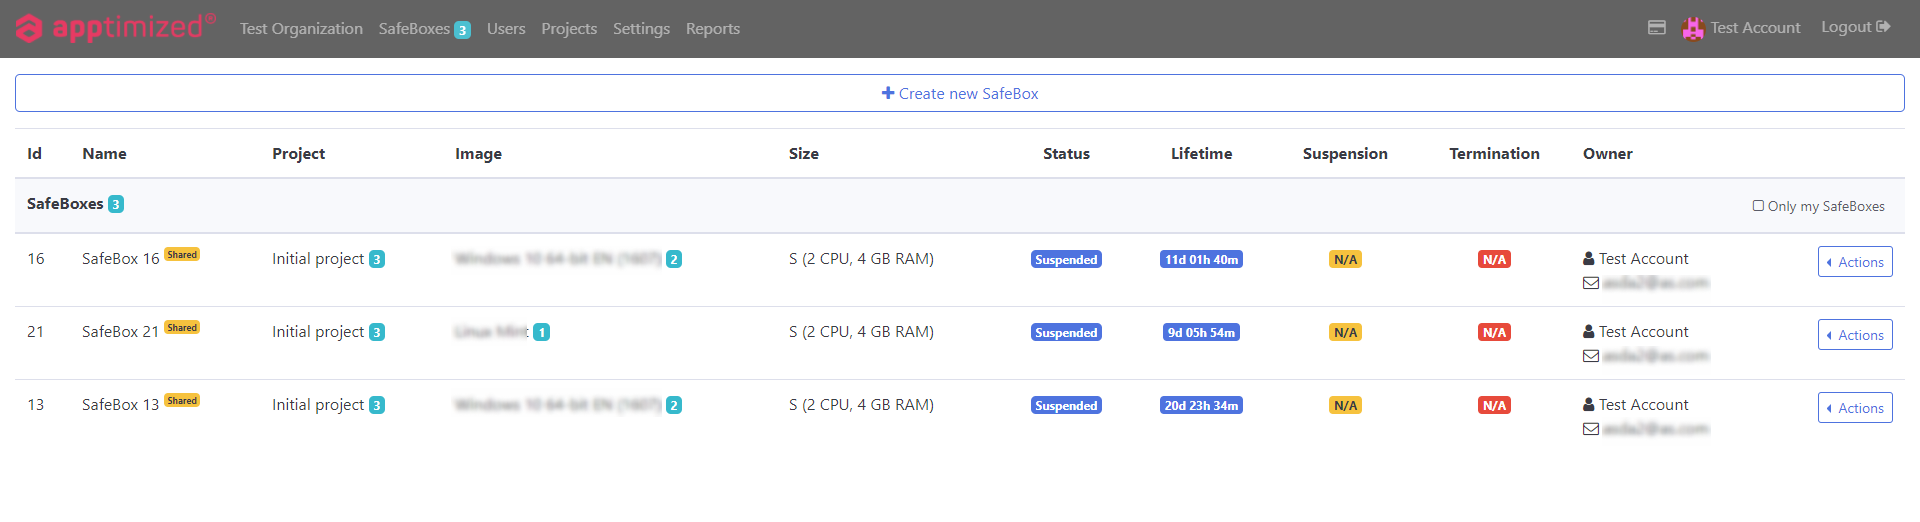 The SafeBox general section is displayed in 2 blocks:
- Information block – this block contains detailed information about SafeBoxes under the project;
- Actions – this block provides functionality to operate with the SafeBoxes.
 SafeBoxes data is grouped into the following categories:
|
Field |
Description |
|
ID |
Indicates the index number of the SafeBox. |
|
Name |
Indicates the name given to the SafeBox when created. The Shared badge indicates that SafeBox users granted access to it. |
|
Project |
Indicates the project SafeBox assigned to. |
|
Image |
Indicates the name of the OS Image SafeBox based on. |
|
Size |
Indicates the key technical parameters of SafeBox. |
|
Status |
Indicates the current state of SafeBox (See Glossary to see all available statuses). |
|
Lifetime |
Indicates a time range during which a SafeBox has been active. Lifetime starts with a SafeBox creation and finishes with its termination. |
|
Suspension |
Indicates the elapsed time a SafeBox will be suspended (paused) automatically. |
|
Termination |
Indicates the elapsed time a SafeBox will be terminated (deleted with all data) automatically. |
|
Owner |
Provides information (i.e., name, email) of a user who created a SafeBox. |
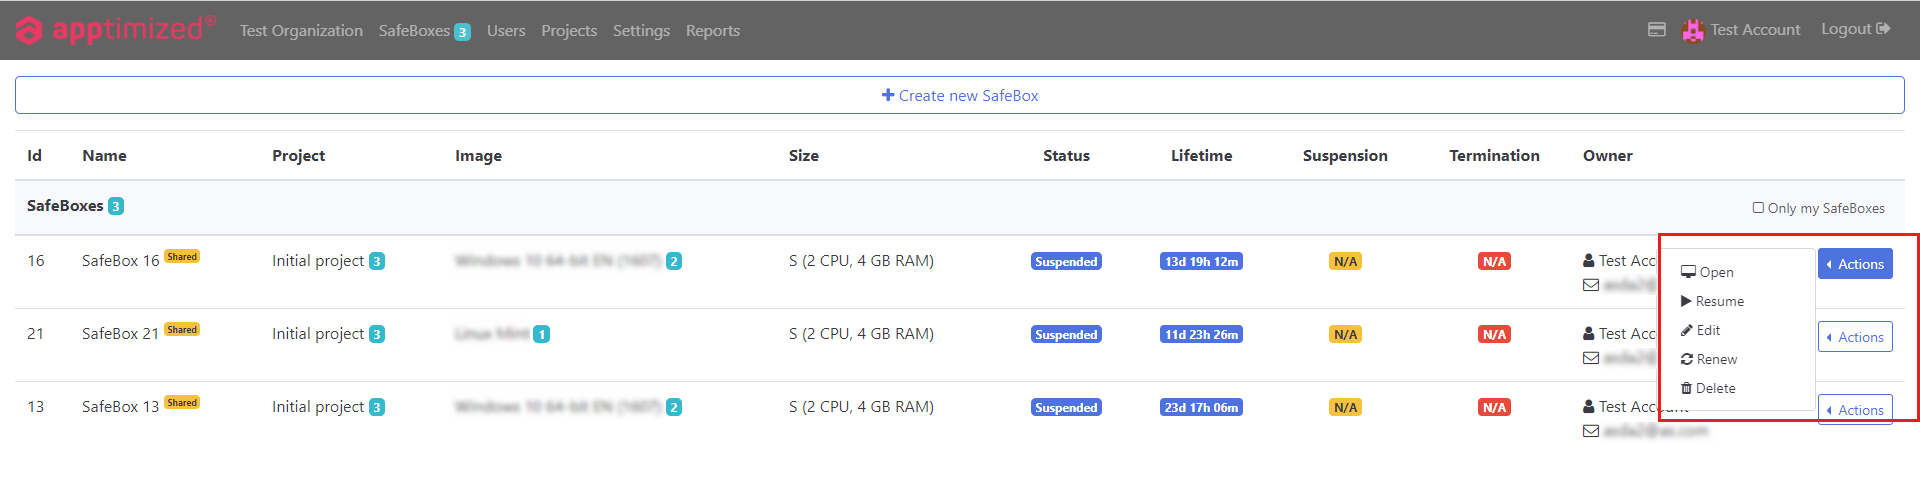
 Safebox general section actions are grouped into the following categories (see Manage SafeBox):
- Open;
- Resume;
- Suspend;
- Edit;
- Renew;
- Delete.
 Create new SafeBox button enables a user to enter Create new SafeBox section (see Create SafeBox).
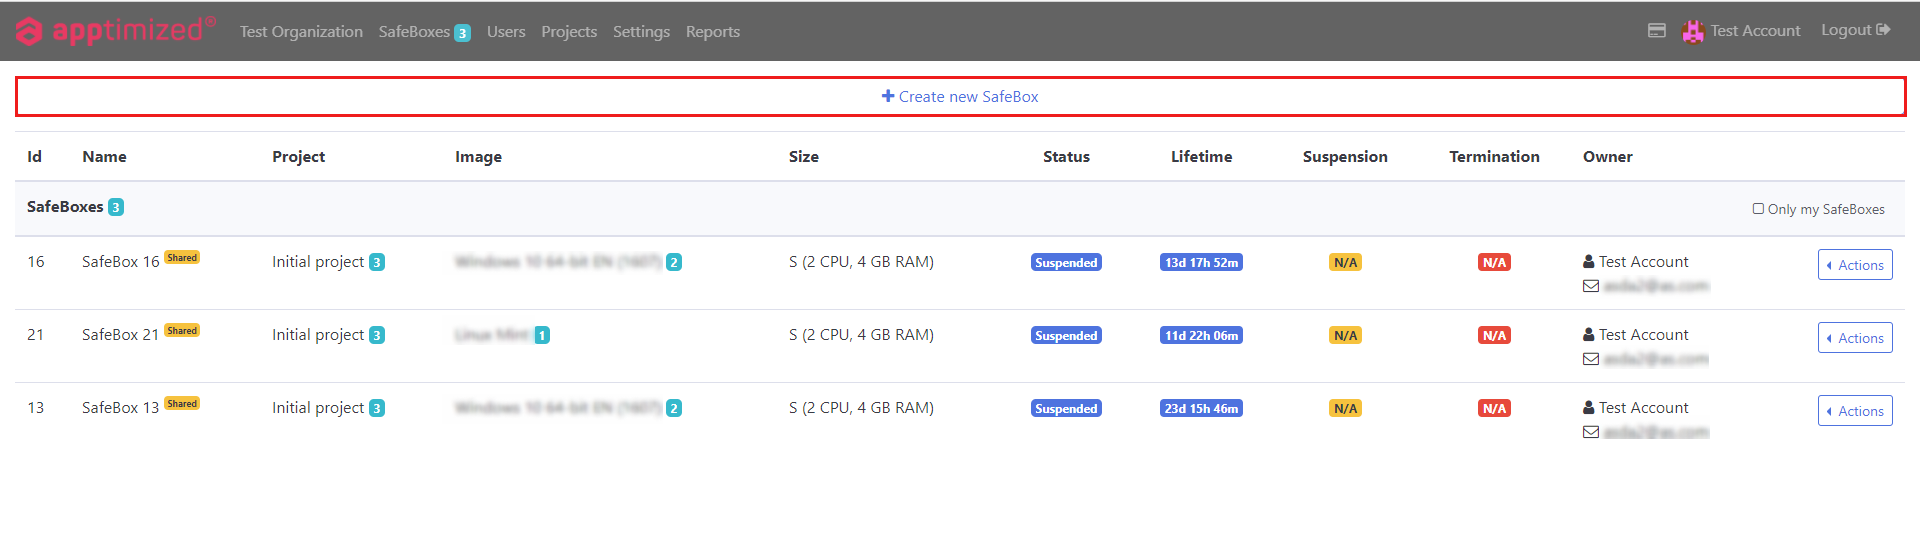 Only my SafeBoxes checkbox enables a user to check to filter results only with SafeBoxes created by the user.
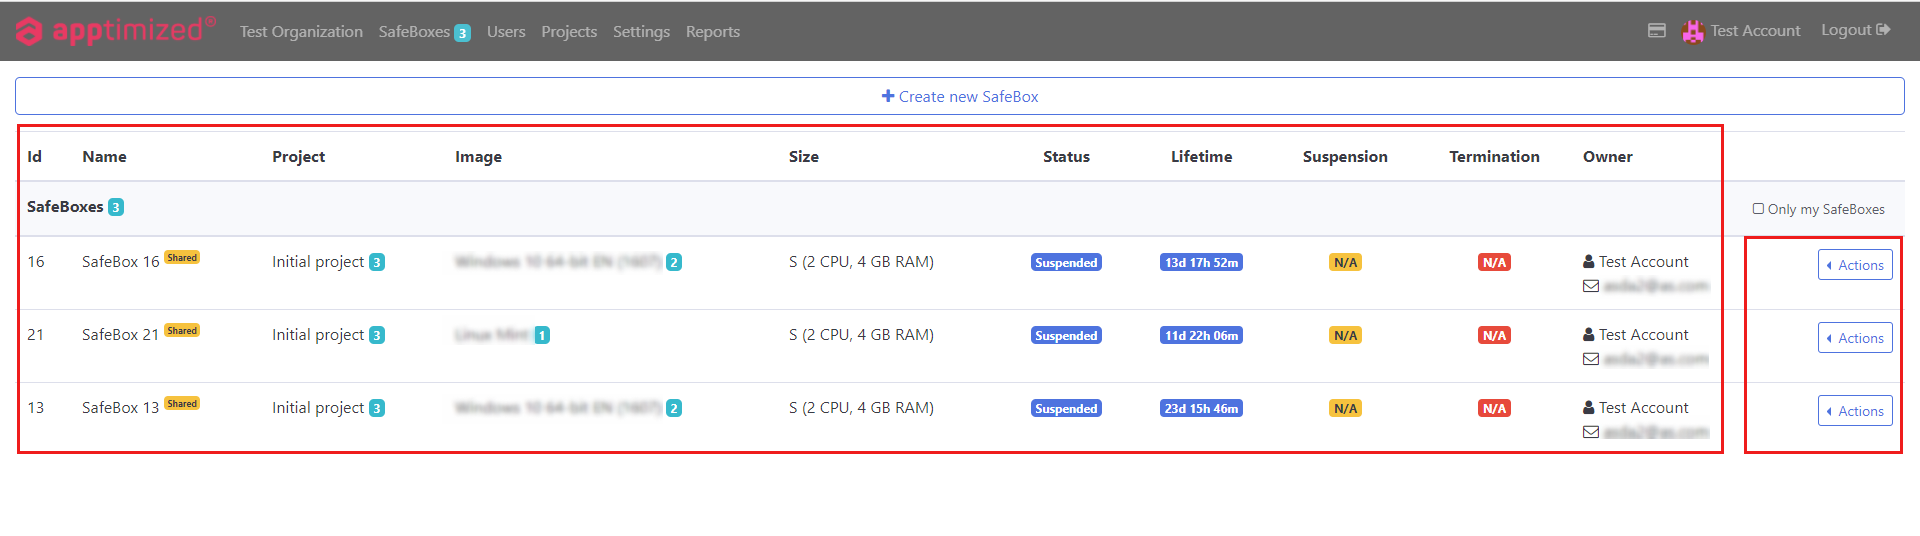
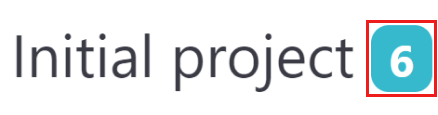
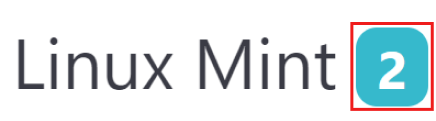
 The following SafeBoxes counters are available:
|
Image |
Counter |
Description |
|
|
Total counter |
Indicates the amount of all SafeBoxes performed on the SafeBox page. |
|
|
Project counter |
Indicates the number of Projects the SafeBoxes have been assigned to. |
|
|
Image counter |
Indicates the number of each created type (image) of SafeBox. |

SafeBox screen
The following scenarios are available to access the SafeBox screen:
- Header > SafeBoxes tab > SafeBoxes page > SafeBox field > Actions > Open;
- Header > [Organization name] dashboard > SafeBoxes tile > SafeBox field > Actions > Open;
- Projects tab > Select project > Actions > Dashboard > SafeBoxes tile > Select SafeBox > Actions > Open.
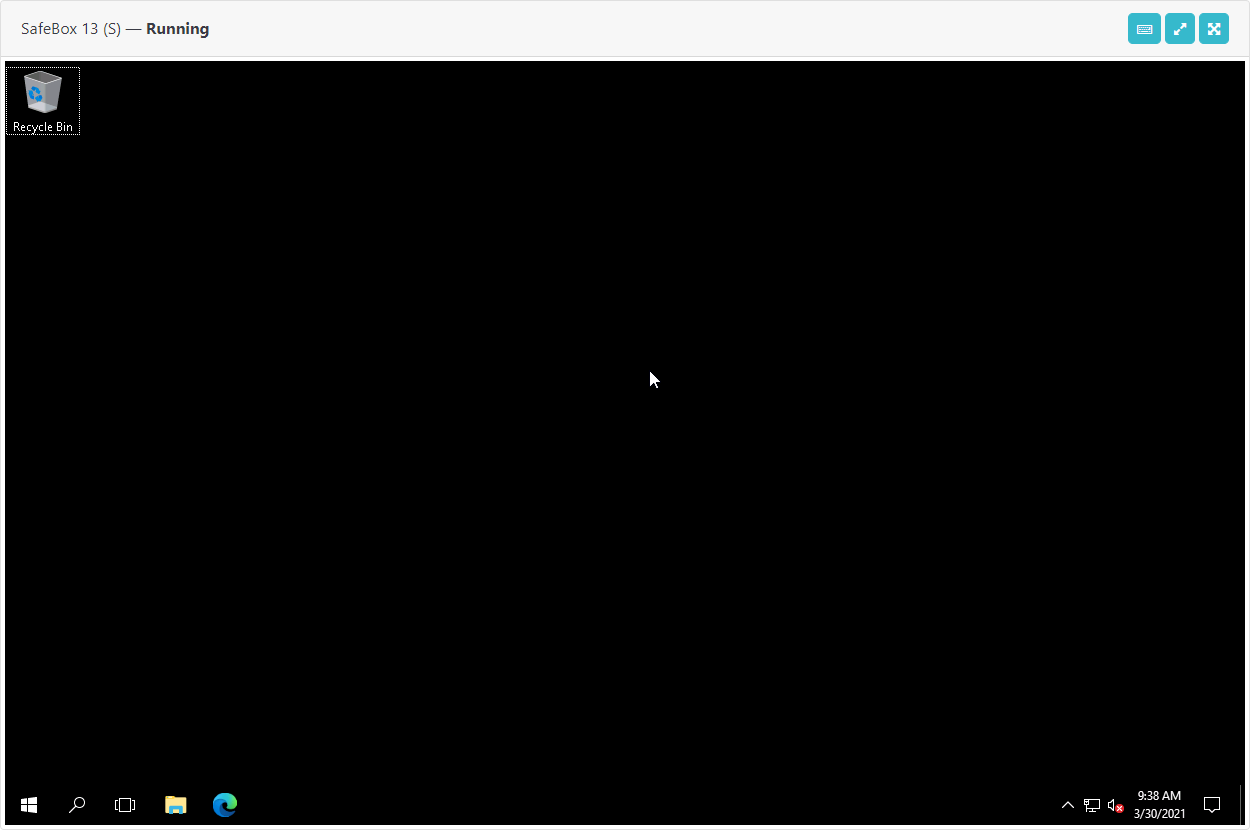
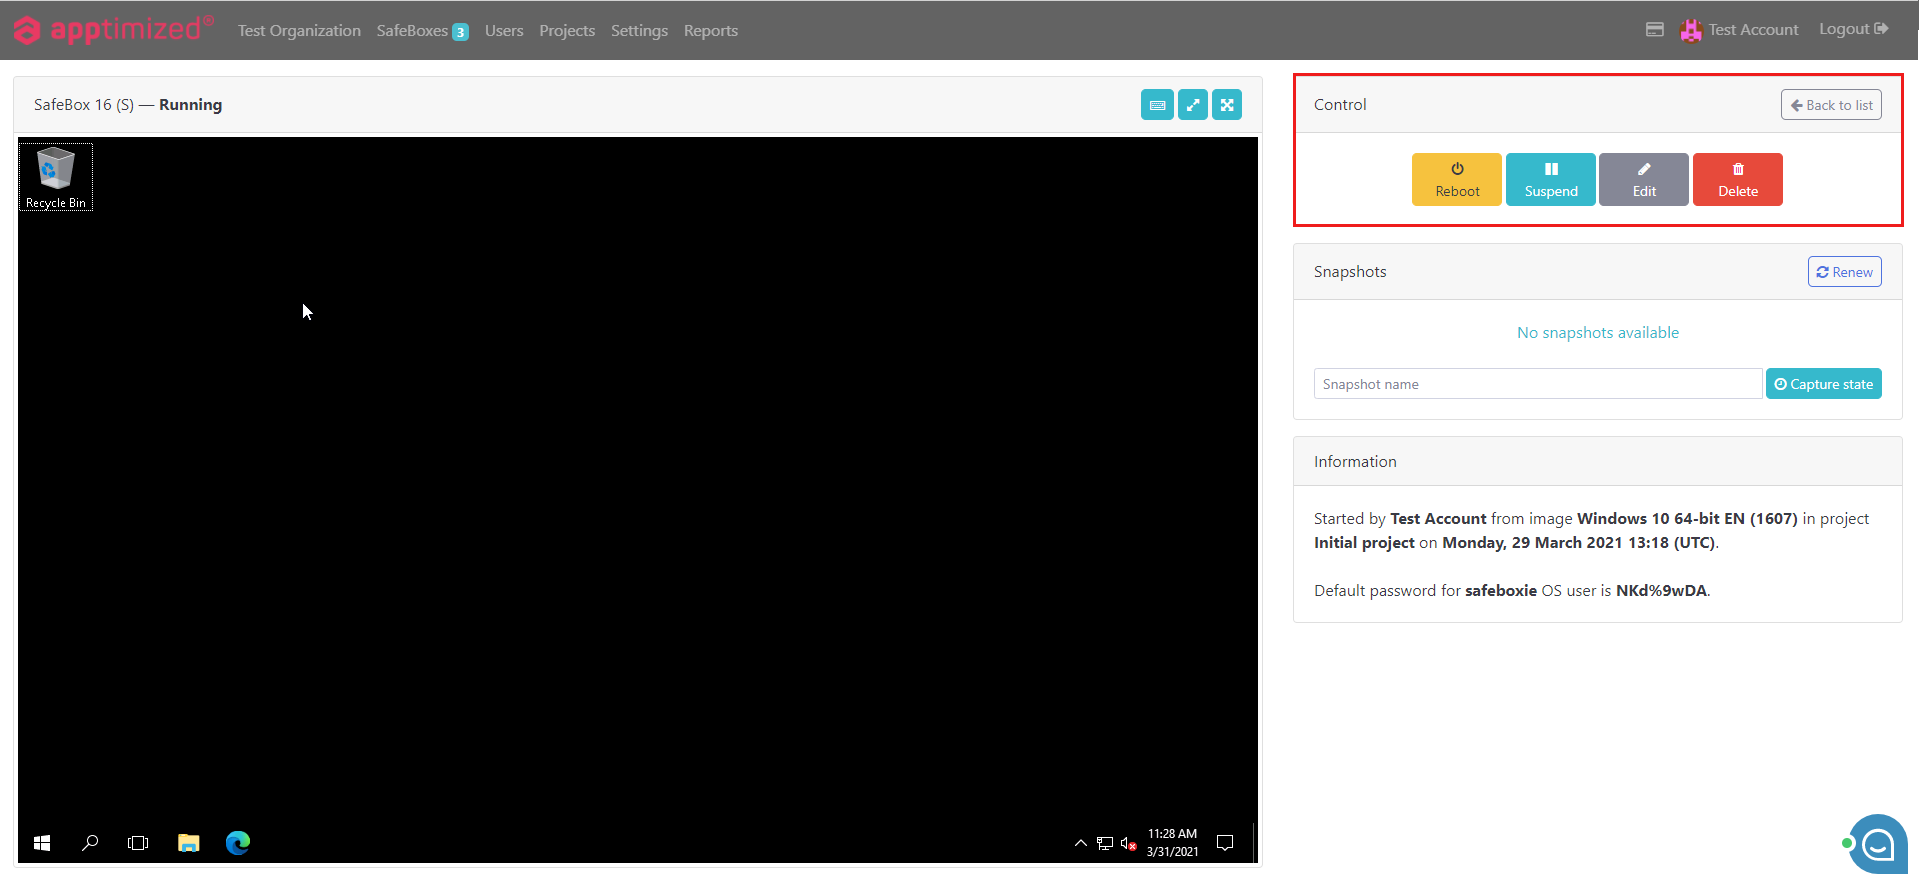
Apptimized provides the following screen when successful:
 The Safebox screen is divided into several sections.
|
Section |
Description |
Screen |
|
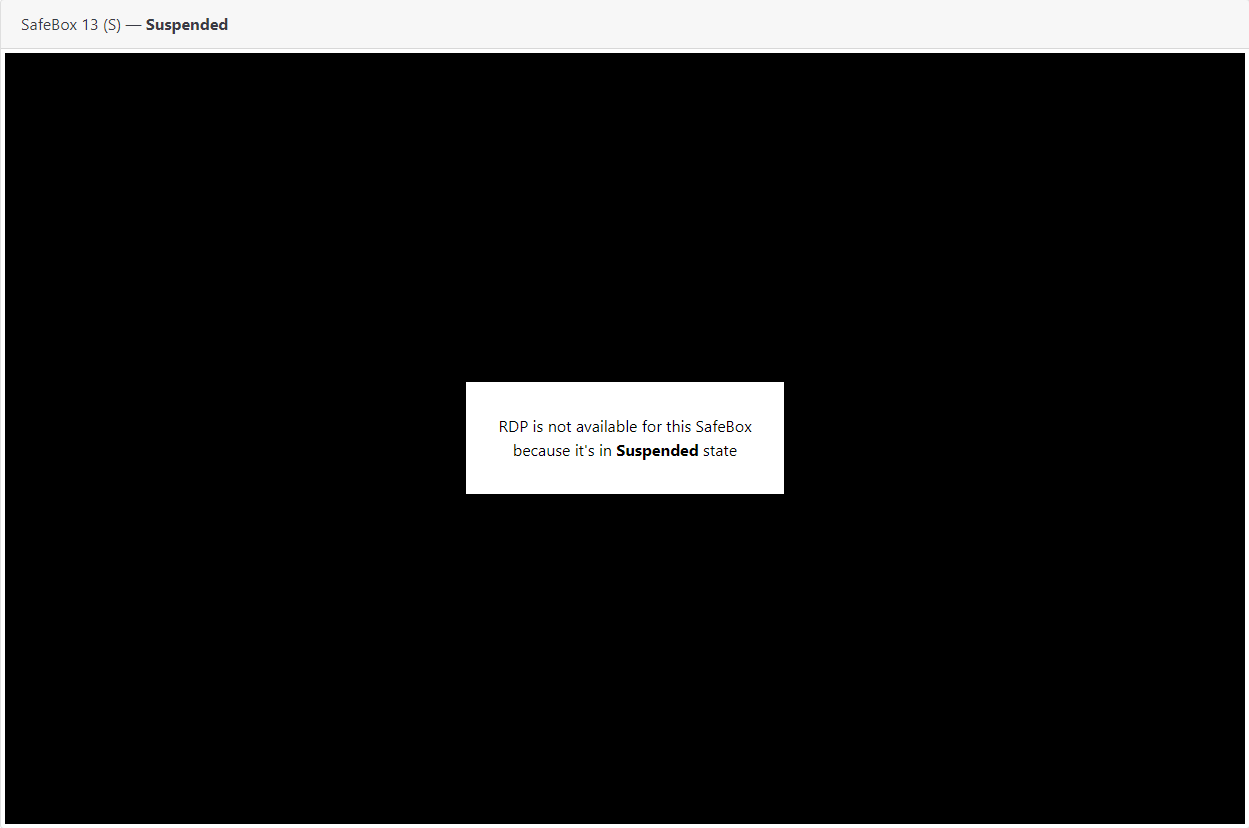
SafeBox |
The sandbox environment in which non-standard workloads can be safely tested and run. The downloading, pending, starting, saving, suspended, and terminating statuses are displayed in the center of the screen. |
|
|
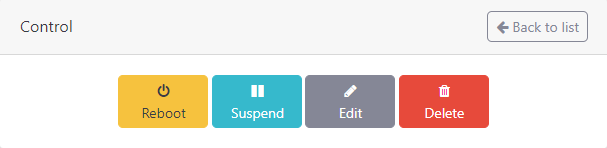
Control |
This block provides a set of control buttons to manage the SafeBox (see Manage SafeBox). |
|
|
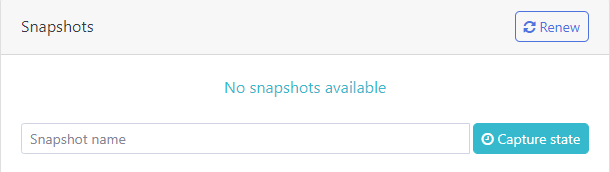
Snapshots |
This block provides a user the following functionality:
Snapshots not available to be created in statuses that differ from the Running state. |
|
|
Information |
This block provides the details about SafeBox (creator, OS image, project name, and time of creation) and the default password used to access SafeBox. |
|
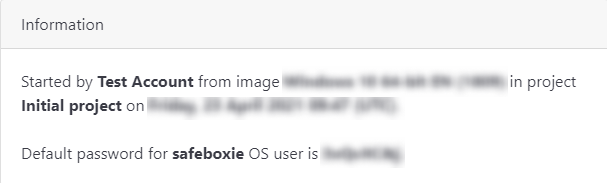
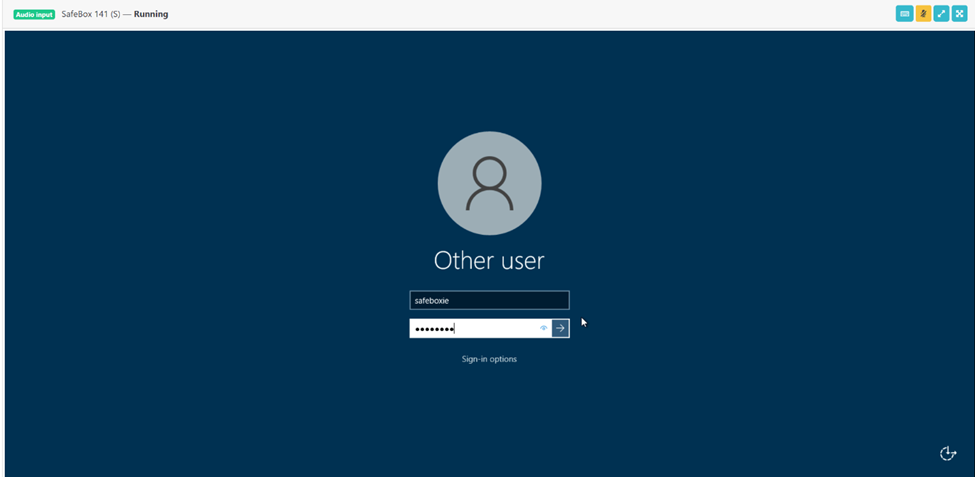
During the first time running after creation, the Default Password entering will be required to proceed with the SafeBox.
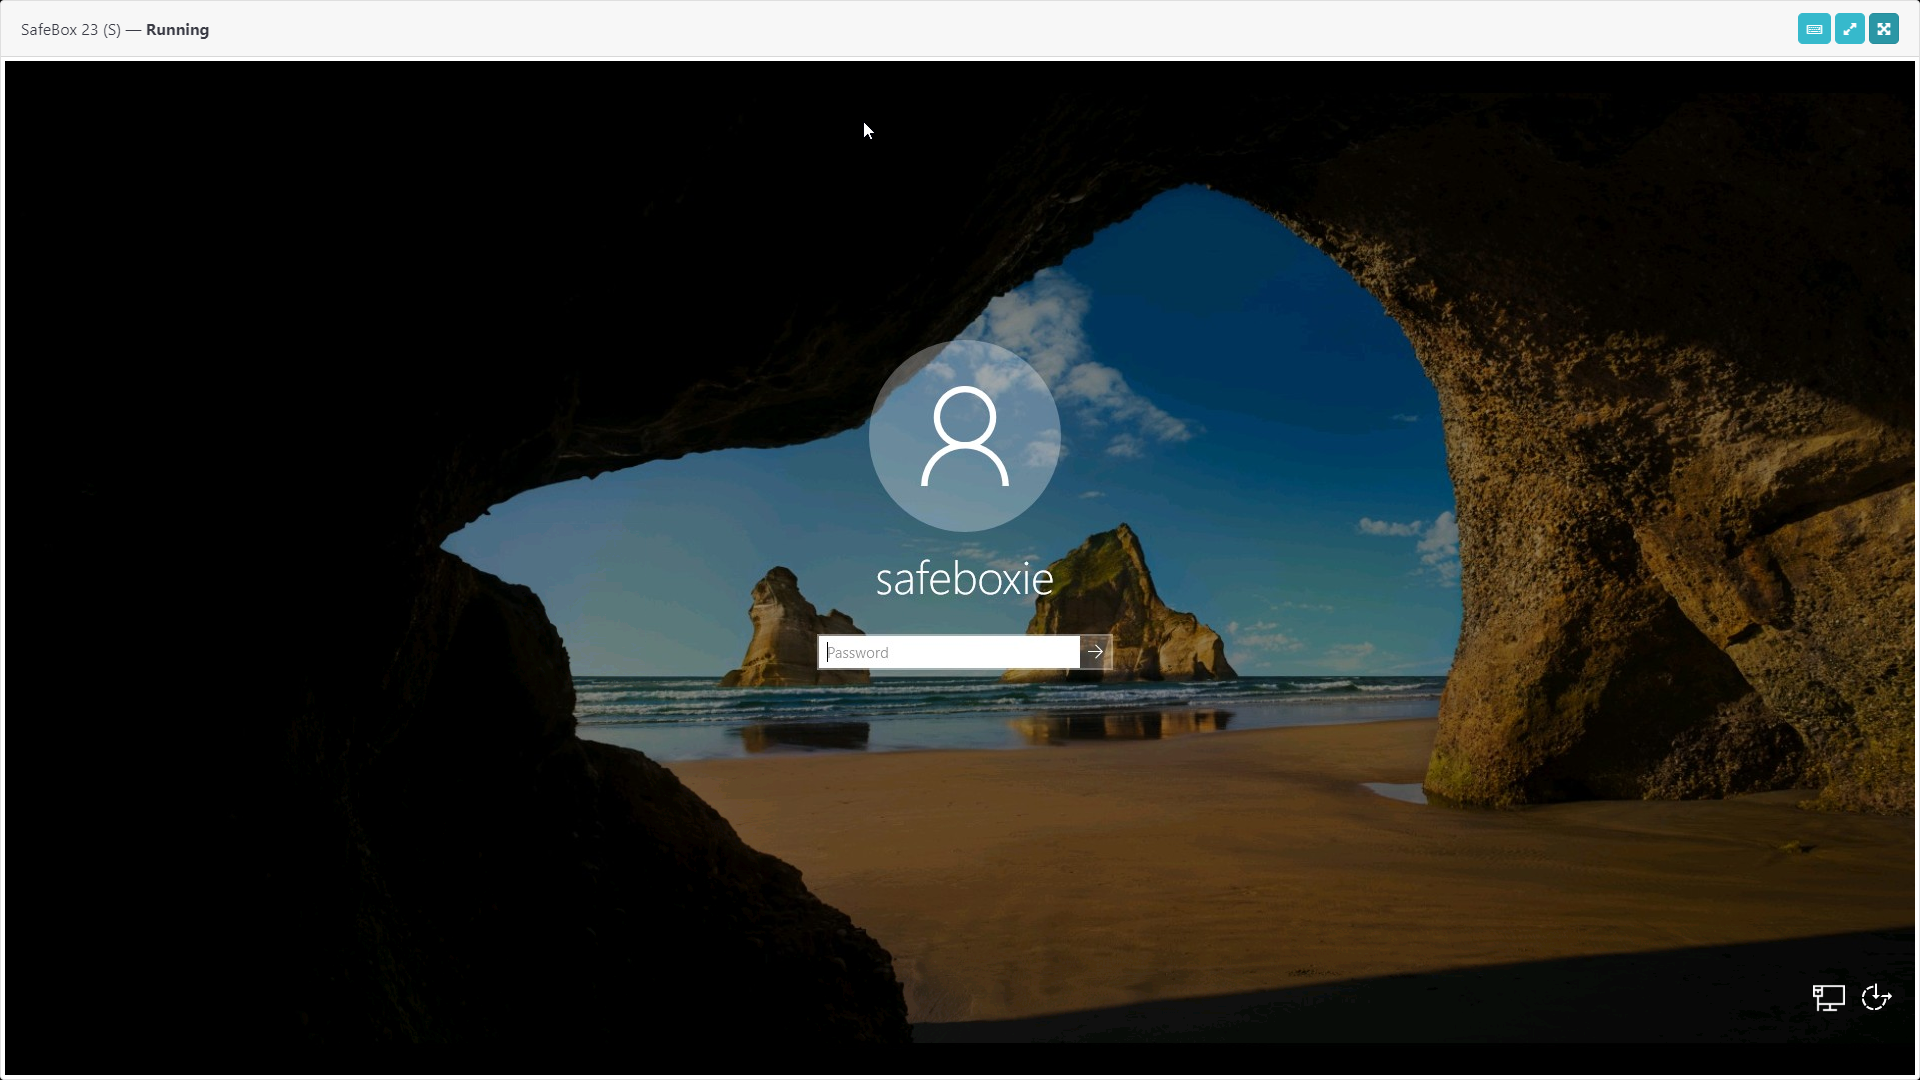 Apptimized provides the following screen when successful:
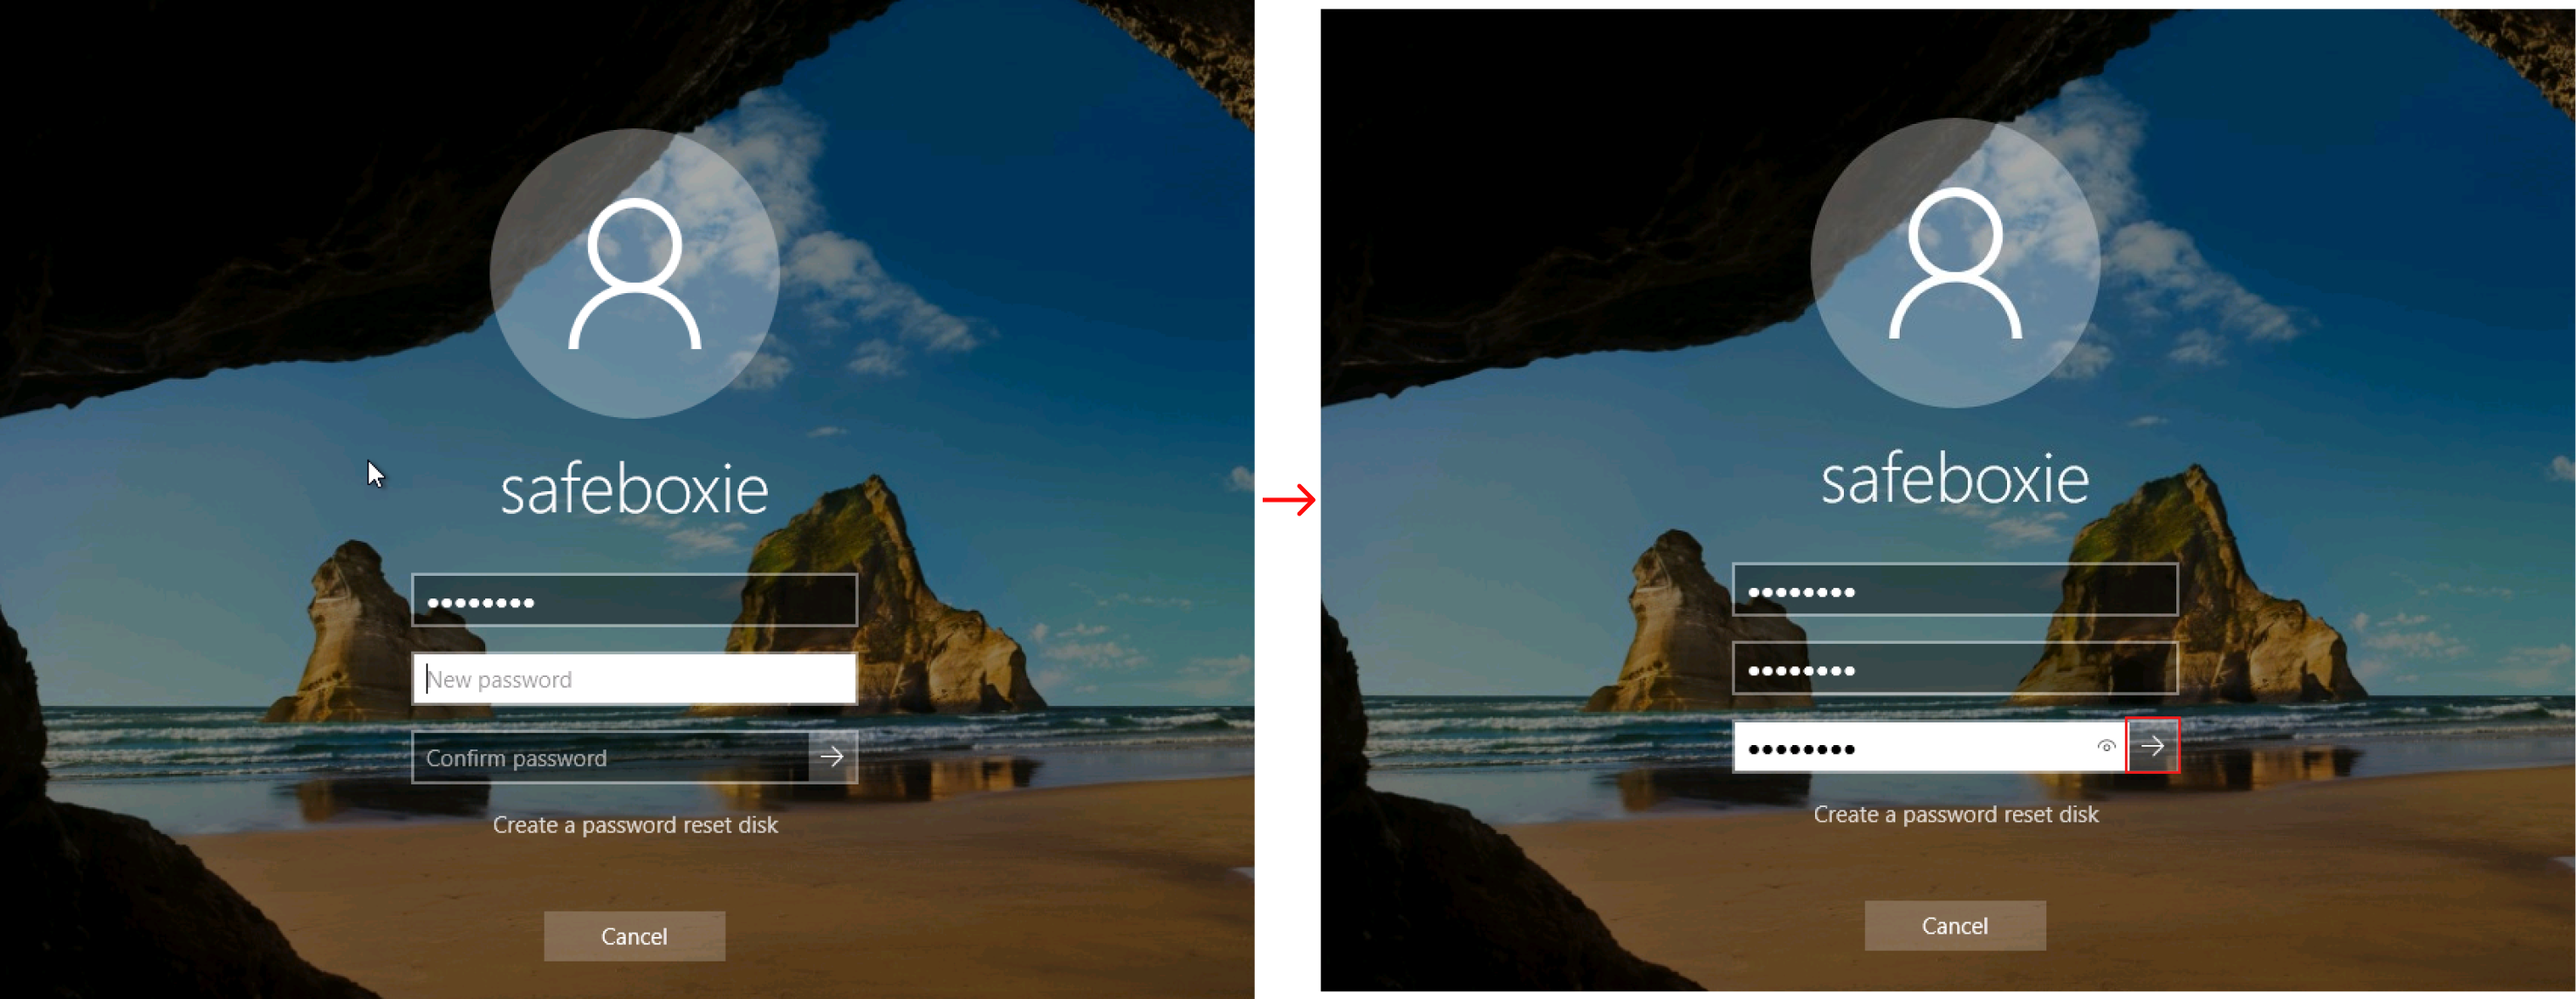
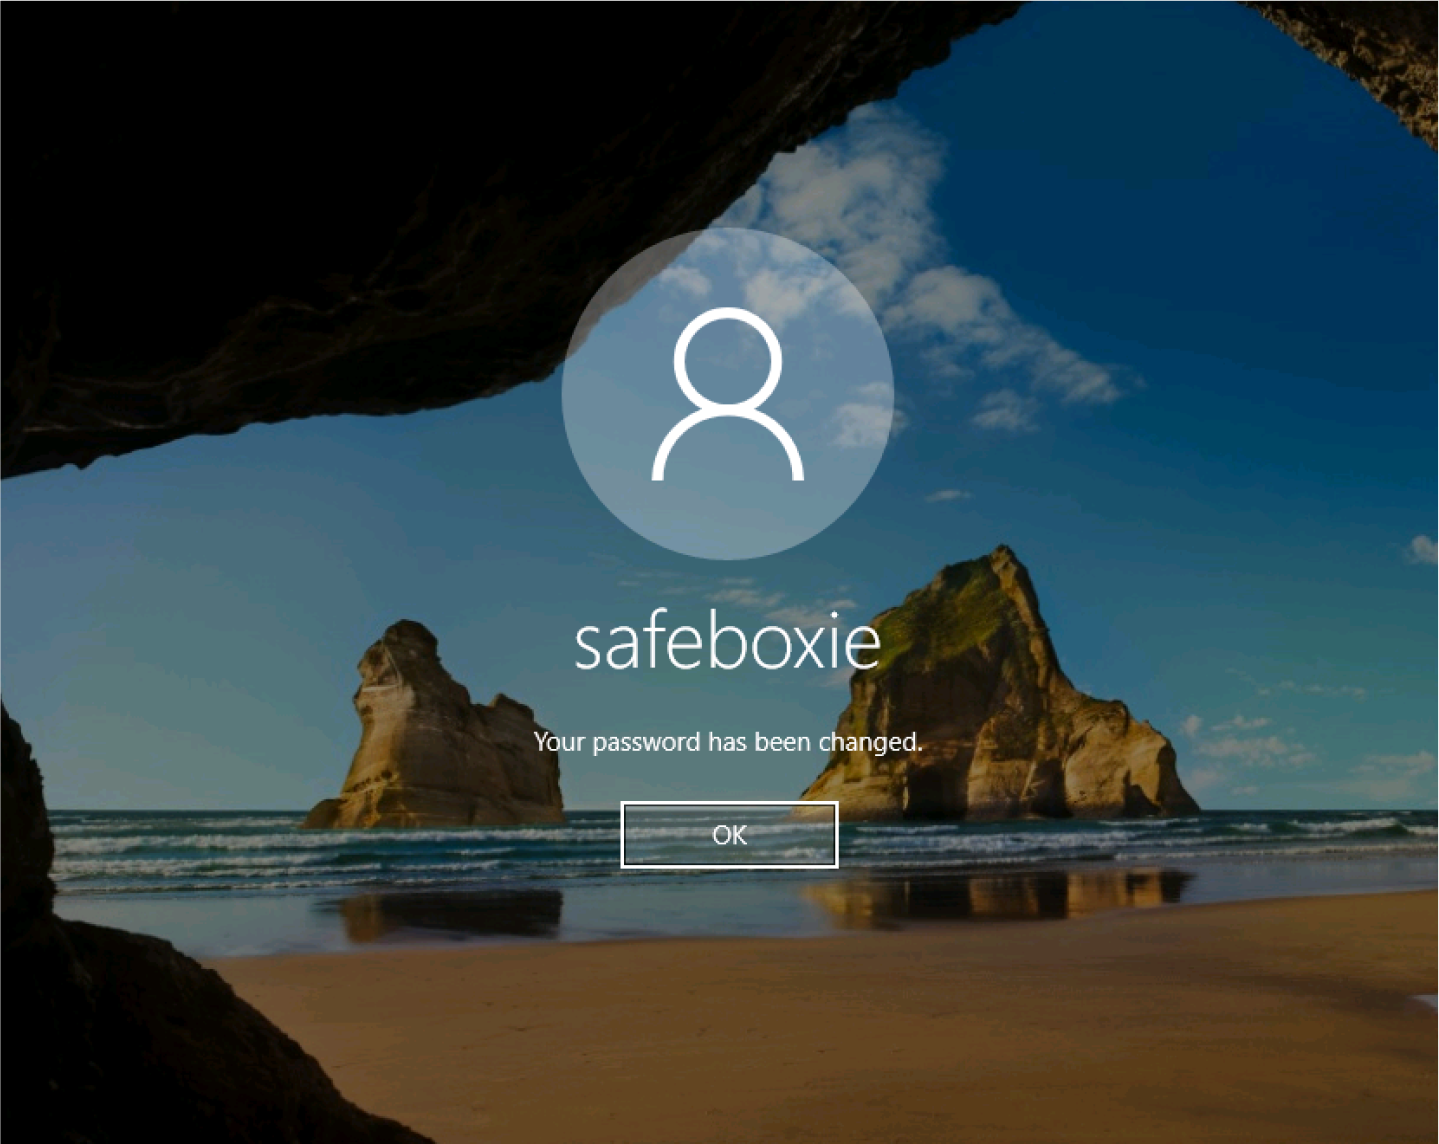
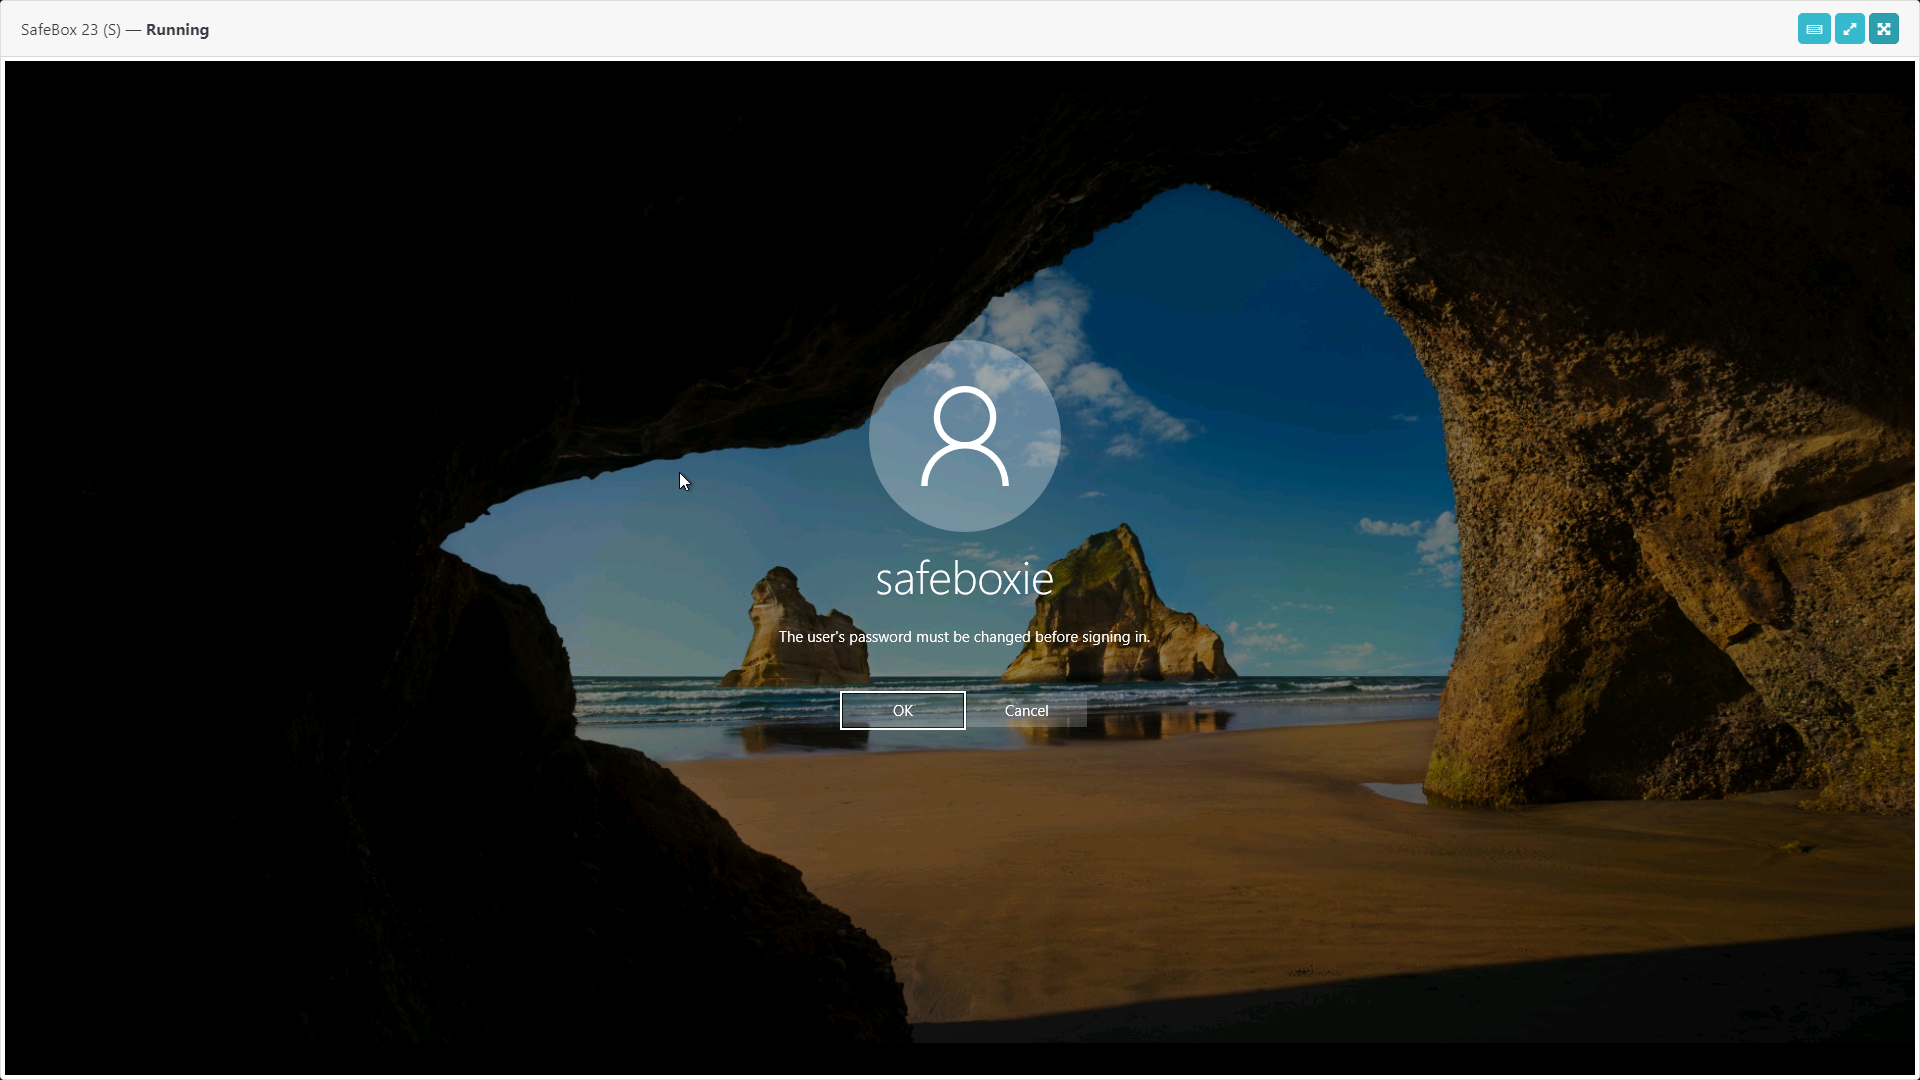 To change the default password in SafeBox based on Windows images, a user proceeds the following flow:
Apptimized shows the following screen when successful:
To change the default password in SafeBox based on Linux Mint images, a user proceeds the following flow:
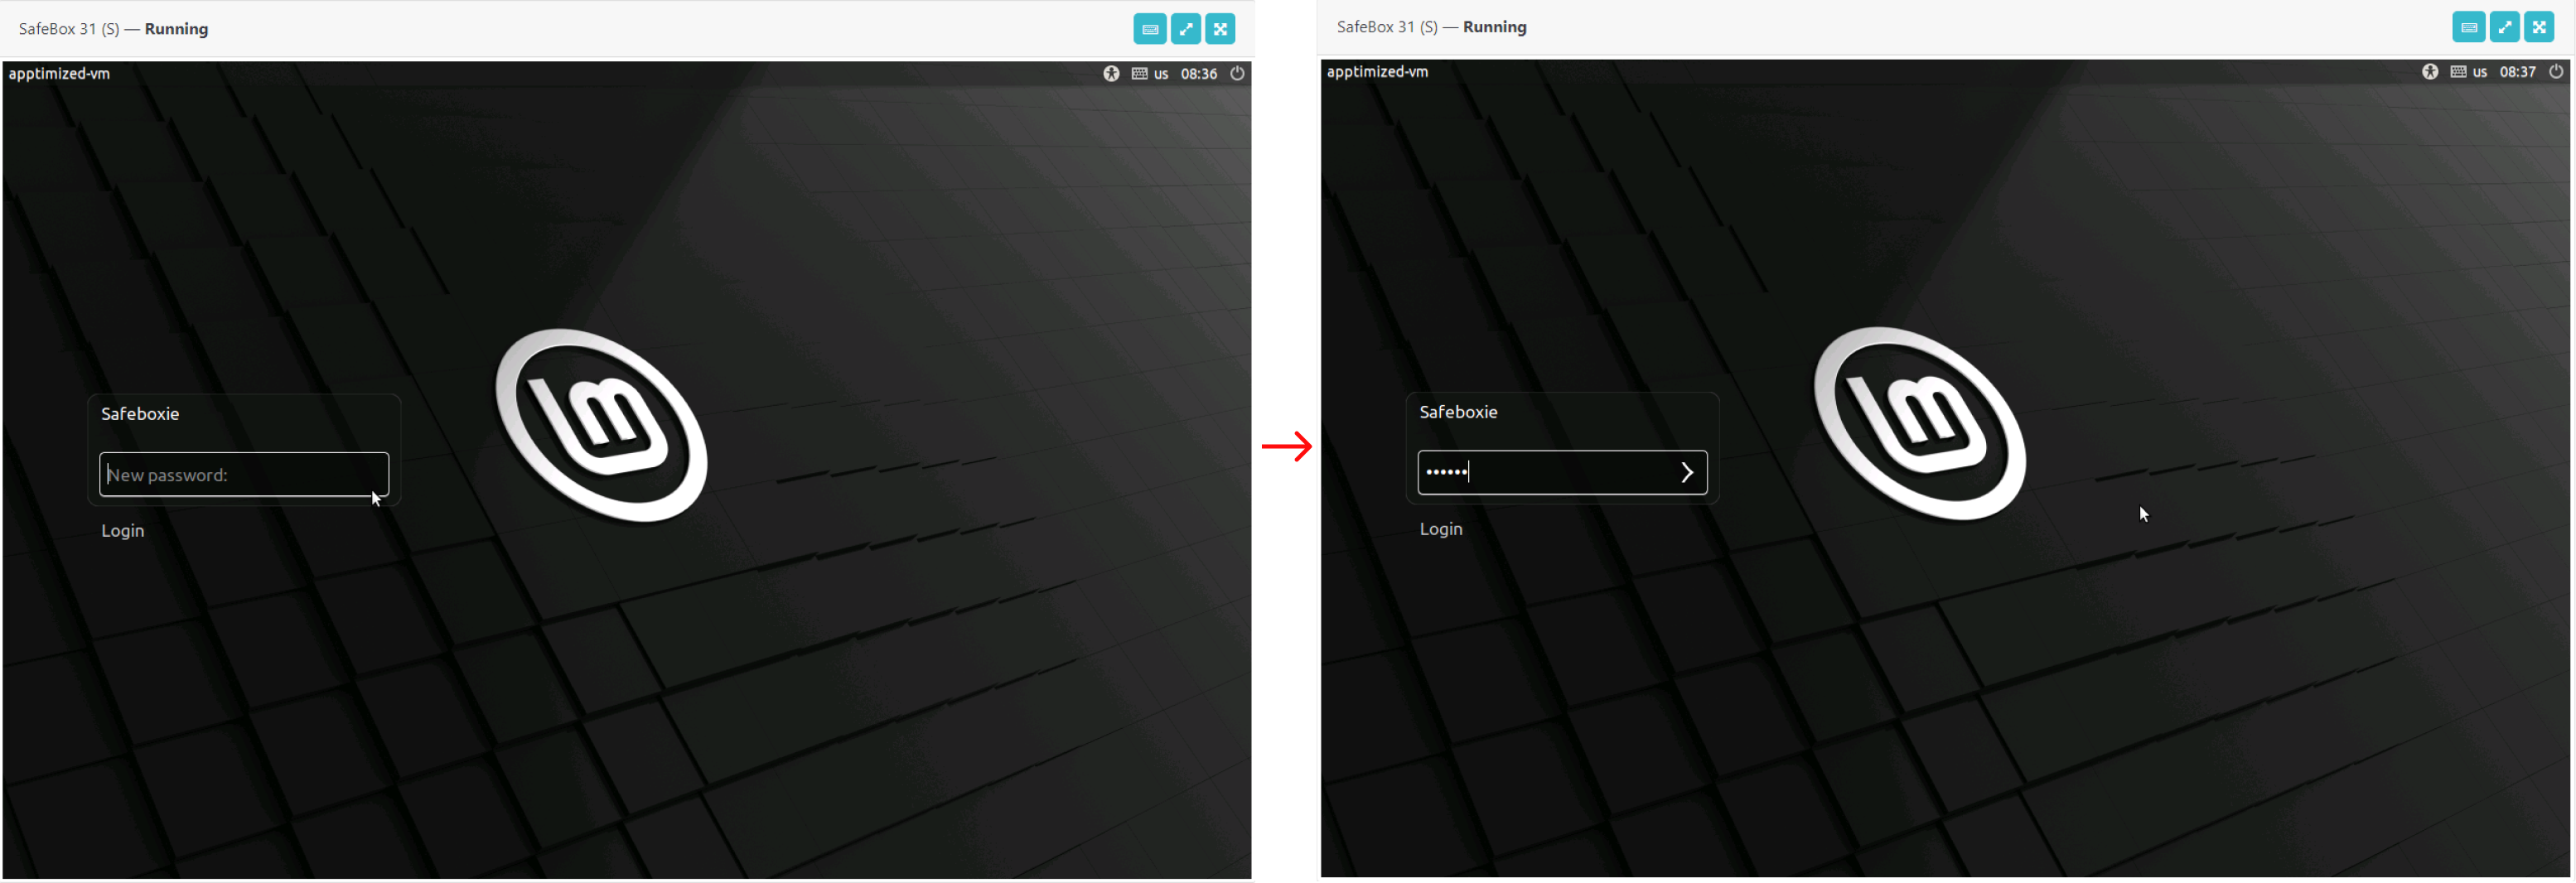
SafeBox section
The following hotkeys are available:
|
Icon |
Name |
Description |
|
|
Special Keys |
Allows users to manually use them in the SafeBox instead of clicking on the keyboard. |
|
|
Ctrl + Alt + Del
|
Enables a user to enter Secure Logon. This button is available under the Special Keys button. |
|
|
Windows |
Allows the user to bring up the Start menu. This button is available under the Special Keys button. |
|
|
Alt + Tab |
Enables a user to switch between open programs. This button is available under the Special Keys button. |
|
|
Audio input |
Enables a user to use microphone. |
|
|
Expanded mode |
Allows to expand the SafeBox to the length of the screen. |
|
|
Detailed mode |
Allows to exit the Expanded mode. |
|
|
Fullscreen mode |
Allows to extend the SafeBox screen to full screen. |


Special Keys buttons can be accessed by clicking on Special Keys button ![]() .
.
The option to enter Secure Logon is available under the CTRL + ALT + DEL button:
.png) The option to bring up the Start menu is available under the Windows button:
The option to bring up the Start menu is available under the Windows button:
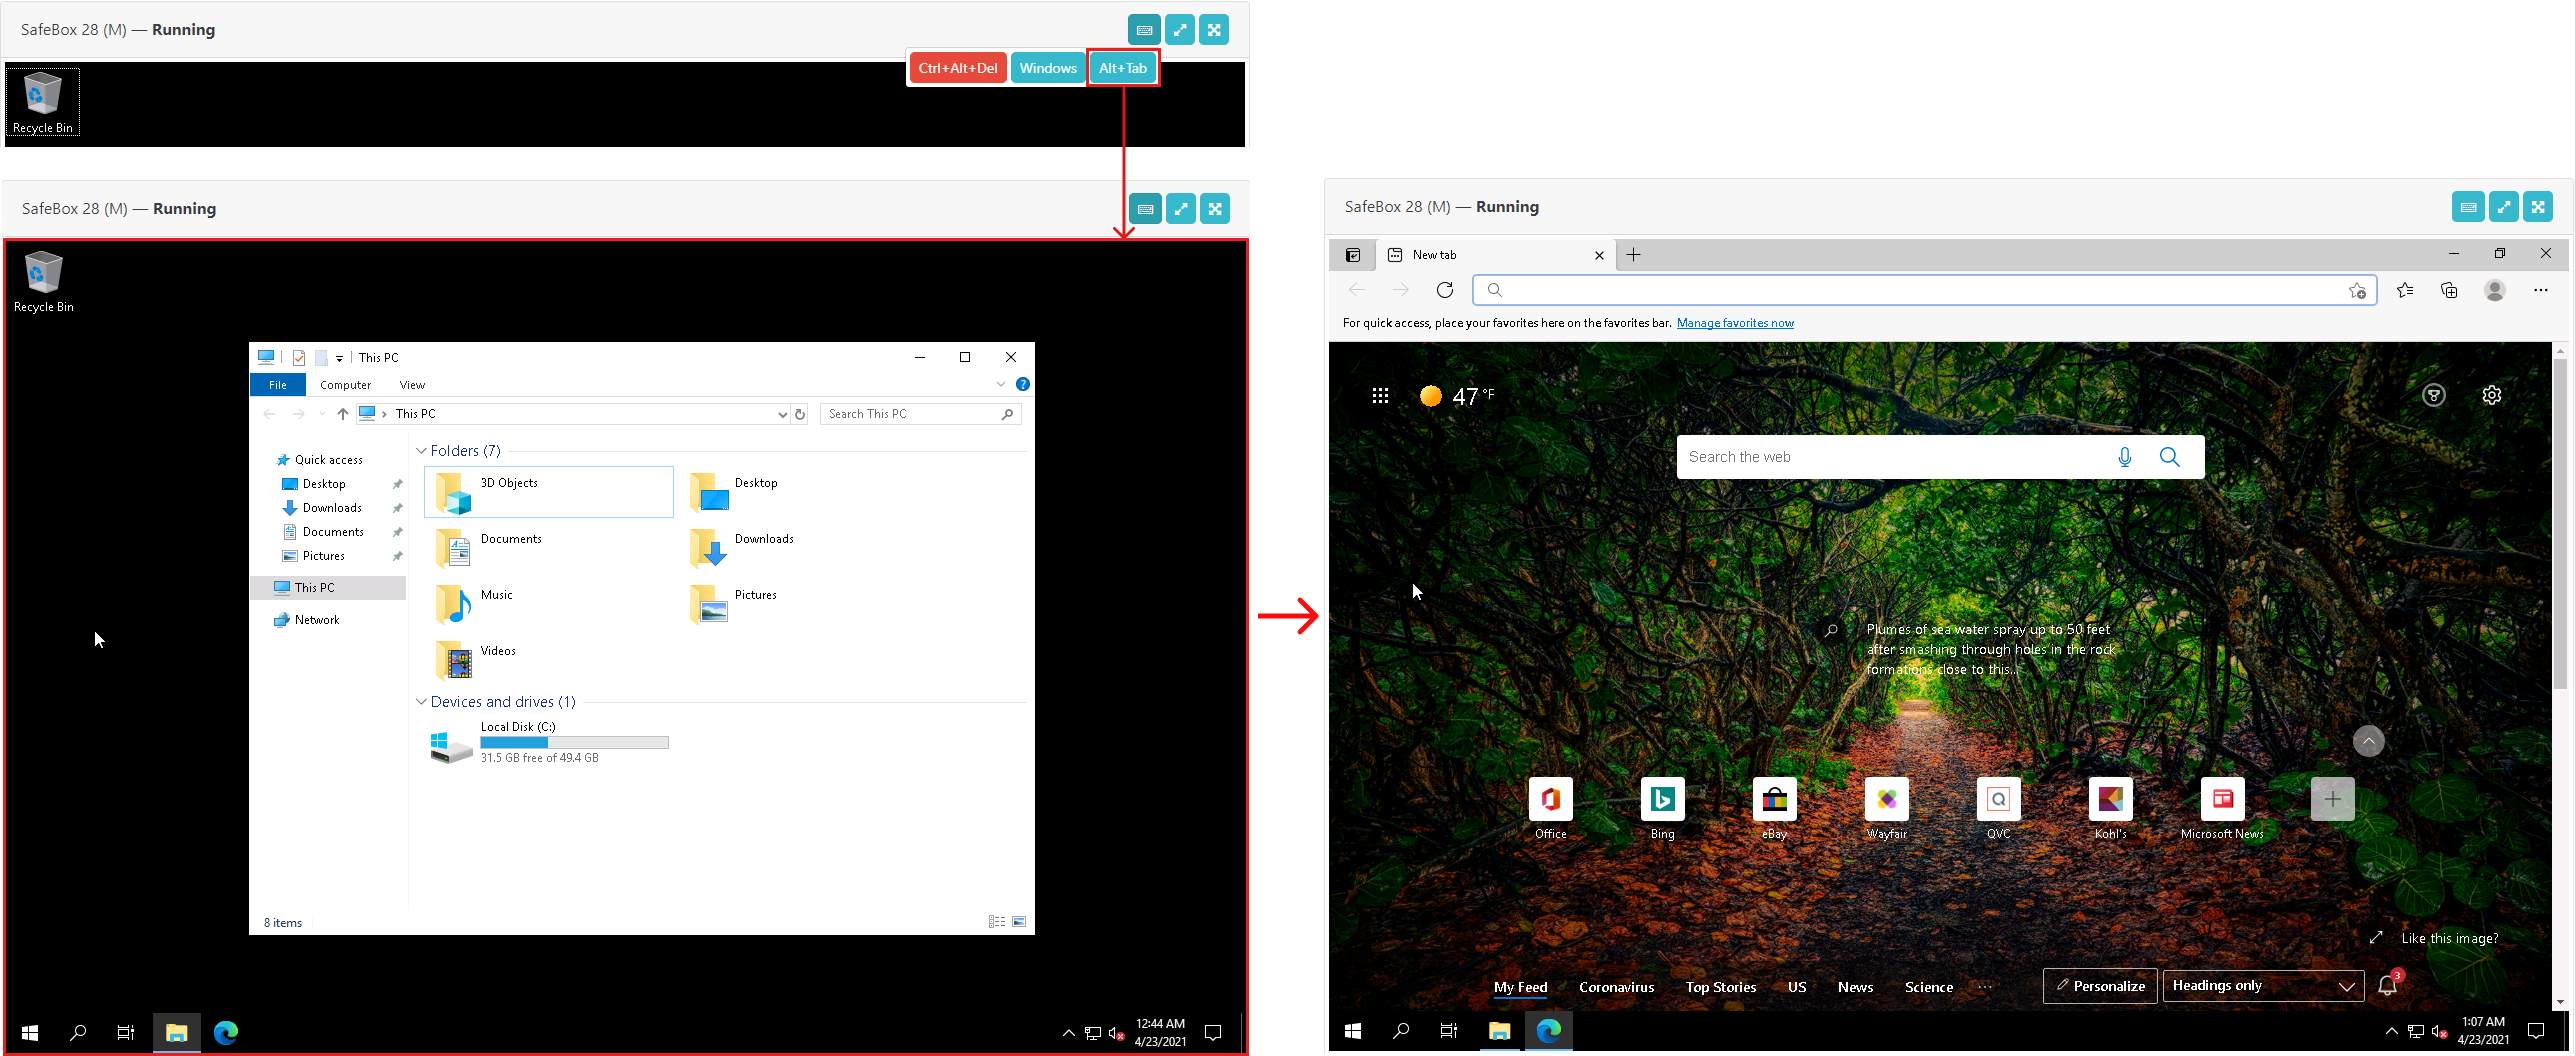
.png) To switch between open programs, a user proceeds the following flow:
To switch between open programs, a user proceeds the following flow:
The Audio input is available under the Audio input button ![]() .
.
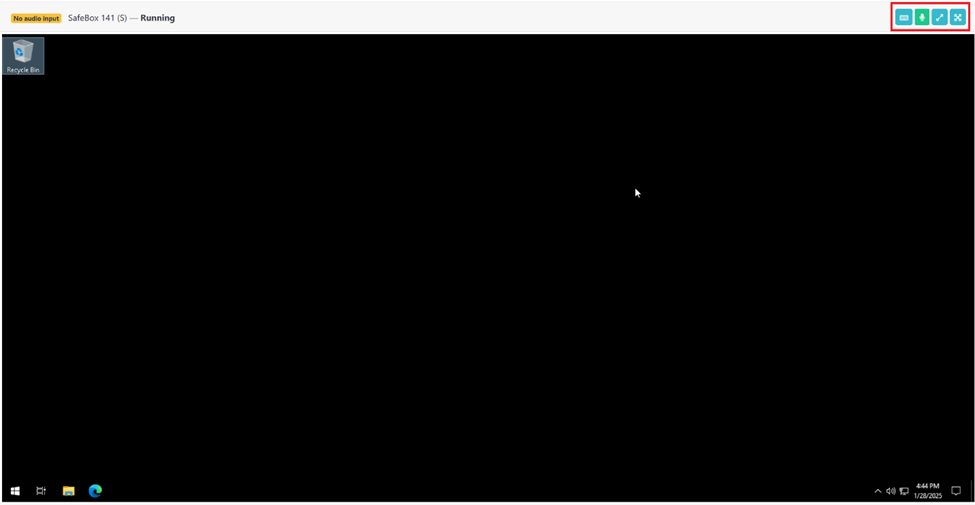
By default, SafeBox does not use the user’s microphone. No audio input indicates that VM does not capture any audio.

When Audio input clicked, SafeBox switches connection from server to VM directly.
User should re-logon in the system.
Audio input device settings are available under:
· Control panel > Hardware > Sound > Recording.
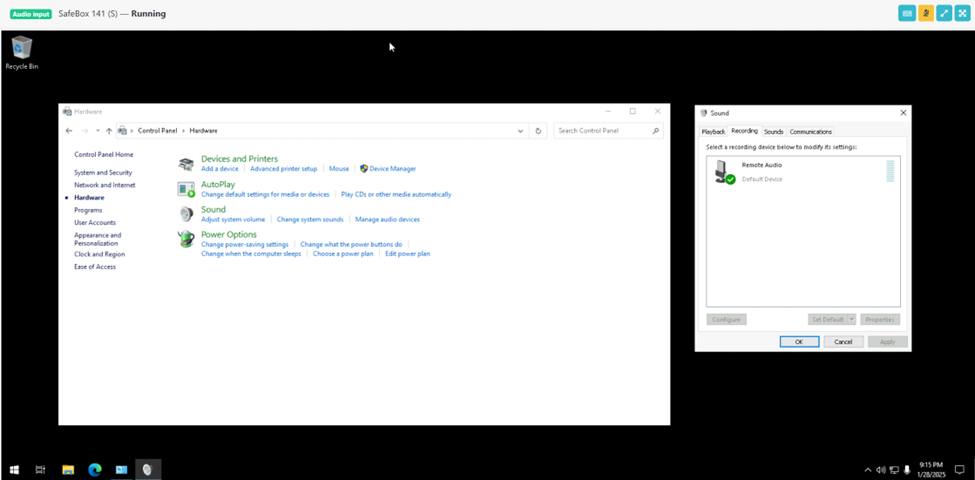
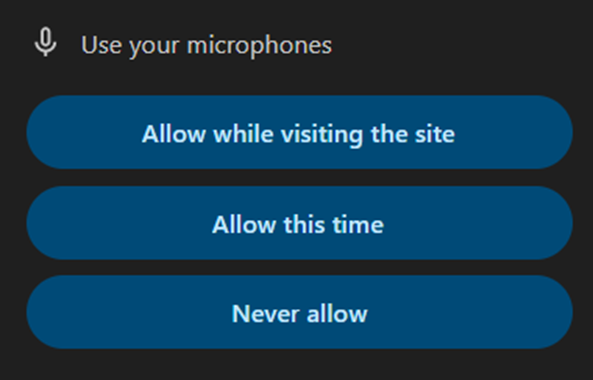
Browser requires user consent to use the microphone at this step.
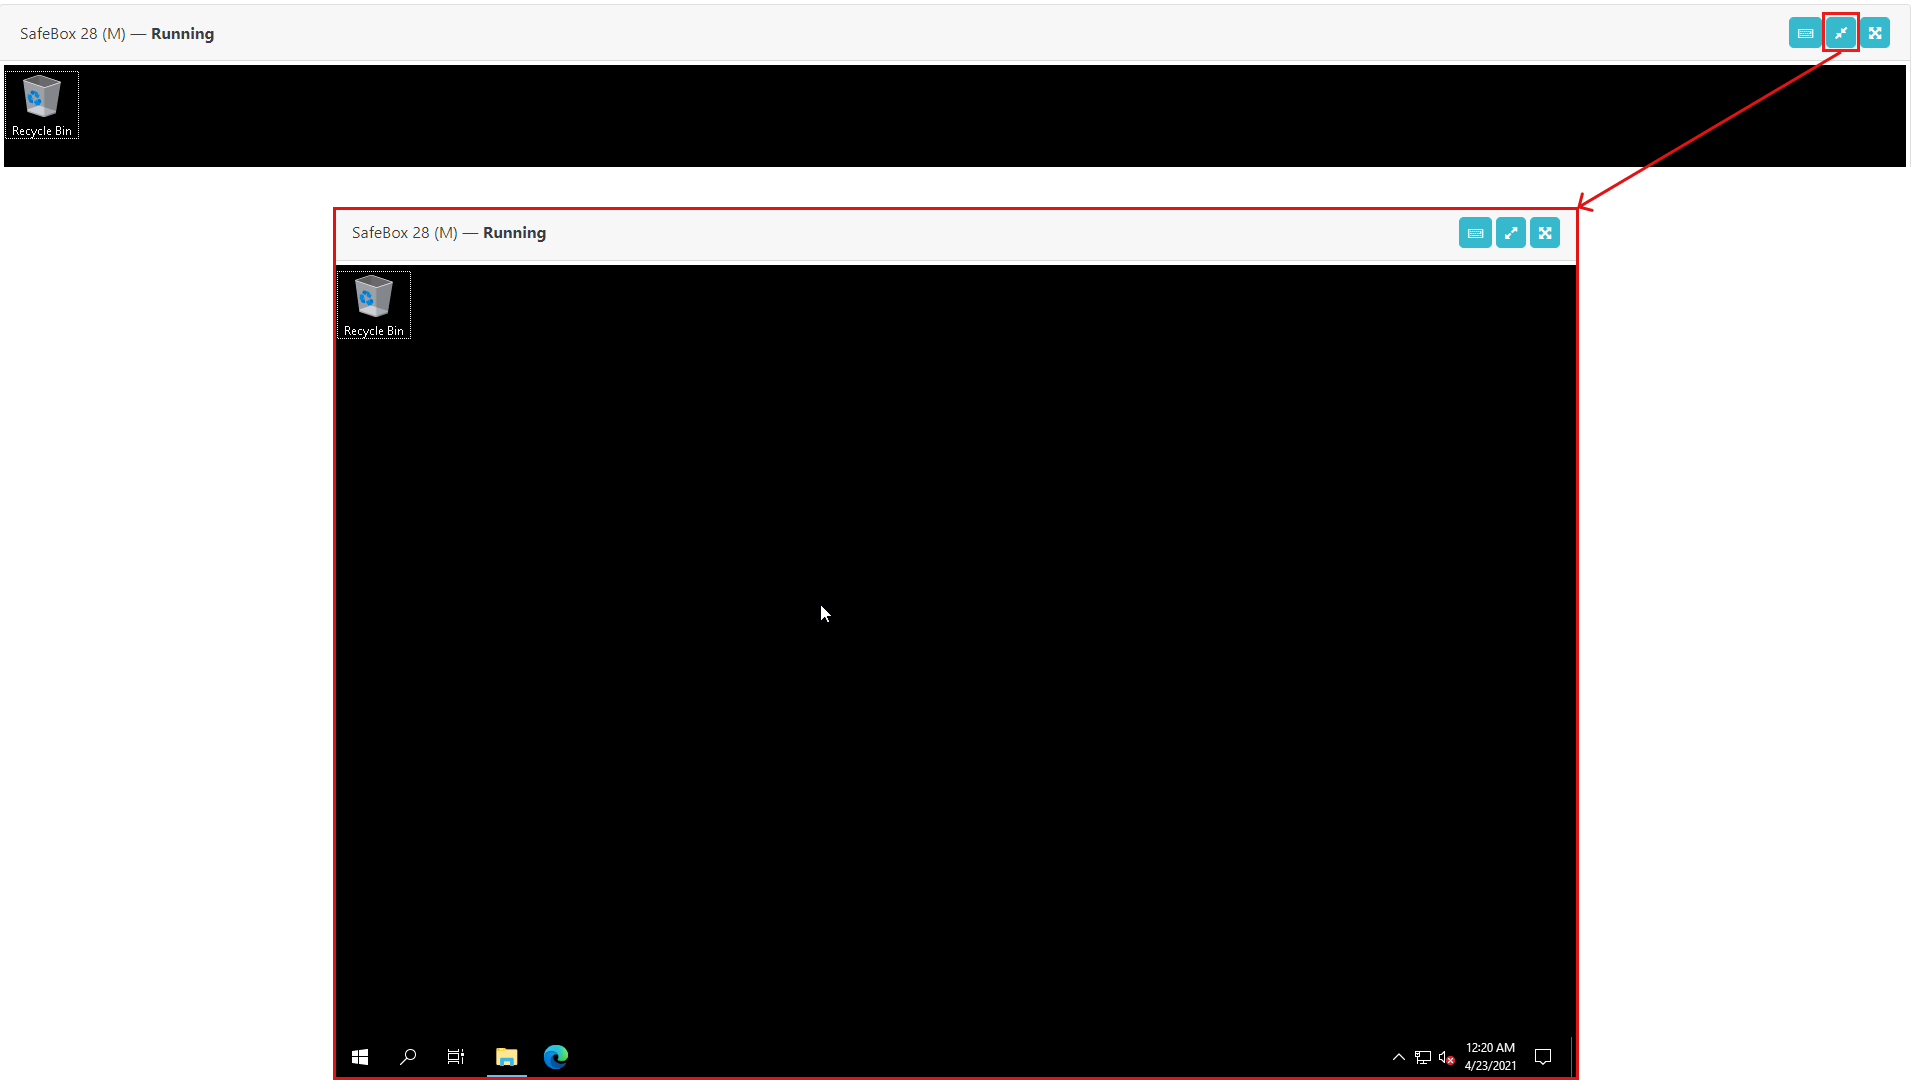
The Expanded Mode is available under the Expanded mode button ![]() .
.
 The Detailed mode is available under the Detailed mode button
 ![]() .
.
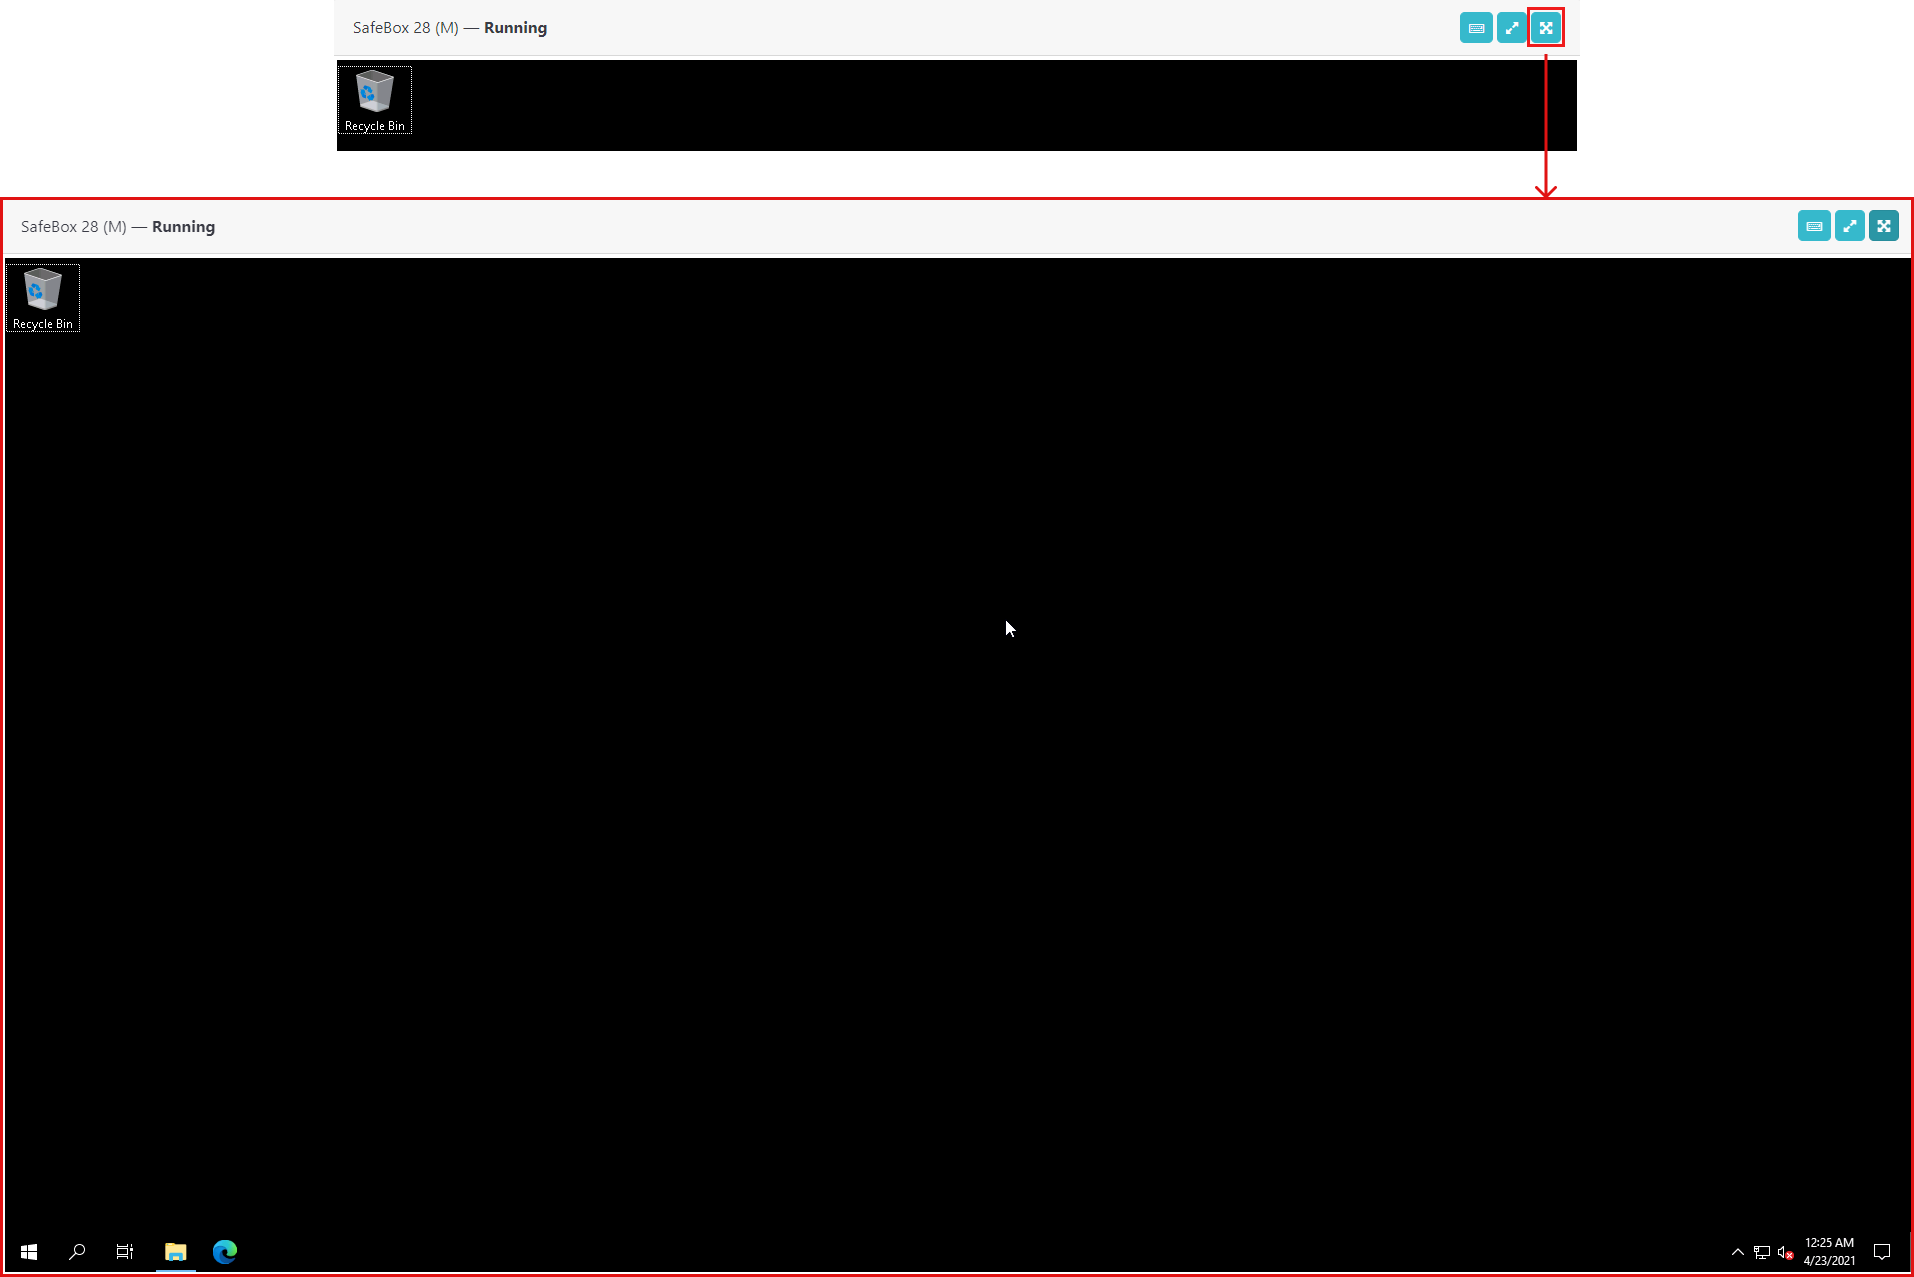
 The Fullscreen mode is available under the Fullscreen mode button
 ![]() .
.
 The option to exit the Fullscreen mode is available under the same button.
Control section
The Control section in the SafeBox screen shows the available option to manage the SafeBox (see Manage SafeBox).
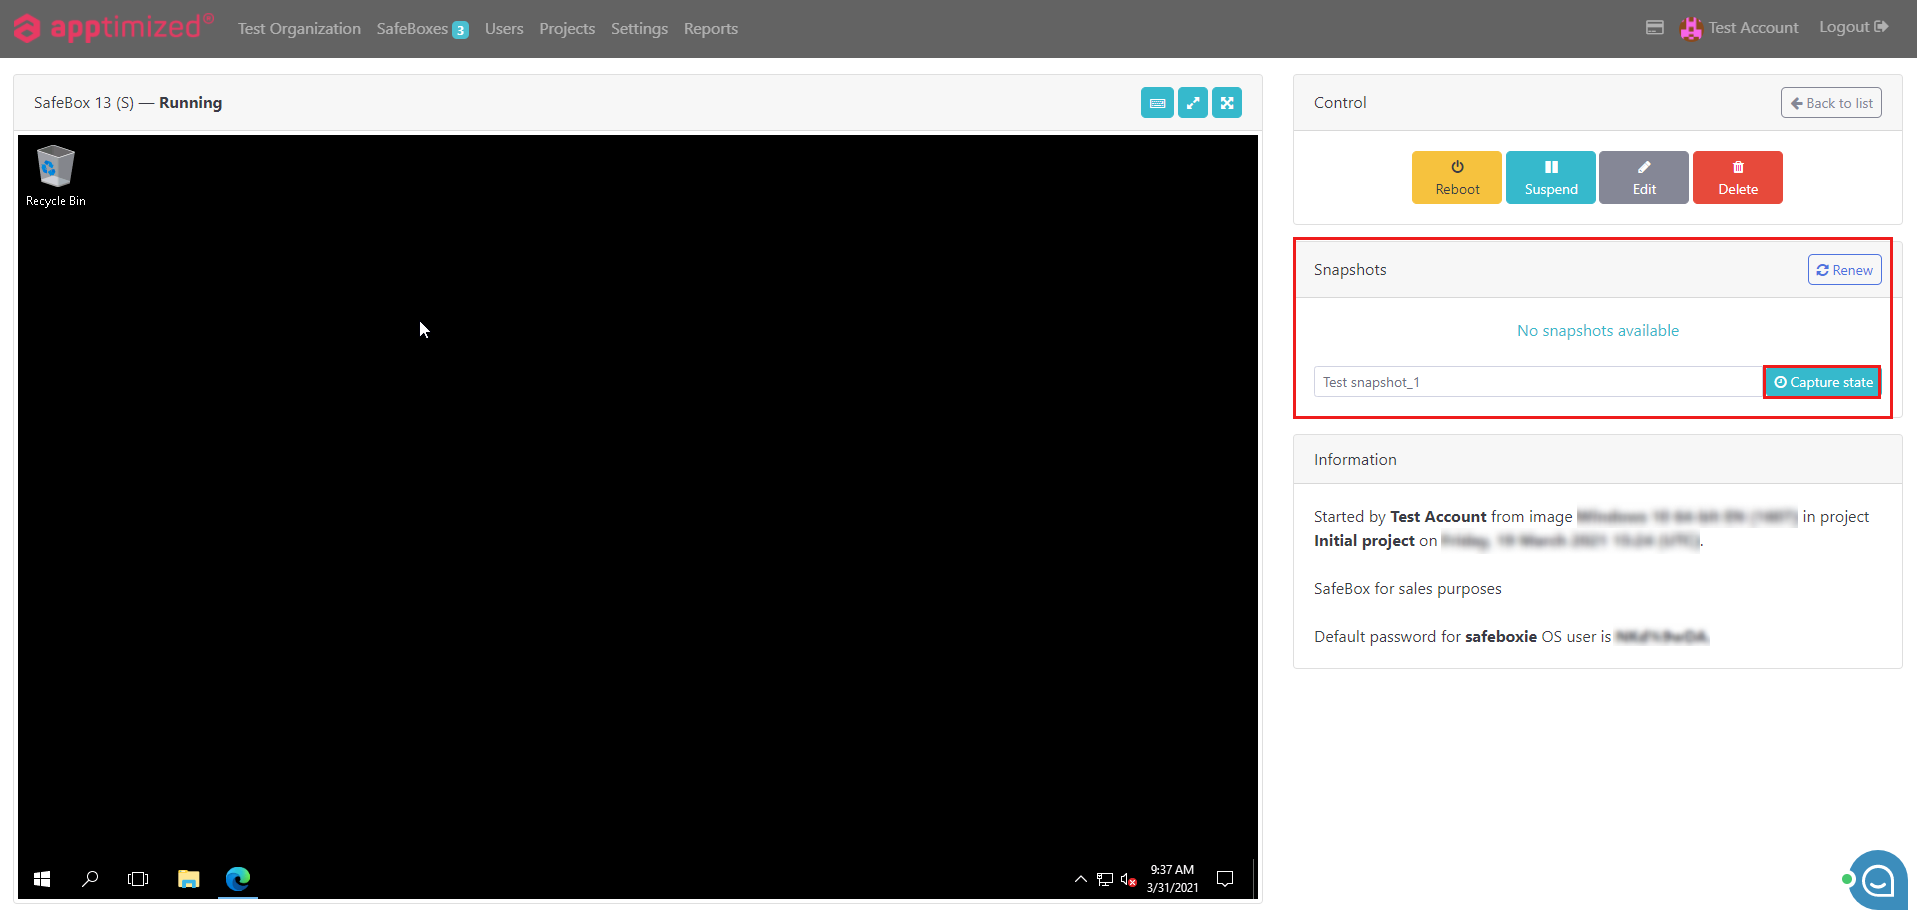
Snapshots section
The Snapshots section allows preserving SafeBox state to return to the same state repeatedly.
The option to create Snapshots is available under the Capture state button.
 Apptimized shows the following notification when successful:
 The option to return SafeBox to a previous state is available under the Snapshot button > Select the relevant snapshot.
.png) Apptimized provides the following modal window when successful:
Apptimized provides the following modal window when successful:
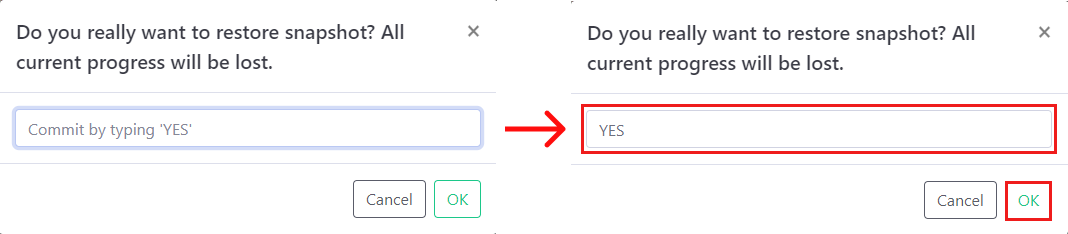
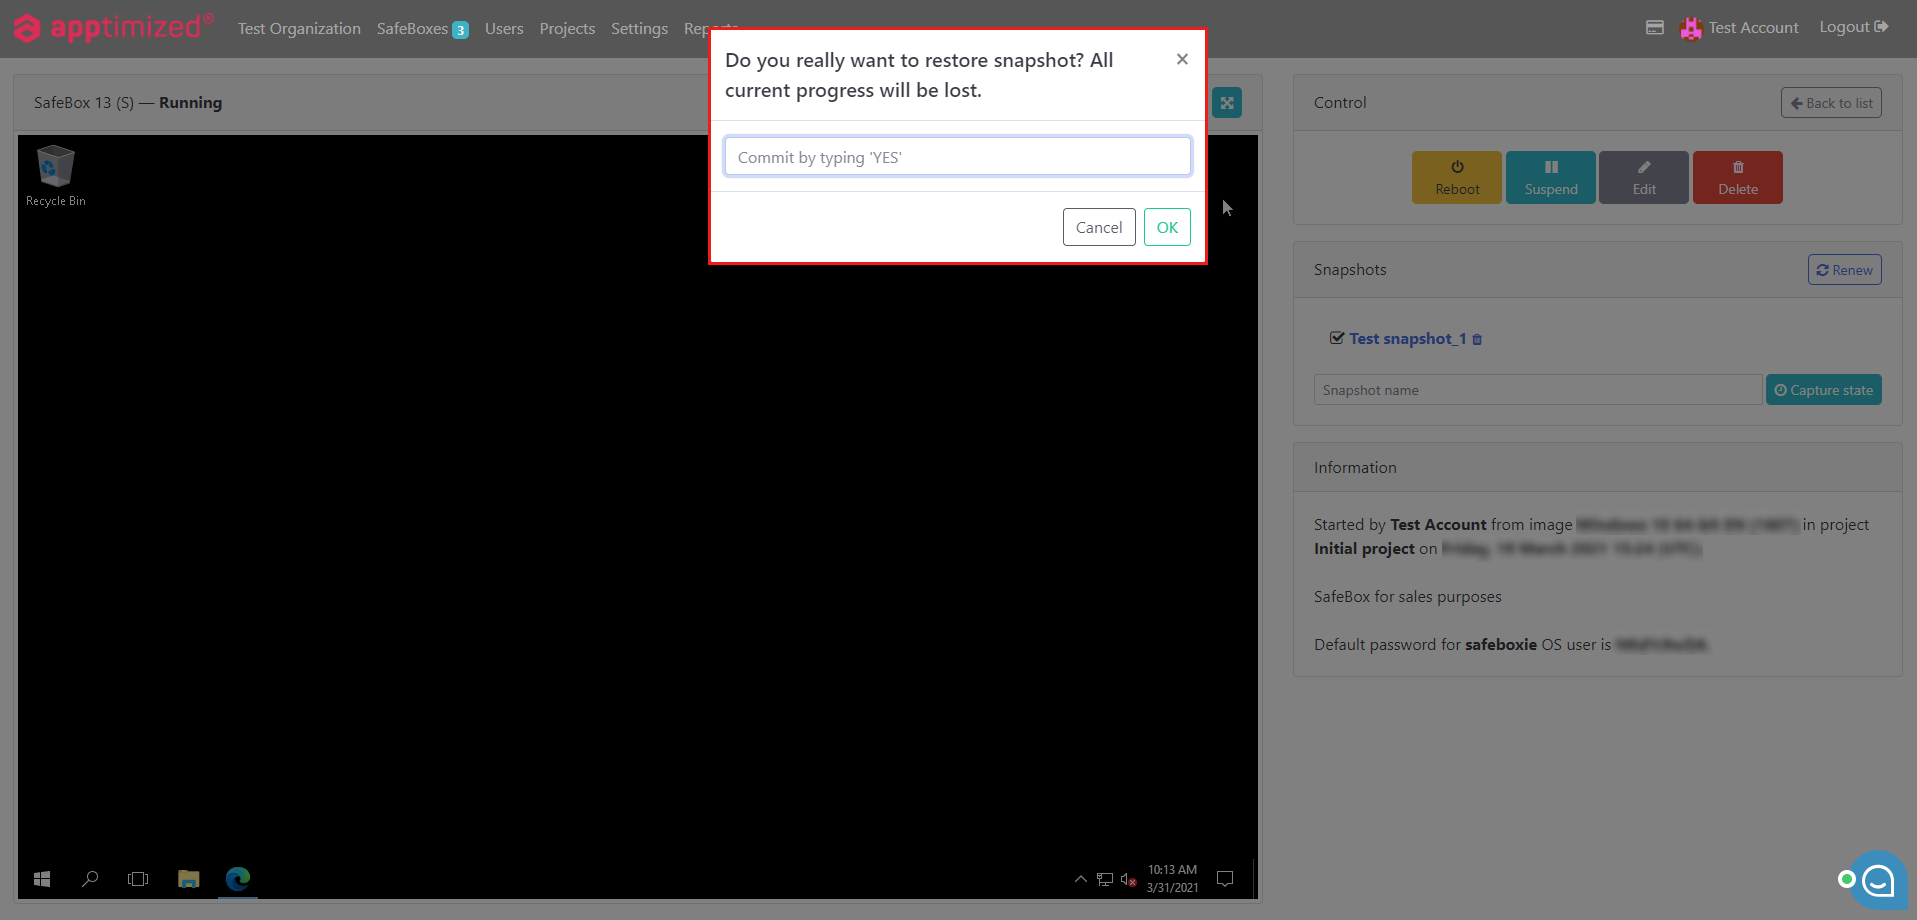 Continuing restoring is available by typing YES in the Commit by typing ‘YES’ field and clicking OK.
Apptimized shows the following notification when successful:
 The option to revert to the SafeBox page is available under the Cancel button.
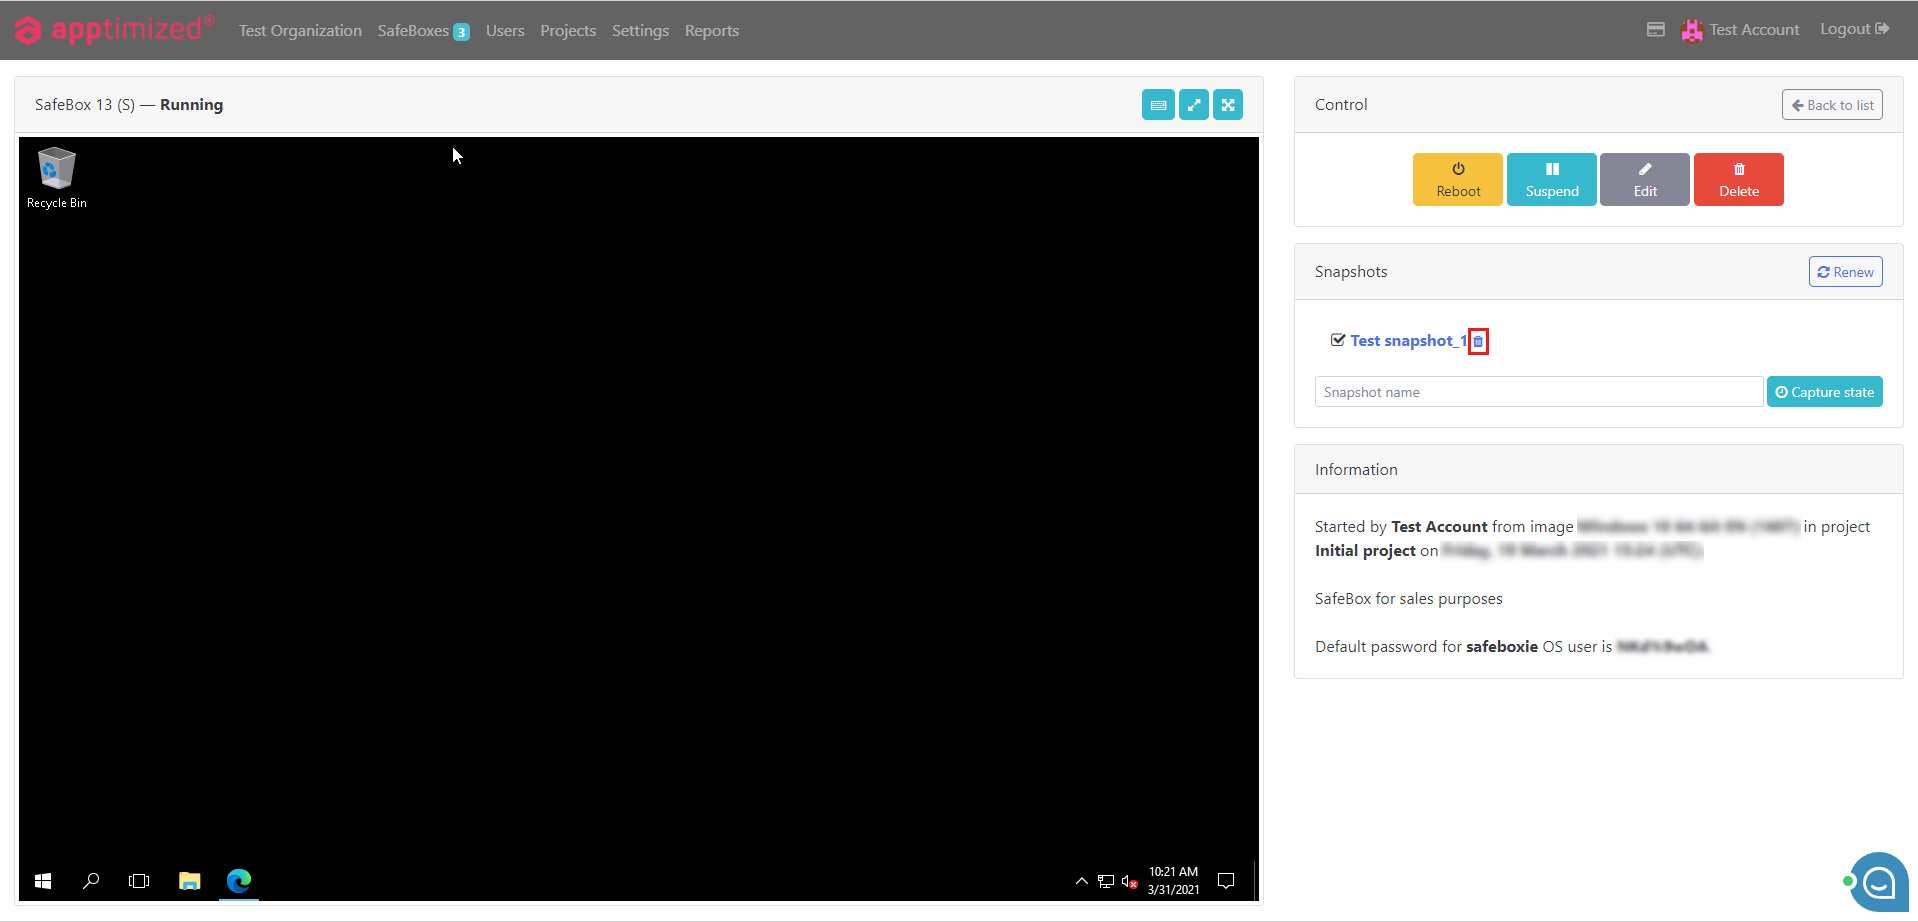
Delete snapshot
The option to delete Snapshot is available under the ![]() button.
button.
 Apptimized provides the following modal window:

The option to continue deleting process, is available by typing YES in the Commit by typing ‘YES’ field and clicking OK.

Apptimized shows the following notification when successful:

The option to revert to the SafeBox page is available under the Cancel button.
Create SafeBox
The following scenarios to open the Create new project section available:
- Header > SafeBoxes tab > Create new SafeBox;
- [Organization name] tab > SafeBoxes tile > Add new;
- Projects tab > [Project name] field > Actions > Dashboard > SafeBoxes tile > Add new.
Apptimized shows the following screen when successful:
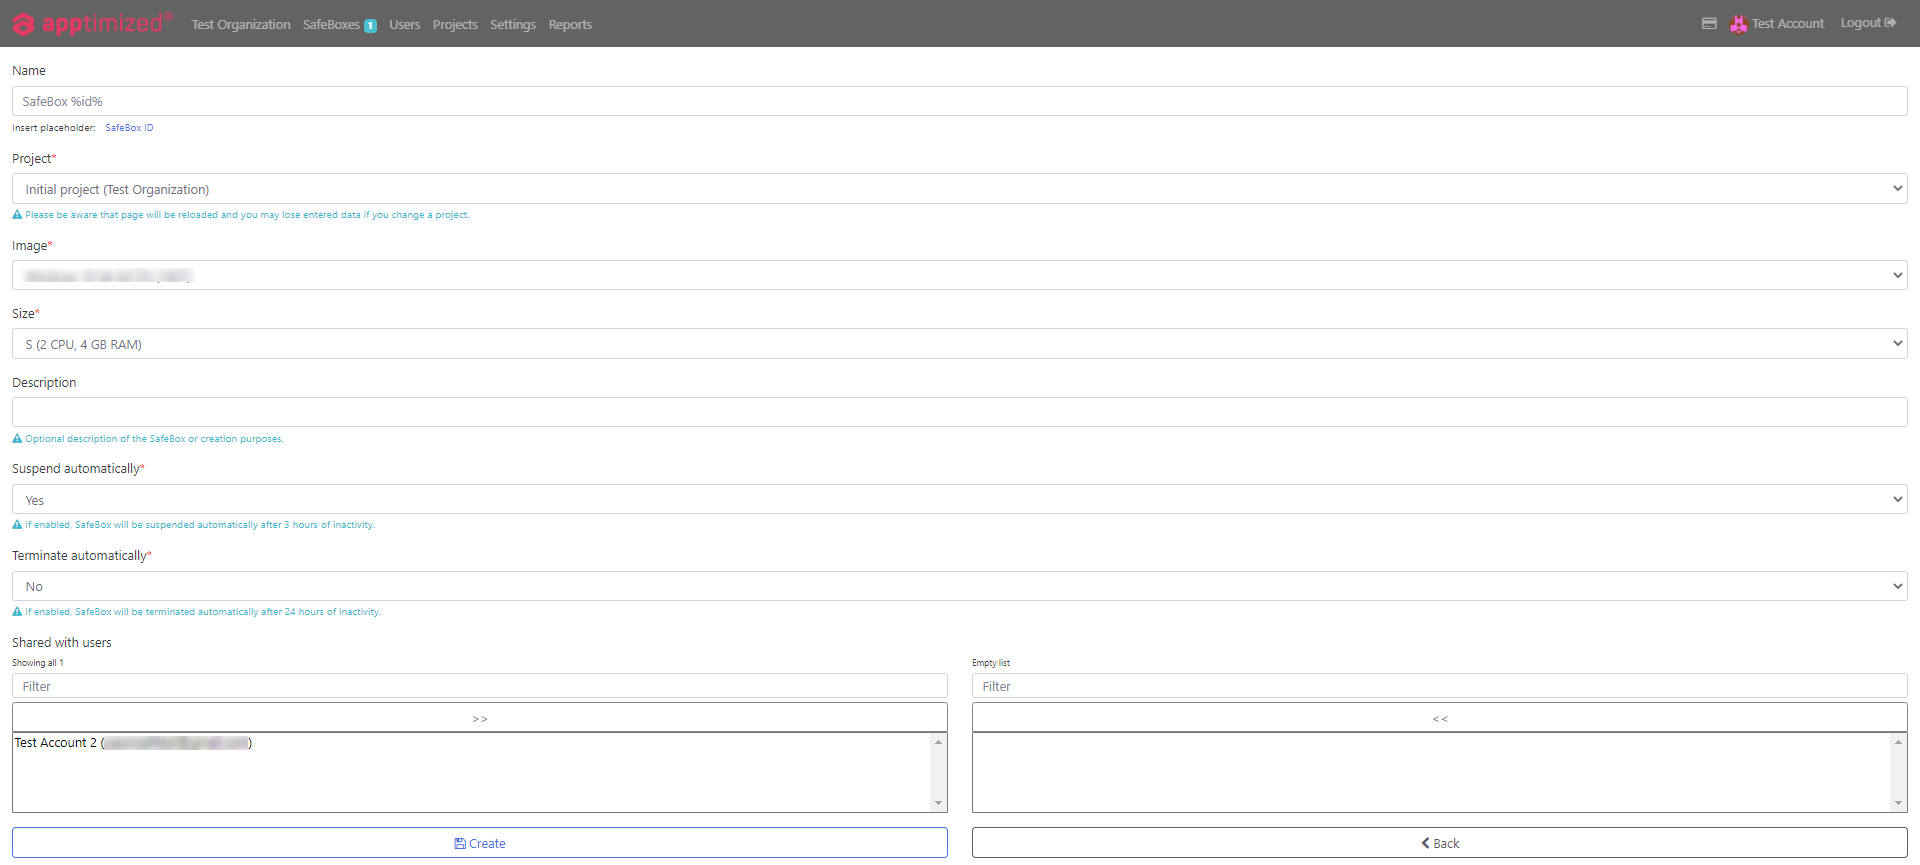
The Create new project section is divided into several fields.
|
Field |
Description |
Default value |
|
Name |
Thіs field indicates the unique title of the SafeBox. There is an opportunity to insert the SafeBox ID by clicking the SafeBox ID button. A user can ignore the default SafeBox naming and assign to it any meaningful name. This field is required. |
By default, the system automatically assigns a name for SafeBox according to a template [SafeBox %id%] (e.g., SafeBox 47). |
|
Project |
This field empowers a user to assign a SafeBox with a particular project.
This field is required. |
Initial Project. |
|
Image |
This field indicates the list of virtual images for SafeBoxes that can be assigned to a project. This field is required. |
The first selected SafeBox image at Project settings. |
|
Size |
This field indicates the predefined size of the SafeBox. The following sizes are available:
This field is required. |
S (2 CPU, 4 GB RAM). |
|
Description |
This field indicates the text description for SafeBox to set up (i.e., purposes). This field is not required. |
|
|
Suspend automatically |
This option enables the suspension of SafeBox after 3 hours of inactivity. This field is required. |
Yes. |
|
Terminate automatically |
This option enables the termination of SafeBox after 24 hours of inactivity. This field is required. |
No. |
|
Shared with users |
The Shared with users field allows sharing the SafeBox with the users assigned to the project (see Edit SafeBox). This field is not required. |
|
The option to create the SafeBox is available by clicking Сreate.
Apptimized provides the following notification when successful:
 The option to revert to the SafeBox page is available under the Back button.
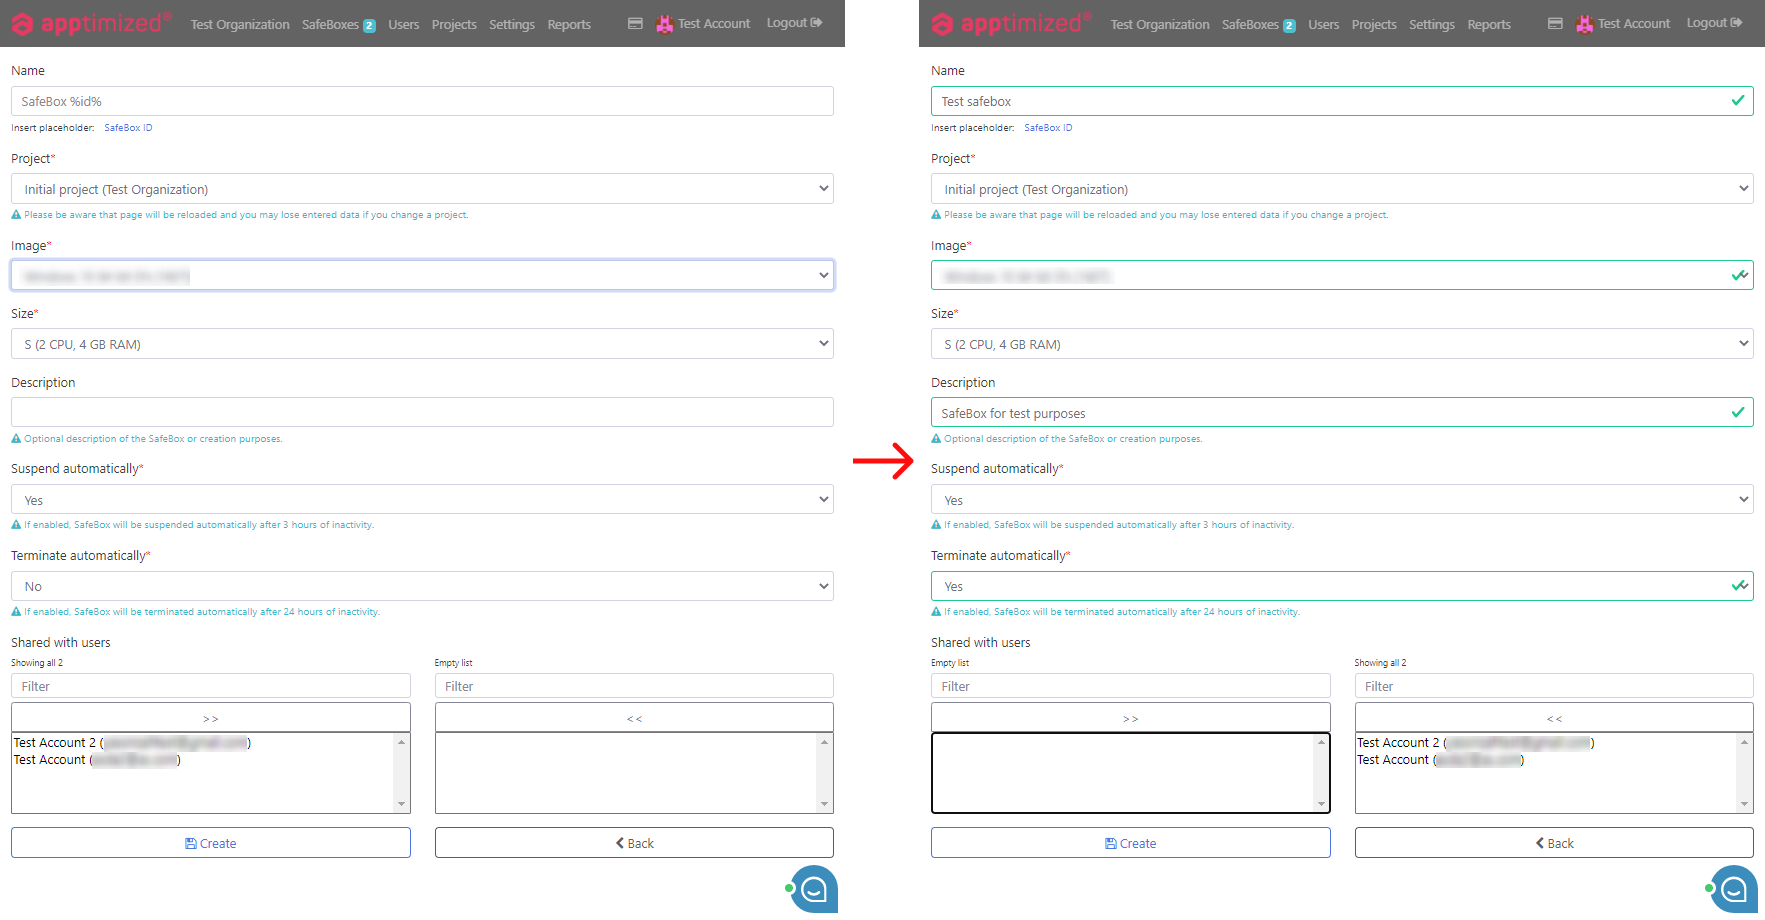
Edit SafeBox
The following scenarios available to access the edit SafeBox section:
- SafeBox tab > SafeBox page > Select the SafeBox > Actions > Edit;
- [Organization name] tab > [Organization name] dashboard > SafeBoxes tile > Select the SafeBox > Actions > Edit;
- Projects tab > Projects page > Select Project > Actions > Dashboard > SafeBoxes tile > SafeBox field > Actions > Edit.
Apptimized shows the following screen when successful:
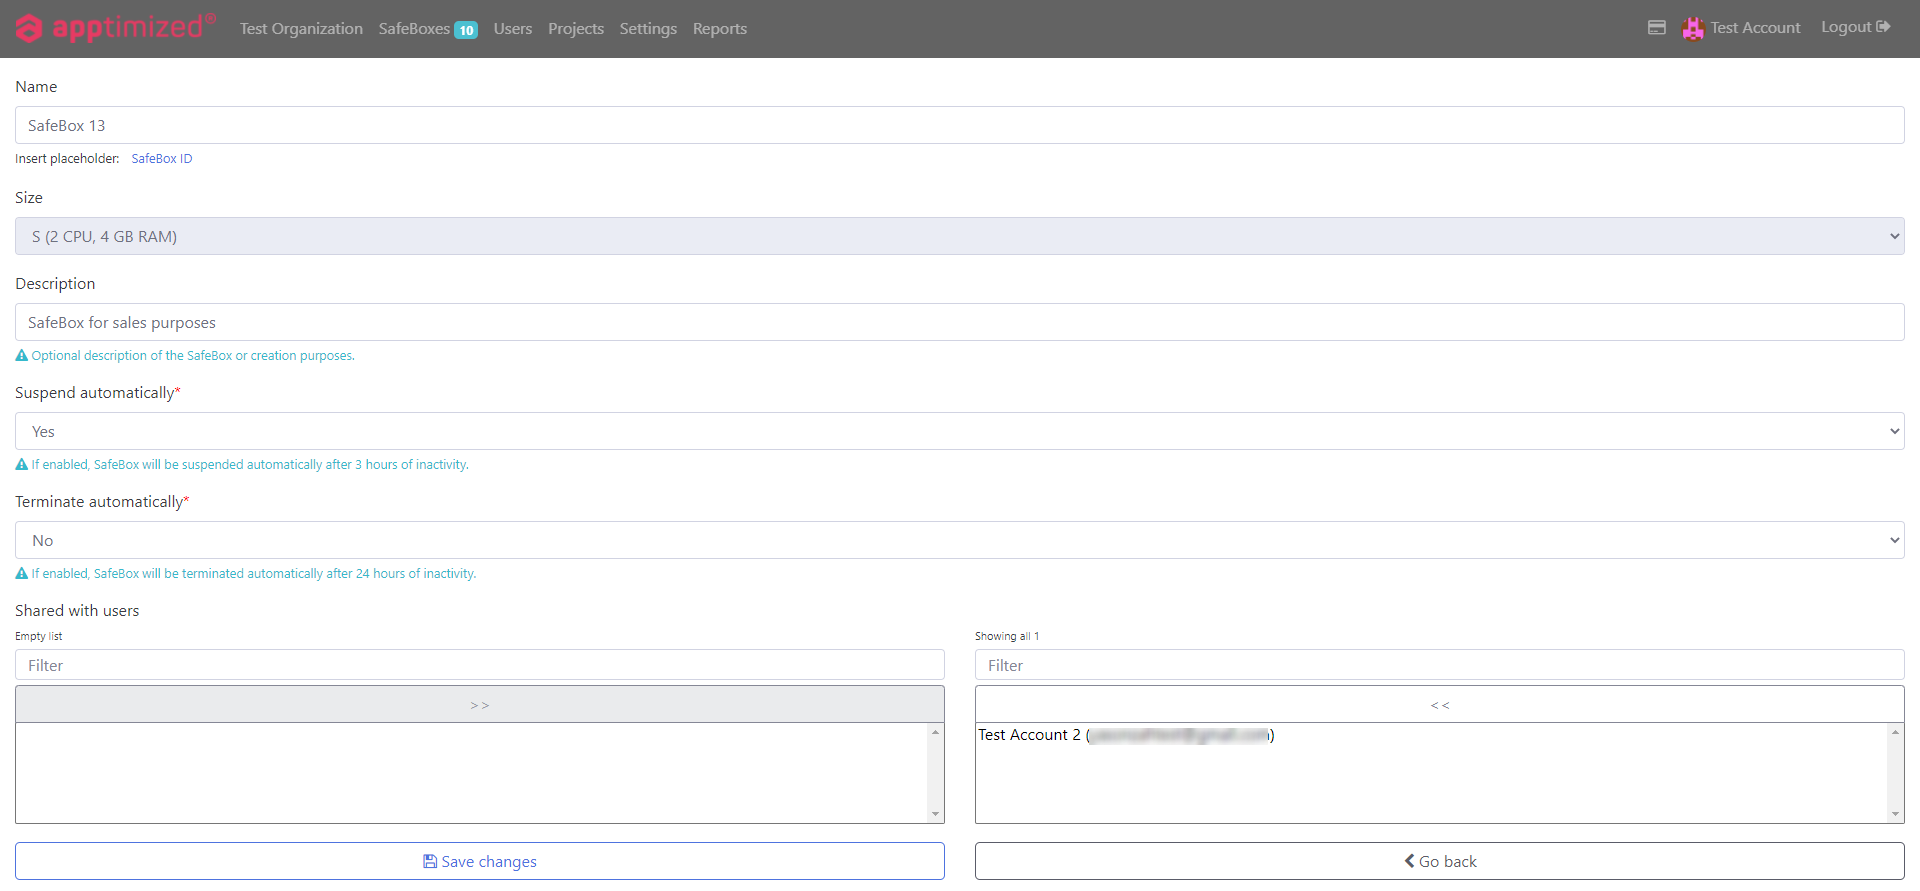
The Edit sections allow to change the SafeBox, Description, Suspend & Terminate options automatically, and the sharing options of the SafeBox.
To change SafeBox settings, a user proceeds the following flow:
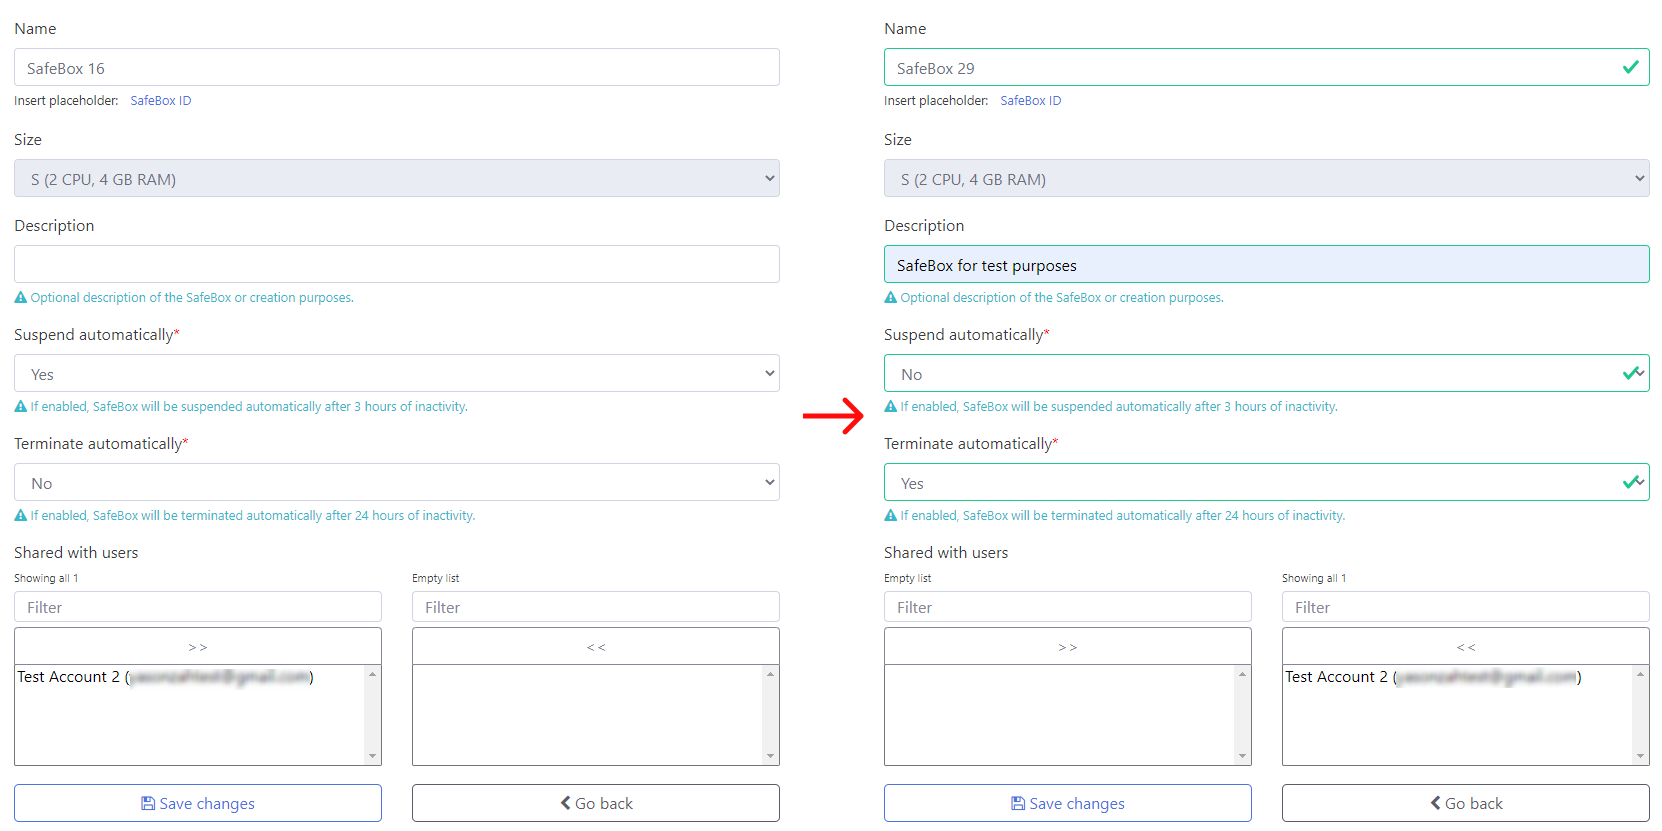
The option to revert to the SafeBox page is available under the Go Back button.
The option to save changes is available under the Save changes button.
Apptimized shows the following notification when successful:

Manage SafeBox
The following scenarios available to access the Manage SafeBox section:
- Header > SafeBoxes page > Select the SafeBox > Actions;
- SafeBox screen > Control section;
- Organization dashboard > SafeBoxes tile > Select the SafeBox > Actions;
- Project Dashboard > Select the SafeBox > Actions.
The Manage SafeBox section includes the following options:
- Resume - allows to turn the SafeBox on from the Sleep mode (Suspend state);
- Edit - allows to enter the Edit section of the SafeBox and update the information;
- Reboot - allows restarting SafeBox without saving state;
- Suspend - allows to save the SafeBox state and shut down the SafeBox;
- Delete – allows discarding the SafeBox;
- Renew – allows to discard the SafeBox and start over from a different image.
Note. The options appear depending on the current state of SafeBox.
Note. If the access is not shared with the user, the following screen will appear: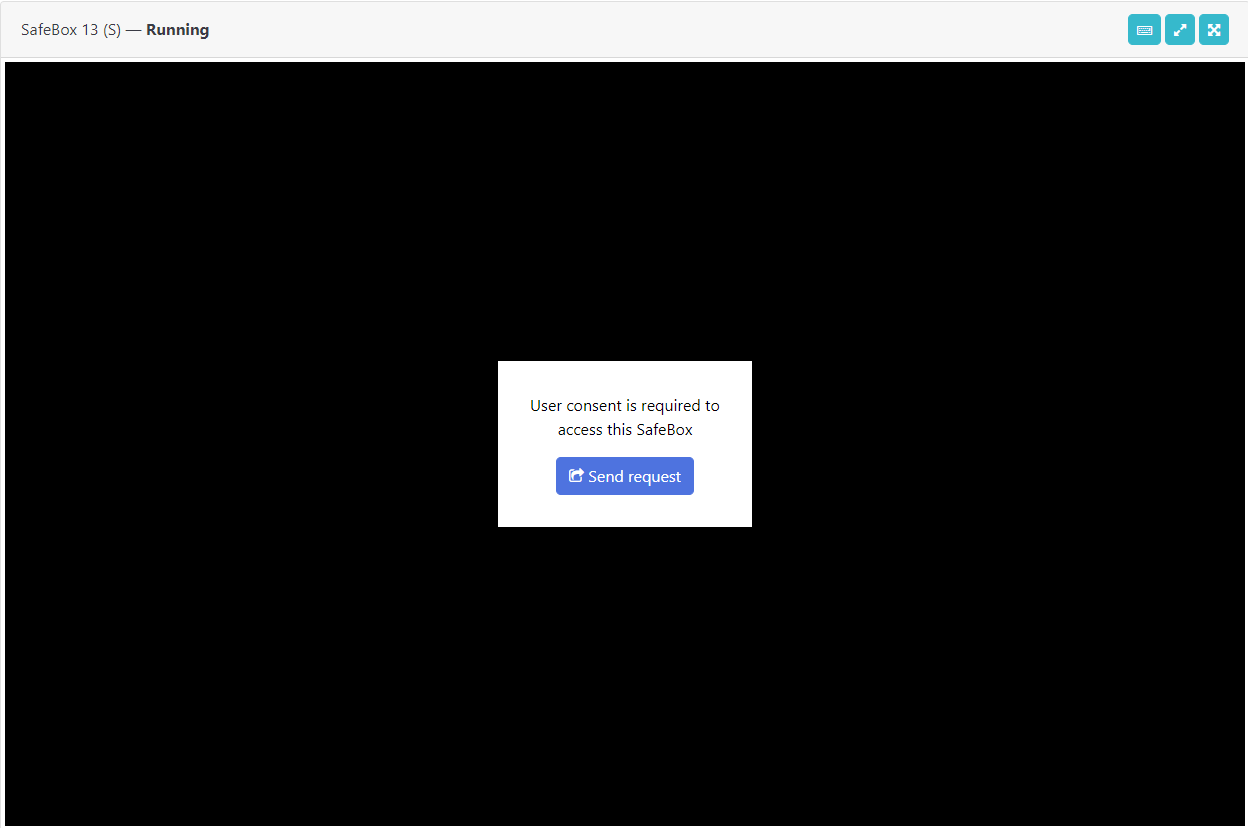
For User’s to receive access to the SafeBox, the user must be assigned to the Project where SafeBox operates and gets the shared access under the SafeBox settings in the Shared with the user option.
No comments to display
No comments to display