
Integration
SCCM Connector empowers Apptimized customers to:
- import software estate from SCCM server to Apptimized project portfolio;
- create an application in SCCM Console;
- add the deployment type to application with automatic media transfer;
- start the deployment of an application.
SCCM Connector Integration saves time and provides instant deployment of SCCM packages without the need to leave Apptimized.
Requirements and limitations
The following prerequisites apply for SCCM connector:
- endpoint PC or VM with access to the 443 port of app.apptimized.com host;
- endpoint membership in Active Directory domain;
- Microsoft Windows Desktop (Windows 7 and above) or Server OS (Windows Server 2012 R2 and above) with installed .NET Framework 4.6.1;
- write permissions for network share with packages source media for automatic media transfer;
- administrator role for SCCM or permissions to create applications, deployment types, and deployments;
- installed SCCM Administrator Console with a connection to the SCCM server.
Integration configuration with Apptimized
Initial integration to Apptimized requires a one-time configuration of SCCM Connector settings. It is required to establish a connection to the remote SCCM Environment.
It is possible to override preconfigured settings during the creation of an object in SCCM if needed, so they take precedence over the template of settings defined during the initial setup.
Connection and default configuration
SCCM Environment
Apptimized enables a user to set up SCCM environments to perform with SCCM connector deployment integration.
Each SCCM Environment is configured separately and can be used for any purpose.
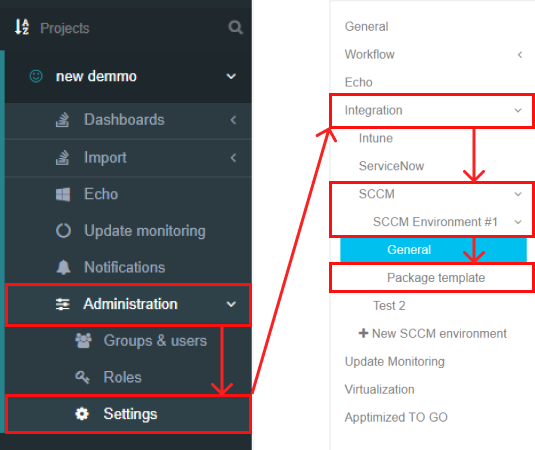
The option to create SCCM environment is available for project administrators under Settings in the project menu > Integration section > SCCM > New SCCM Environment

Apptimized shows the following screen when successful:
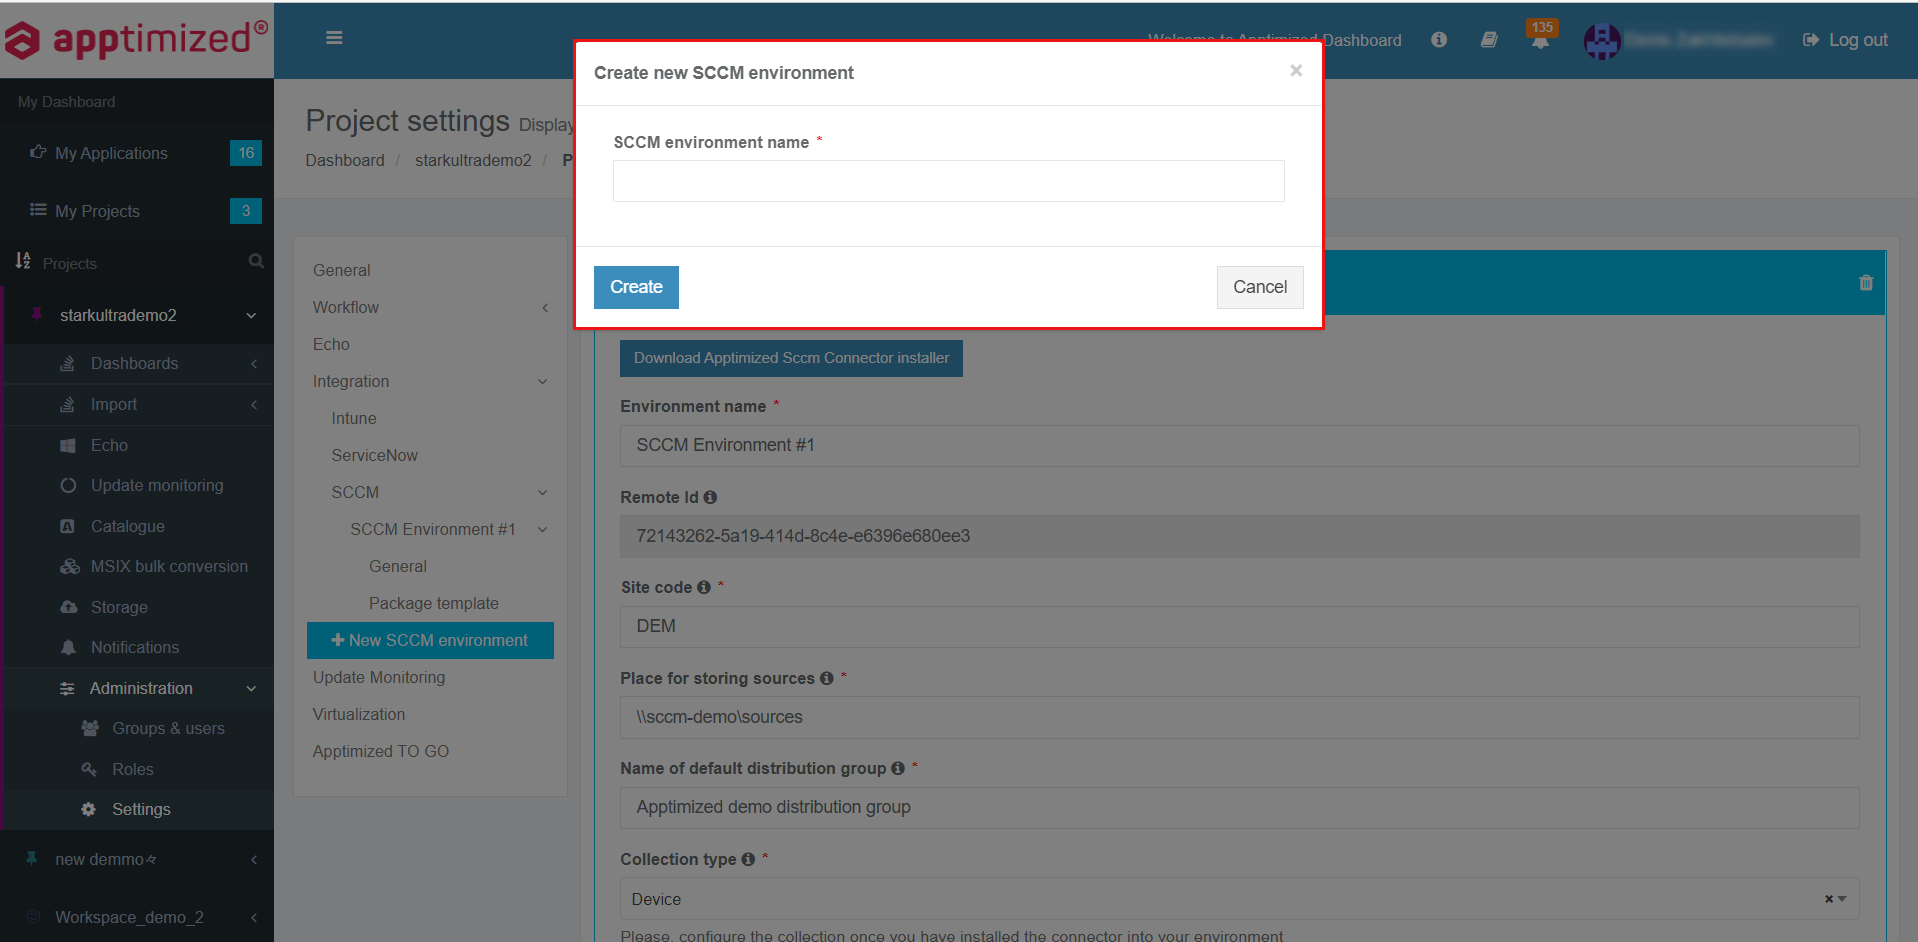
THe option to set the name of SCCM Environment is available under SCCM Environment name field.
The option to finish the creation process is available after setting the SCCM Environment name > Create button.
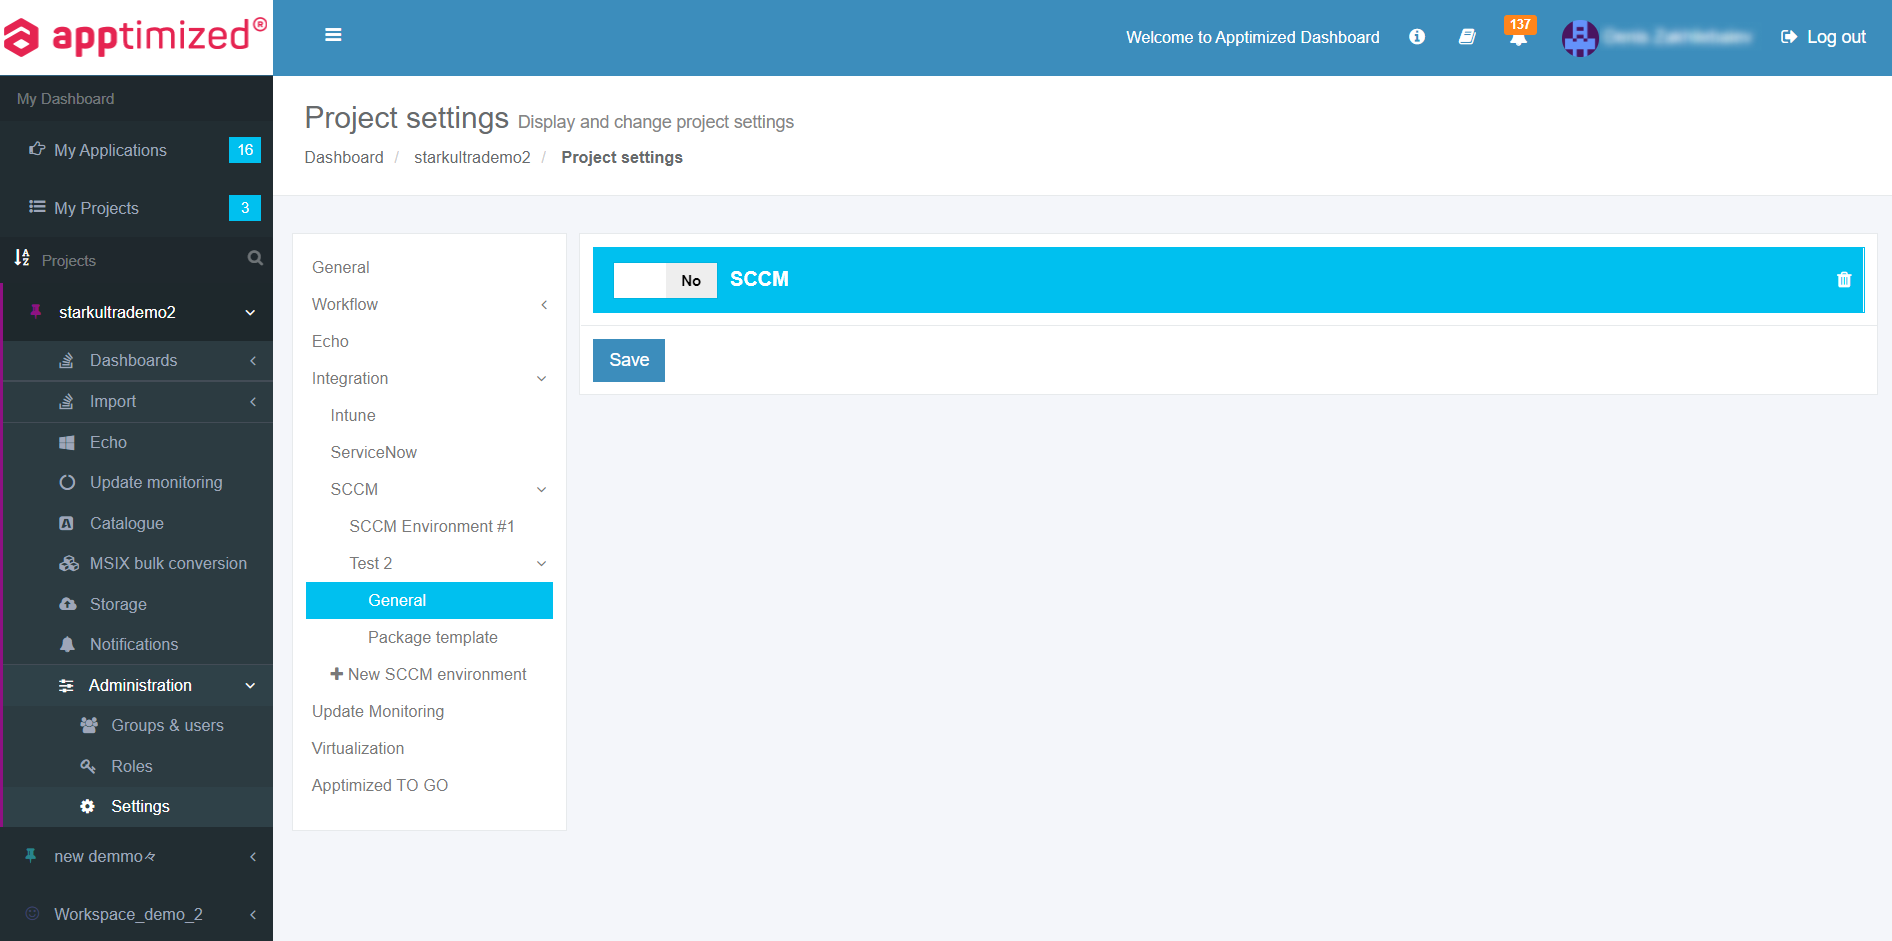
Apptimized shows the created environment when successful:
General settings
The one-time configuration is available for project administrators under Settings in the project menu > Integration section > SCCM > General.

SCCM Connector becomes active when switched on and once the settings are completed.
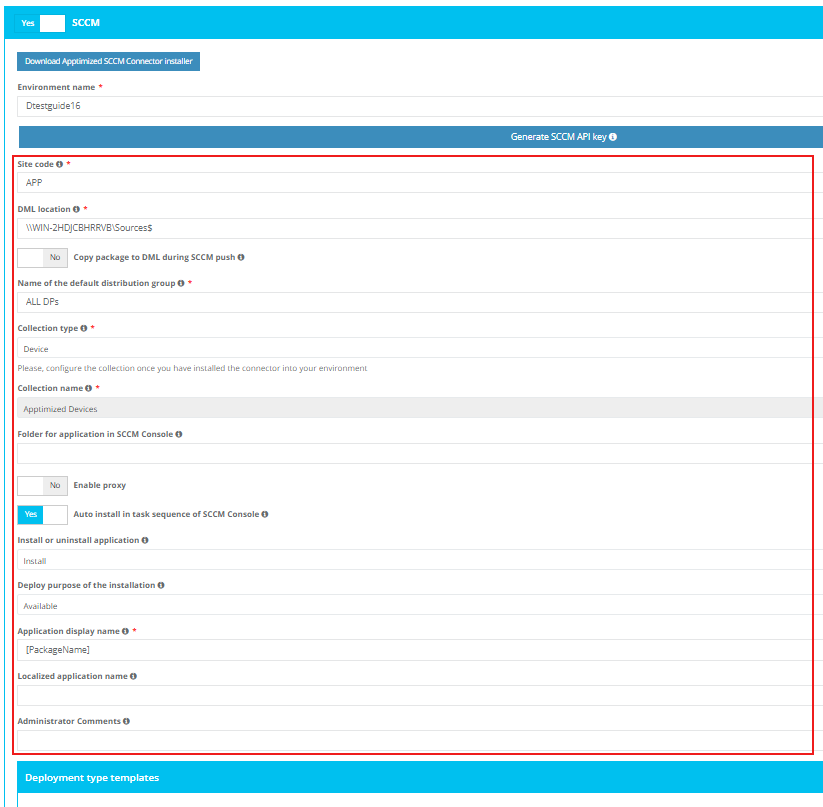
Table 1. General settings
|
Settings |
Details |
| Environment name |
The Environment name is the name of SCCM environment the SCCM connector operates in. |
| Remote ID |
The remote ID is a unique identifier generated automatically for every project during its creation. Remote ID provides customer identification. The Remote ID is used during SCCM connector installation on customer's environment. |
| Site code |
Site codes and site names identify sites in a Configuration Manager hierarchy. Configuration Manager Setup prompts for a site code and site name for the central administration site, and each primary site and secondary site installation. Learn more. |
| DML Location | Secondary deployment target which packaged files will be copied to during the SCCM push in addition to the deployment type content library. |
| Name of the default distribution group |
Indicates the default group of users or devices where to Install applications. This setting corresponds to the term "Distribution point group" in the SCCM admin console. |
| Collection type |
Indicates the type of collection where apps should be installed. The following types are:
|
| Collection name |
Indicates the collection of devices where to install applications. This setting corresponds to the term "Collection name" in the SCCM admin console. |
| Folder for application in SCCM Console |
This field is optional and can stay blank. If provided, overrides the default “Application” folder in SCCM Administrator Console as a target path for created application records.
Example: Testfolder1\testFolder2 or Testfolder1\testfolder2\testfolder3. |
| Install or uninstall the application |
This setting indicates whether a task sequence action in SCCM Console can install the application. Yes or No options are available. |
| Deploy the purpose of the installation |
This option specifies whether the application deployment can is mandatory or optional. Available or Required options are available. |
| Application display name |
The name of the application to be shown in SCCM Console. |
| Localized application name |
Specifies the application name for the English(US) default language. |
|
Administrator comments |
This optional field indicates the optional content with the dynamic variables can be filled by the user. |
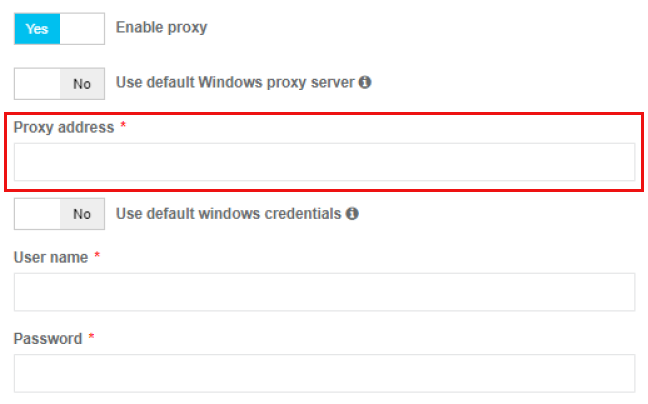
If the endpoint connects to the internet via the proxy server, configure the connection by turning on Enable proxy and selecting Use default windows credentials or providing credentials in Username and Password fields.
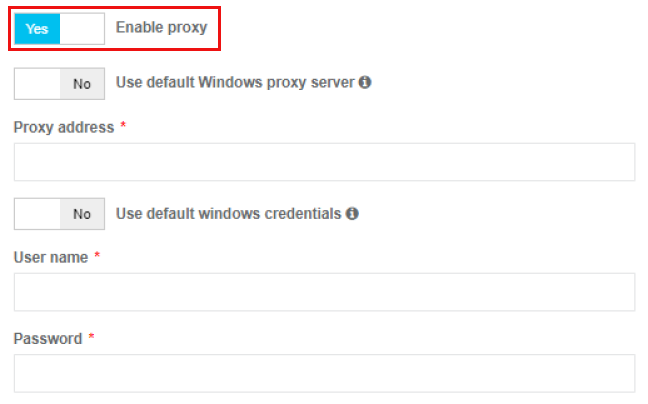
The option to use a proxy server whiсh is configured o VM where SCCM connector will be running is available under Use default Windows proxy server switch.

Note. If Use default Windows proxy server switched to Yes, the Proxy address field disappears.
The option to set a Proxy address is available under the Proxy address field.
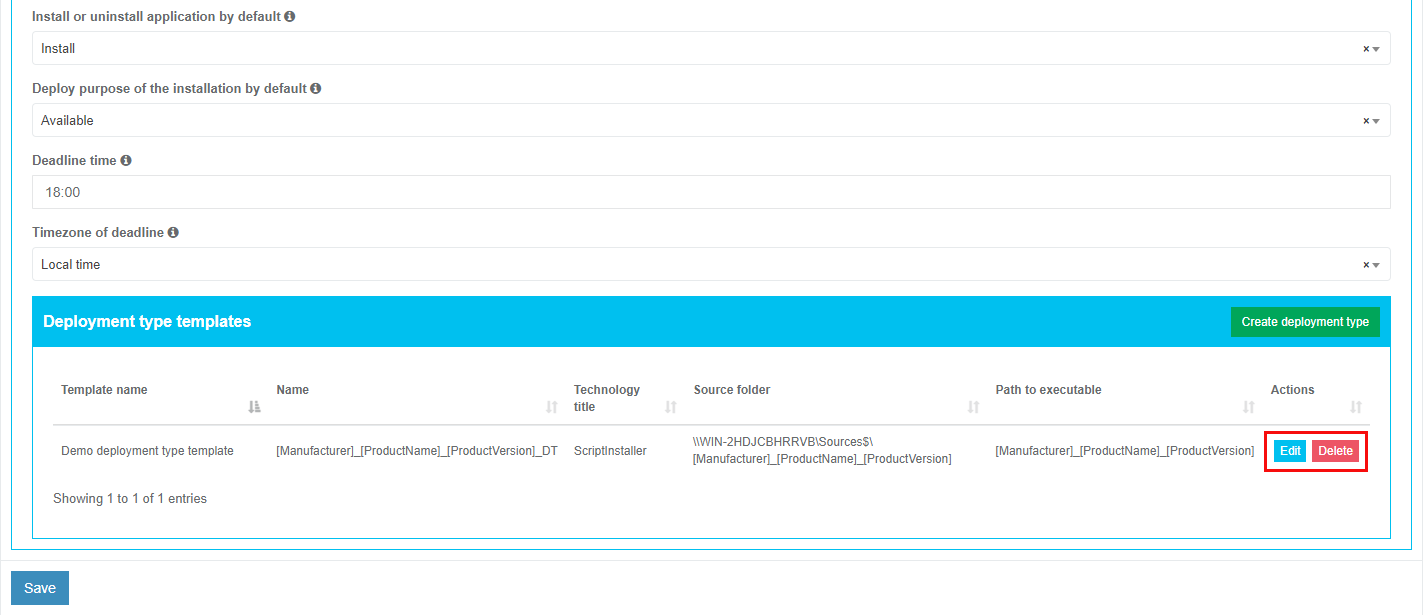
Deployment types templates settings
This setting enables a user to implement multiple deployment types by creating multiple deployment templates within one project.
The option to enable SCCM deployment templates becomes active when all required fields in the SCCM general tab are filled in.
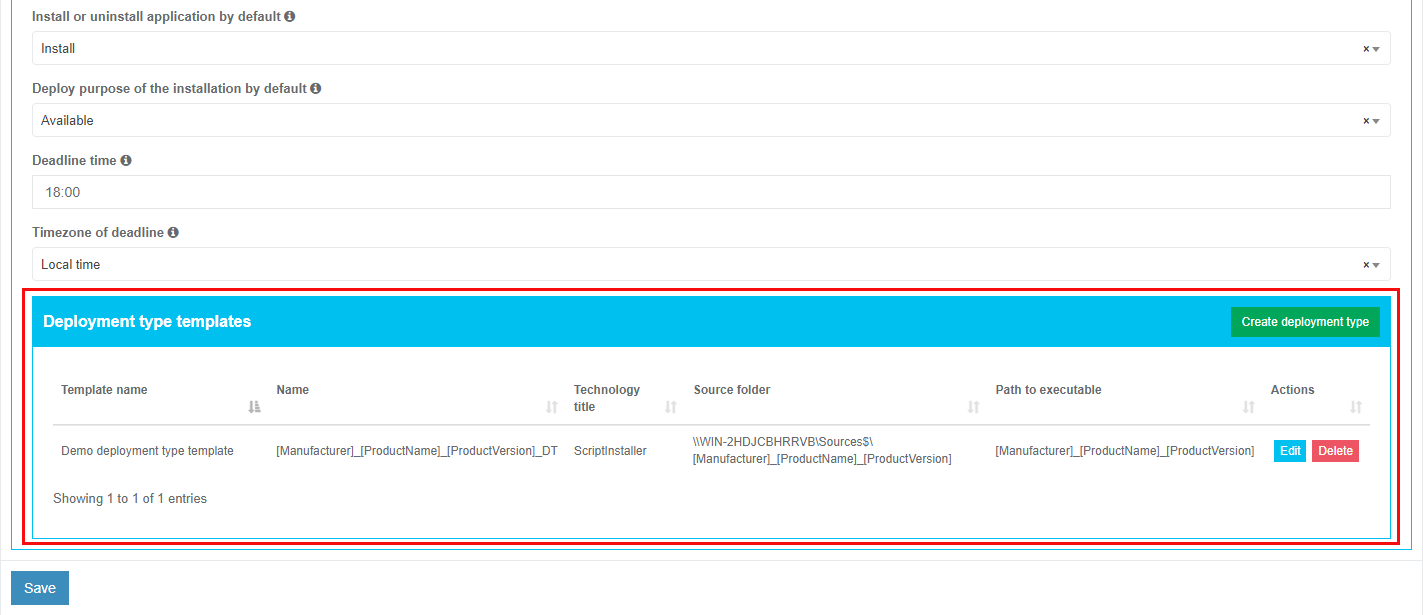
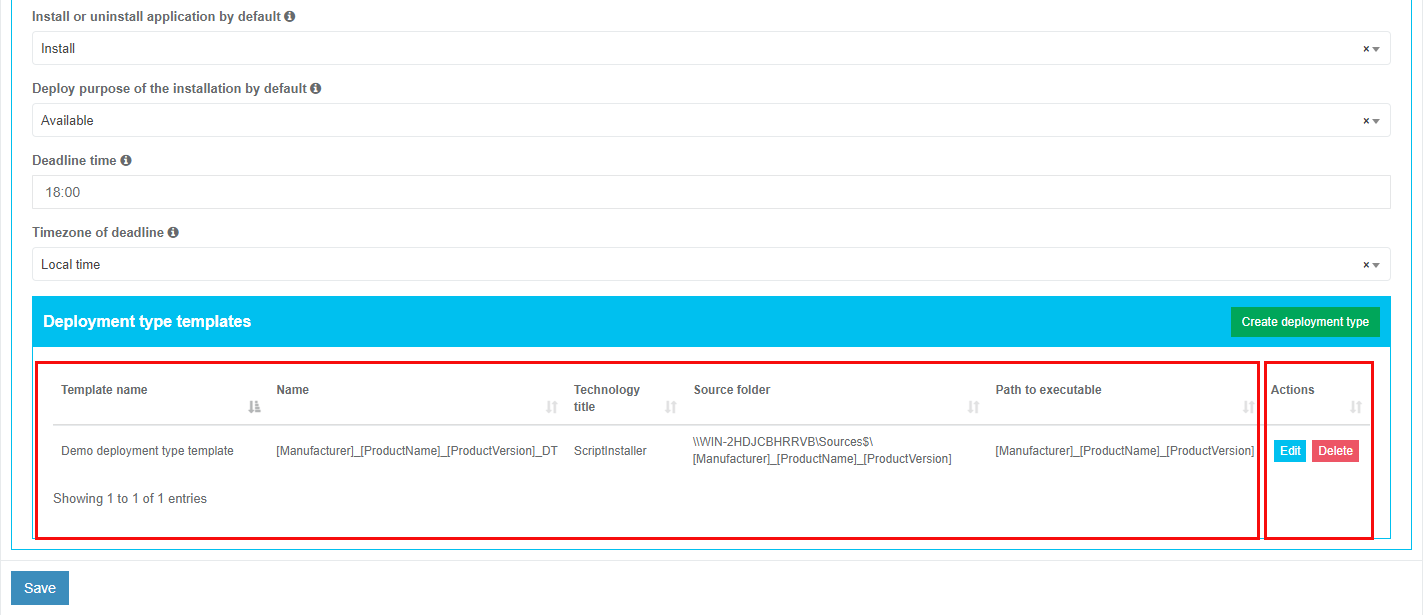
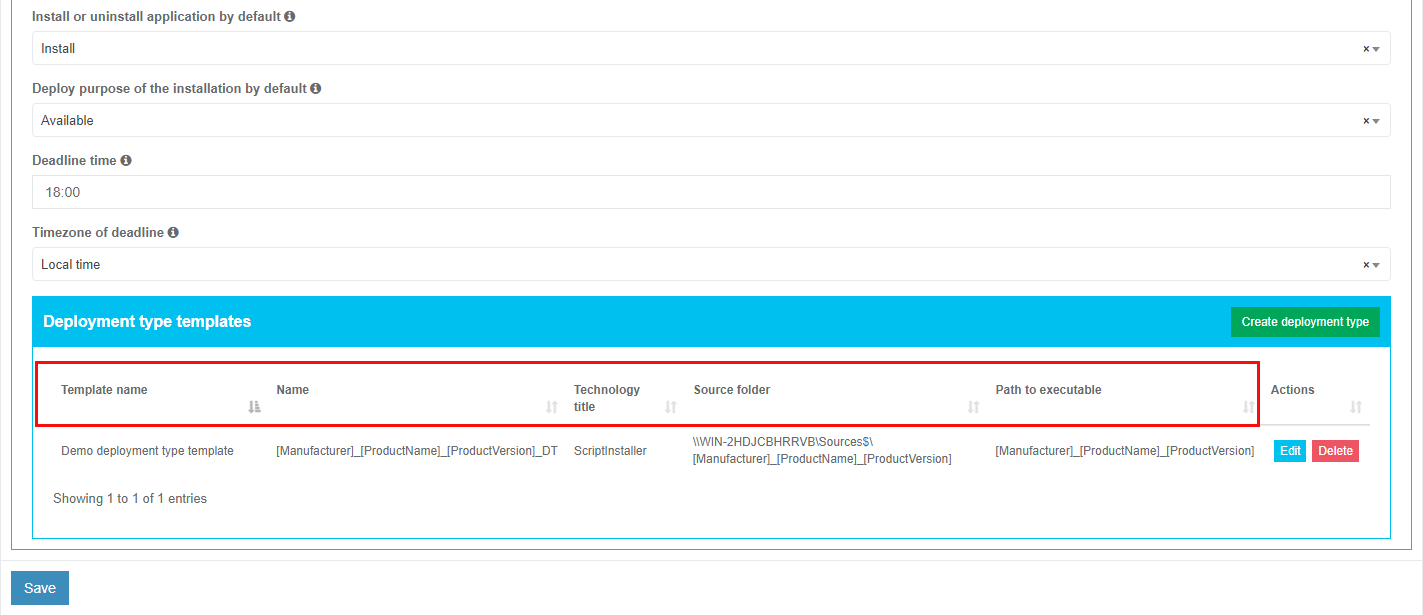
The deployment types sections is displayed in 2 blocks:
- Information block – this block contains detailed information about the Deployment templates;
- Actions block – this block provides the options to operate with the deployment templates.
Deployment type templates data is grouped into the following categories:
|
Сategory |
Description |
|
Template name |
The field indicates the template name to help a user to identify templates in Apptimized portal. |
|
Name |
This field indicates the name of a deployment type. |
|
Technology title |
This field indicates the type of template installation. |
|
Source folder |
This field indicates the path to the location of the package source. |
|
Path to executable |
This field indicates the path to the location of the package source executable file. |
Users actions are grouped into the following categories:
- Edit - enables a user to enter edit Deployment type template;
- Delete - allows a user to delete the Deployment type template.
The option to Create new deployment type is available under Create Deployment type button
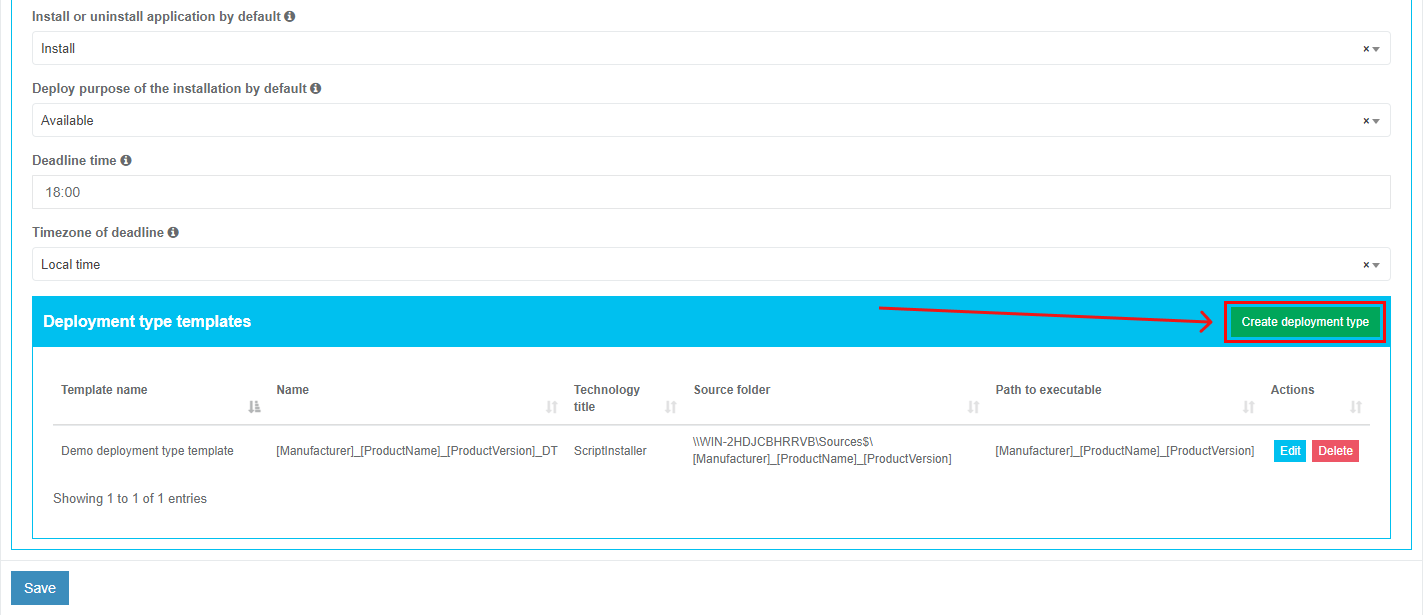
Apptimized shows the following screen when successful:
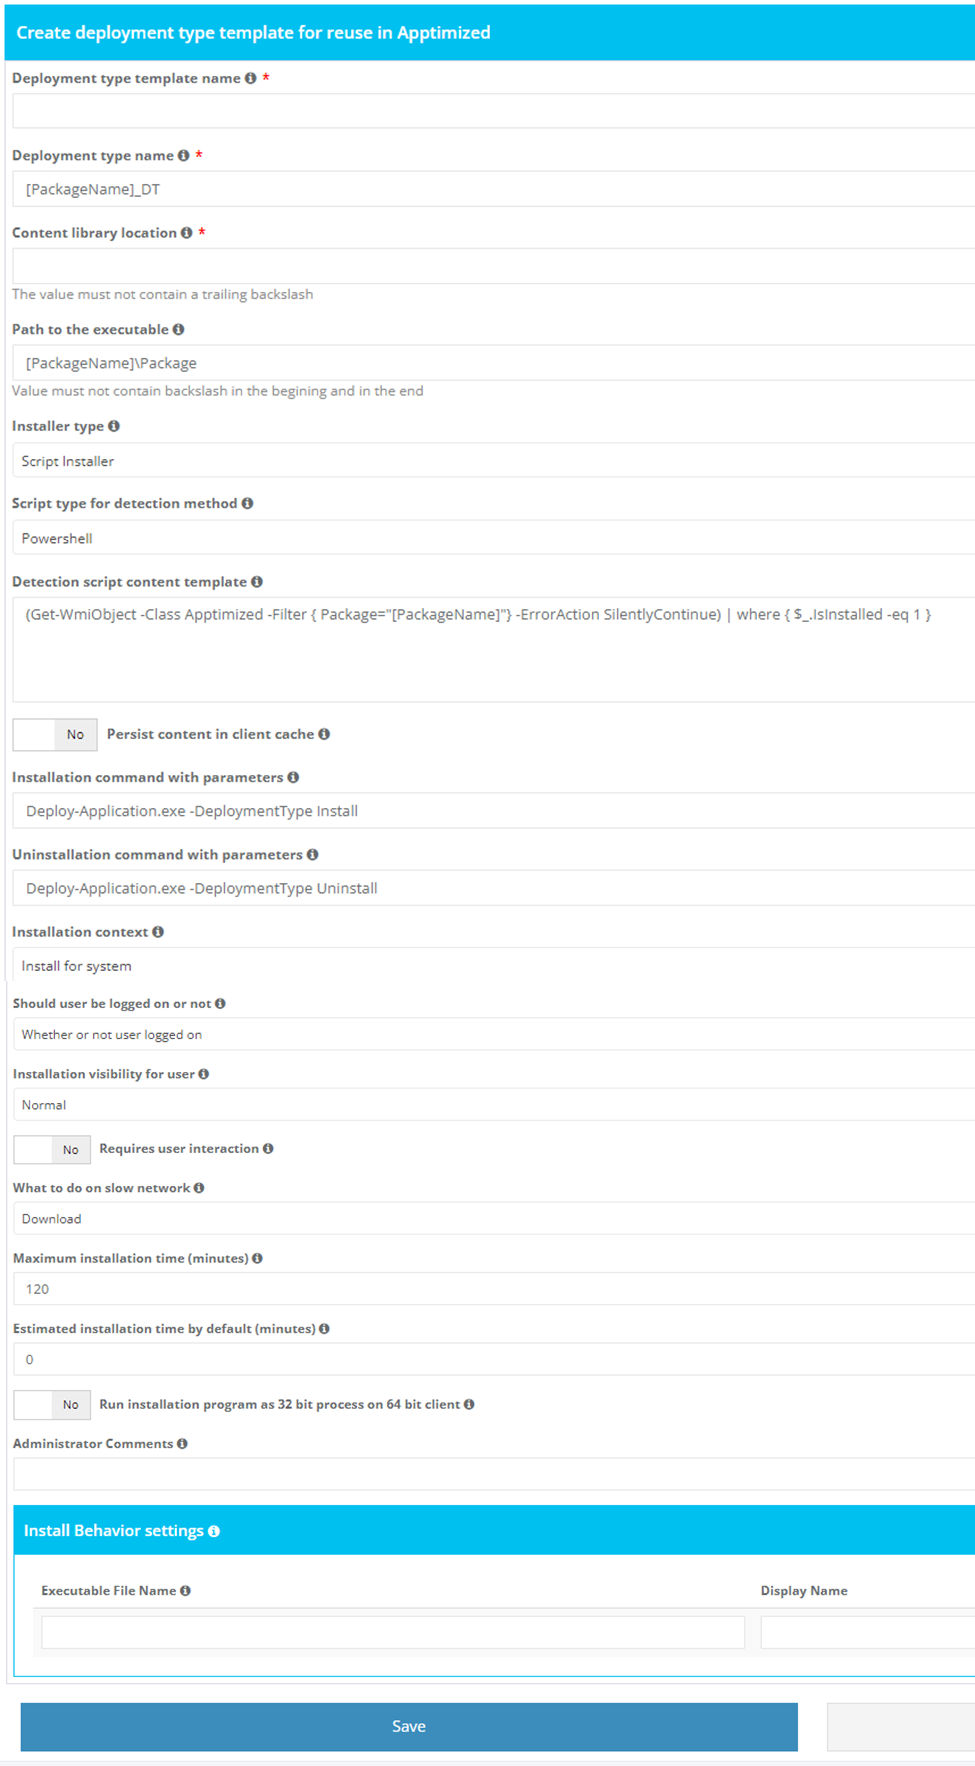
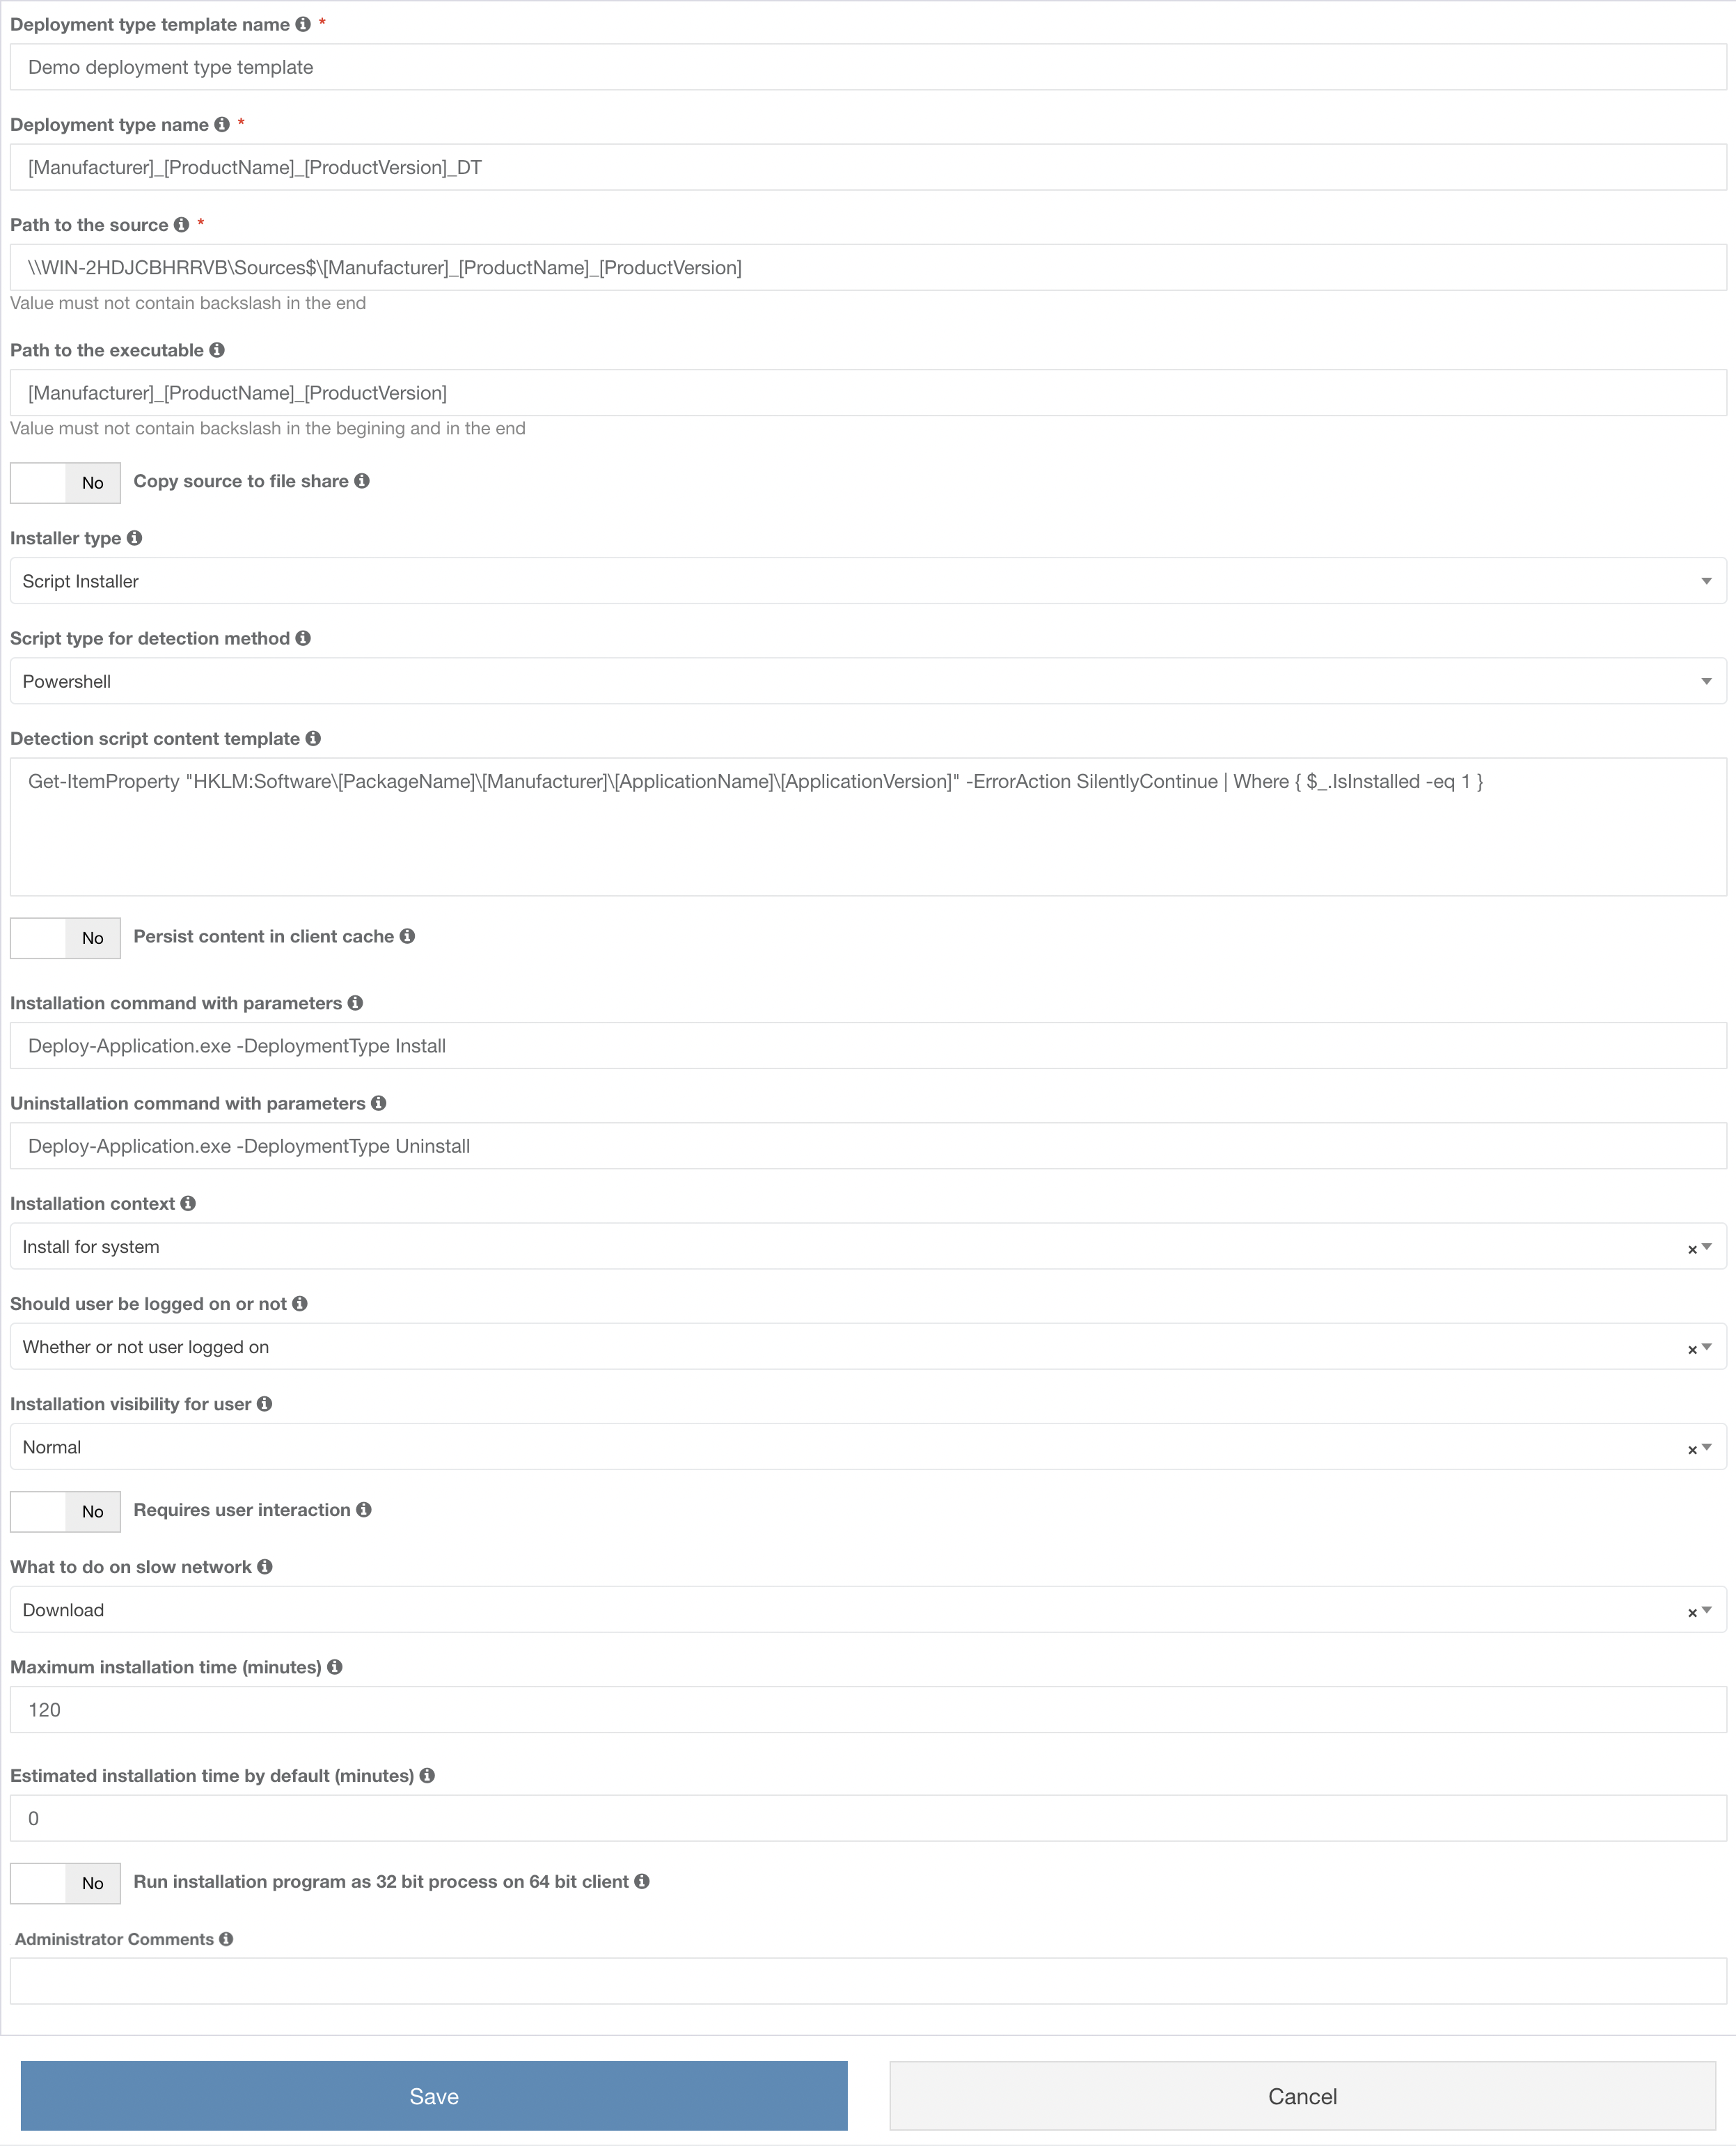
The set of SCCM deployment template settings depends on the chosen installer type.
Table 3. Deployment types template settings
| Settings |
Description |
Availability of settings depending on the Installer type | |||
| MSI |
Script
|
AppV |
|||
|
Microsoft Application Virtualization 4 |
Microsoft Application Virtualization 5 |
||||
|
Deployment type template name |
The field indicates the template name to help a user to identify templates in Apptimized portal. The default value is Deployment type template name [number]. This field is required. |
+ | + | + | + |
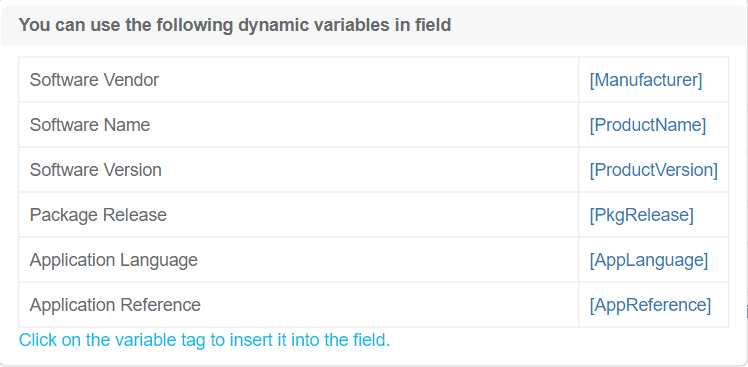
| Deployment type name |
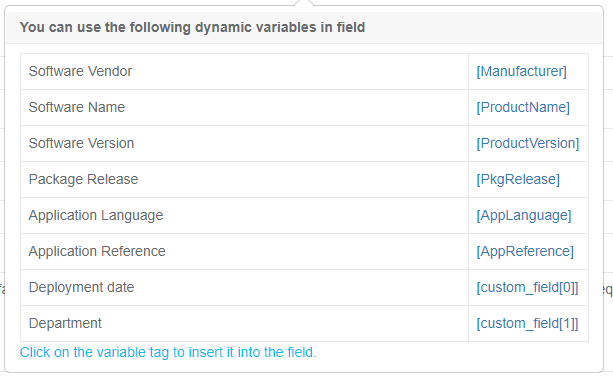
This field indicates the name of a deployment type. It is implemented during SCCM application deployment process and is sent to SCCM server. A user can set the Deployment type name manually or use the following dynamic variables:
This field is required. |
+ | + | + | + |
| Path to the source |
This field indicates the path to the location of the package source. SCCM deployment template automatically generated this field. This field is required. |
+ | + | + | + |
| Path to the executable |
This field indicates the path to the location of the package source executable file. A user can set the Path to the executable manually or use the following dynamic variables:
This field is required. |
+ | + | + | + |
| Copy source to file share |
This option allows to copy to the folder, the location of which was defined in field Place for storing sources in the General SCCM settings tab. |
+ | + | + | + |
| Installer type |
This setting indicates the type of installer to use. The following installer types are available: The default value is Script Installer. |
+ | + | + | + |
| Script type for the detection method |
This setting indicates the type of script content of the detection method. The following script types for detection method are available: The default value is Powershell. |
+ | |||
|
Detection script content template |
This field specifies the script template of the detection method. It is possible to provide a custom template with mandatory variables in square brackets, indicating them in any order and quantity. The Connector replaces these variables with specific values during the deployment to SCCM. The default value is Get-ItemProperty "HKLM:Software\[PackageName]\ |
+ | |||
|
Persist content in the client cache |
This setting indicates the necessity to upload the application or package source to the client's machine or device cache. Yes or No options are available. The default value is No. |
+ | |||
| Installation command with parameters |
This setting indicates the command to run during the package installation. The default value for the Script Installer is Deploy-Application.exe -DeploymentType Install The default value for the MSI Package is msiexec /i "\\atd-dist01\Public\CM\DTeam\FeatureData\OSD\Tbreck\Setup1.msi" or msiexec /i "\\atd-dist01\Public\CM\DTeam\FeatureData\OSD\Tbreck\Setup1.msi" /qn |
+ | + | ||
|
Uninstallation command with parameters |
This setting indicates the command to run during the package uninstallation. The default value is Deploy-Application.exe -DeploymentType Uninstall |
+ | |||
|
Installation context |
This option defines the context of the package installation. The following installation contexts are available:
The default value is Install for the system. This option corresponds to the term Installation behaviour in the SCCM admin console. |
+ | |||
|
Should the user be logged on or not |
This option defines the required user state when the installation starts. The following options are available:
The default value is Whether or not users are active in the system. This option corresponds to the term Logon requirement in the SCCM admin console. |
+ | |||
| Installation visibility for the user |
This option defines the installation process visibility. The following options are available:
The default value is Normal. This option corresponds to the term Installation program visibility in the SCCM admin console. |
+ | |||
| Requires user interaction |
This setting indicates if the user can be involved in the installation or uninstallation process. Yes or No options are available. The default value is No. |
+ | |||
| Identify deployment type information from a package file |
This setting indicates the option of a manual (Yes) or automatic (No) deployment type information identification. The default value is No. |
+ | + | + | |
| The file where to get information |
This field indicates the file with the deployment type information. The following options are available:
|
+ | + | + | |
| What to do on a slow network |
This option specifies actions with package sources in case of a slow network. Following options are available:
|
+ | + | + | + |
| Maximum installation time (minutes) |
This option indicates the maximum duration per installation in minutes. The default value is 120. |
+ | + | + | + |
| Estimated installation time by default (minutes) |
This option indicates the estimated duration per installation in minutes. The default value is 0. |
+ | + | + | + |
| Run installation program as a 32-bit process on 64-bit client |
This setting forces the installer to launch as a 32-bit process on the 64-bit client. Yes or No options are available. The default value is No. |
+ | + | ||
|
Administrator comments |
This optional field corresponds to the term Administrator comments in the SCCM admin console. |
+ | + | + | + |
The screenshot below shows the default values of the Deployment type template settings:
Settings are persisted on click to Save button.
Apptimized shows the following notification when successful:

Package template
The option to configure SCCM package template is available under Project settings > Integration > choose SCCM Environment > Package template.
Apptimized shows the following screen when successful:
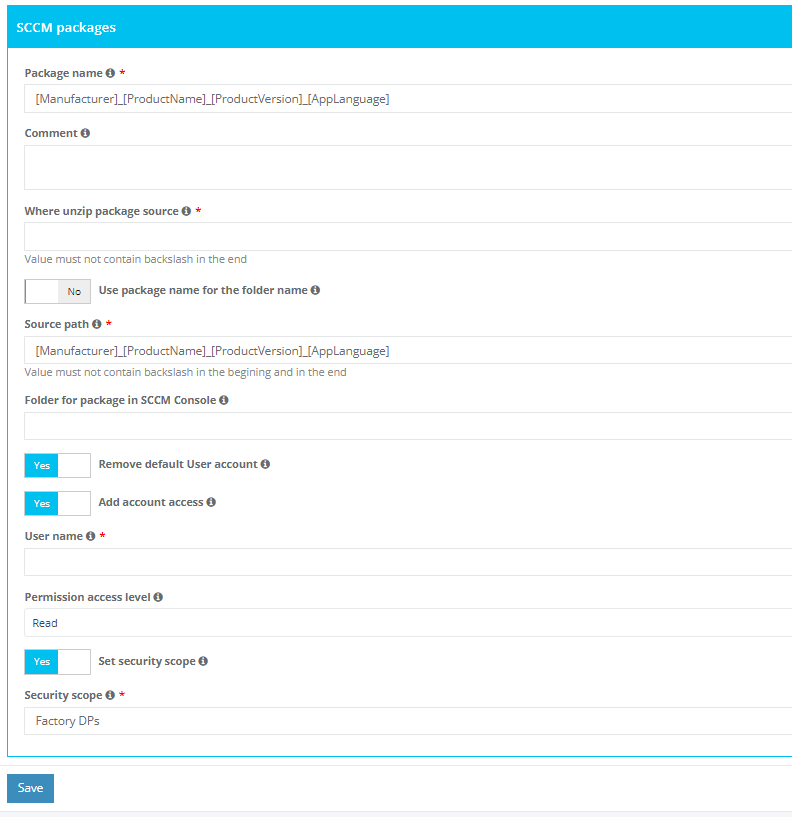
Table 4. Package template settings
|
Setting |
Description |
|
Package name |
This setting enables a user to set up the name for package template. This setting is required.
The default value is: [Manufacturer]_[ProductName]_[ProductVersion]_[AppLanguage]. |
|
Comment |
This setting enables a user to set an optional descriptions for the package template. |
|
Where unzip package source |
This setting enables a user to set up patch for unzipped package source files will be placed on. This section is required.
Note. In most cases, this field will be the same as Source path field value. |
|
Use package name for the folder name |
This setting enables a user to use package name as package folder name. The default value is No. |
|
Source path |
This setting enables a user to set up folder where the source is placed in zip file. The zip file name is ignored under clarifying the source path. This setting is required.
The default value is [Manufacturer]_[ProductName]_[ProductVersion]_[AppLanguage]
Note. This path is relative to Where unzip package source field value. |
|
Folder for package in SCCM Console |
This setting enables a user to set up folder for package in SCCM Console.
Example:
Note. The package will be created under the root if the value is empty. |
|
Remove default User account |
This setting enables a user to Remove user from Manage Access Account window, which is added to package by default.
The default value is Yes. |
|
Add account access |
This setting enables a user to fill Group name and Permission access level fields. The default value is Yes. |
|
User name |
This setting enables a user to fill name of the user that will be addedd to Manage Accont Acces window of SCCM servier. The fill within form is [domain]\[userName]. This setting is required. |
|
Permission access level |
This setting enables to set up permission access level for the specified user. The following levels available:
The default value is Read. |
|
Set security scope |
This setting enables to set up Security scope field to be specified. |
|
Security scope |
This setting enables a user to set up Security scope name that will be set to most (or all) packages. This setting is required.
The default value is Factory DPs. |
Programs for packages
The created programs for SCCM packages are stored under Programs for packages section.
.png)
The option to create program is available under Create program button.
.png)
Apptimized shows the following screen when successful:
.png)
Table 5. Program template settings
| Setting | Description |
| Program name |
This setting enables a user to set up the name of the program template. This setting is required.
The default value is Install. |
| Command line |
This setting enables a user to set up the command line of the program template.
The default value is install.cmd |
|
Start folder |
This setting enables a user to set up he name of startup folder of the program template. |
|
User interaction |
This setting enables to set up interaction lever of user with package. The following levels available:
The default value is Hidden. |
|
Program can run |
This setting enables a user to define run context of package. The following contexts available:
The default value is Whether or not user is logged on. |
|
Run mode |
This setting enables a user to define permission level of package context run. This setting is available to change only if Only when user is logged on setting is set under Program can run setting. The following permission levels available:
The default value is Run with Administrative rights. |
|
Allow users to view and interact with the program installation |
This setting enables to allow users to view and interact with the program insallation. The default value is No. |
|
Drive mode |
This setting enables to define drive mode of the package installation / uninstallation. The following modes available:
The default value is Runs with UNC name. |
|
Allow this program to be installed from task sequence |
This setting enables to allow the program to be installaed from the Install Package task sequecne without being deployed. The default value is No. |
|
Select platfroms |
This setting enables to select OS platforms where package can run. The following platforms available:
Note. Empty field value is allowing any platform. |
|
Estimated disk space |
This setting enables to estimate disk space for packages if required. The value if unknown is 0 or empty. The default value is 0. |
|
Select unit of a disk sace size |
This setting enables to define unit f the disk space if the estimated disk space is set. The following units available:
The default value is MB. |
|
Maximum allowed run time (minutes) |
This setting enables a user to set up maximum allowed run time in minutes. The default value is 120. |
|
Administrative comment |
This optional field corresponds to the term Administrator comments in the SCCM admin console. |
The option to save settings is available under Save button.
Apptimized shows the following notification when successful:
.png)
.png)
Deployment for packages
Created deployments for packages are stored under Deployments for packages section.
.png)
The option to create deployment is available under Create deployment button.
.png)
Apptimized shows the following screen when successful:
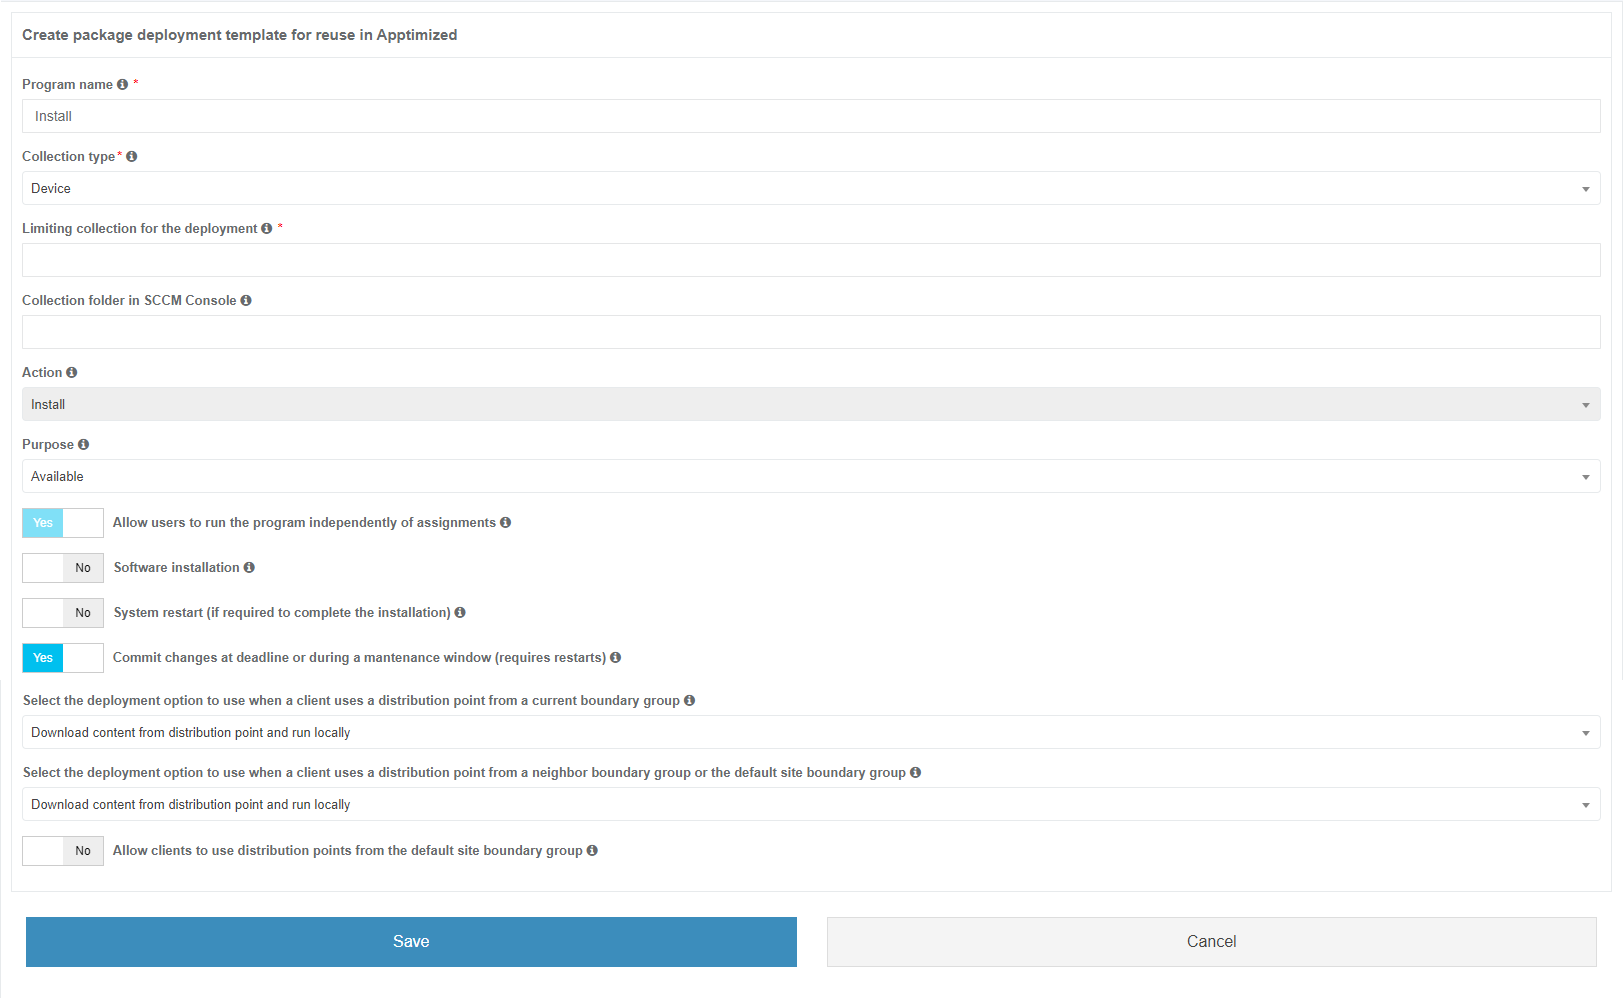
Table 6. Package deployment template settings
|
Setting |
Description |
|
Program name |
This setting enables to set up program name to which deployment belongs to. This field is required.
The default value is Install. |
|
Collection type |
This setting enables to indicate the collection type that will be loaded from the user SCCM server. This setting is required. The following types are available:
The default value is Device. |
|
Limiting collection for the deployment |
This setting enables settng limiting collection for the collection deployment. |
|
Collection folder in SCCM Console |
This setting enables setting up a collection path under the SCCM console. |
|
Action |
This setting enables set the action during deployment. The available action is Install. The value can not be changed. |
|
Purpose |
This setting enables the definition of the requirement of the installation/uninstallation process. The following values are available:
The default value is Available. |
|
Send wake-up packets |
This setting enables to define sending wake-up packets before deployment under SCCM. The default value is No. Note. This setting is available only if Required purpose is set. |
|
Allow clients on a metered internet connection to download content after the installation deadline, which right incurs additional costs |
This setting enables to allow clients on a metered internet connection to download content after the installation deadline, which right incurs additional costs. The default value is No. Note. This setting is available only if Required purpose is set.
|
|
Rerun behavior |
This setting enables to specify rerunning deployment behavior on a client. The following values are available:
The default value is Always rerun program. Note. This setting is available only if Required purpose is set.
|
|
Recur every |
The setting enables to specify a recurring interval. The default value is 1. Note. This setting is available only if Required purpose is set.
|
|
Recurrence interval type |
This setting enables selection of recurrence interval types for the schedule. The following options are available:
The default value is Days. Note. This setting is available only if Required purpose is set.
|
|
Schedule |
This setting enables to schedule date and time for the deployment. Note. Time must be UTC. The time will be converted to the timezone of the User’s SCCM Server. This setting is available only if Required purpose is set. |
|
Allow users to run the program independently of assignments |
This setting enables users to run the program from Software Center. The default value is Yes. The value can not be changed. |
|
Software installation |
This setting enables a user to allow installation of the deployed software outside of maintenance windows.
The default value is No. |
|
System restart (if required to complete the installation) |
This setting enables to set up system restarting outside a maintenance window.
The default value is No. |
|
Commit changes at deadline or during a maintenance window (requires restarts) |
This setting enables to setting up write filters for embedded devices. The default value is Yes.
Note. If this setting is not enabled, the content will be applied on the overlay and committed later. |
|
Select the deployment option to use when a client uses a distribution point from a current boundary group |
This setting enables to specify client behavior on a fast network. The following options are available to select:
The default value is Download content from distribution point and run locally. |
|
Select the deployment option to use when a client uses a distribution point from a neighbor boundary group or the default site boundary group
|
This setting enables to specify client behavior on a slow network. The following options are available to select:
The default value is Download content from distribution point and run locally. |
|
Allow clients to use distribution points from the default site boundary group |
This setting enables allow clients to use shared content.
The default value is No. |
The option to save deployments for packages settings is available under Save button.
Apptimized shows the following notification when successful:
.png)
The option to save package templates settings is available under Save button.

Apptimized shows the following notification when successful:
.png)
Apptimized SCCM Connector Installer
The integration procedure of the Apptimized SCCM Connector and SCCM environment ends up with the installation of SCCM Connector Agent to the endpoint PC.
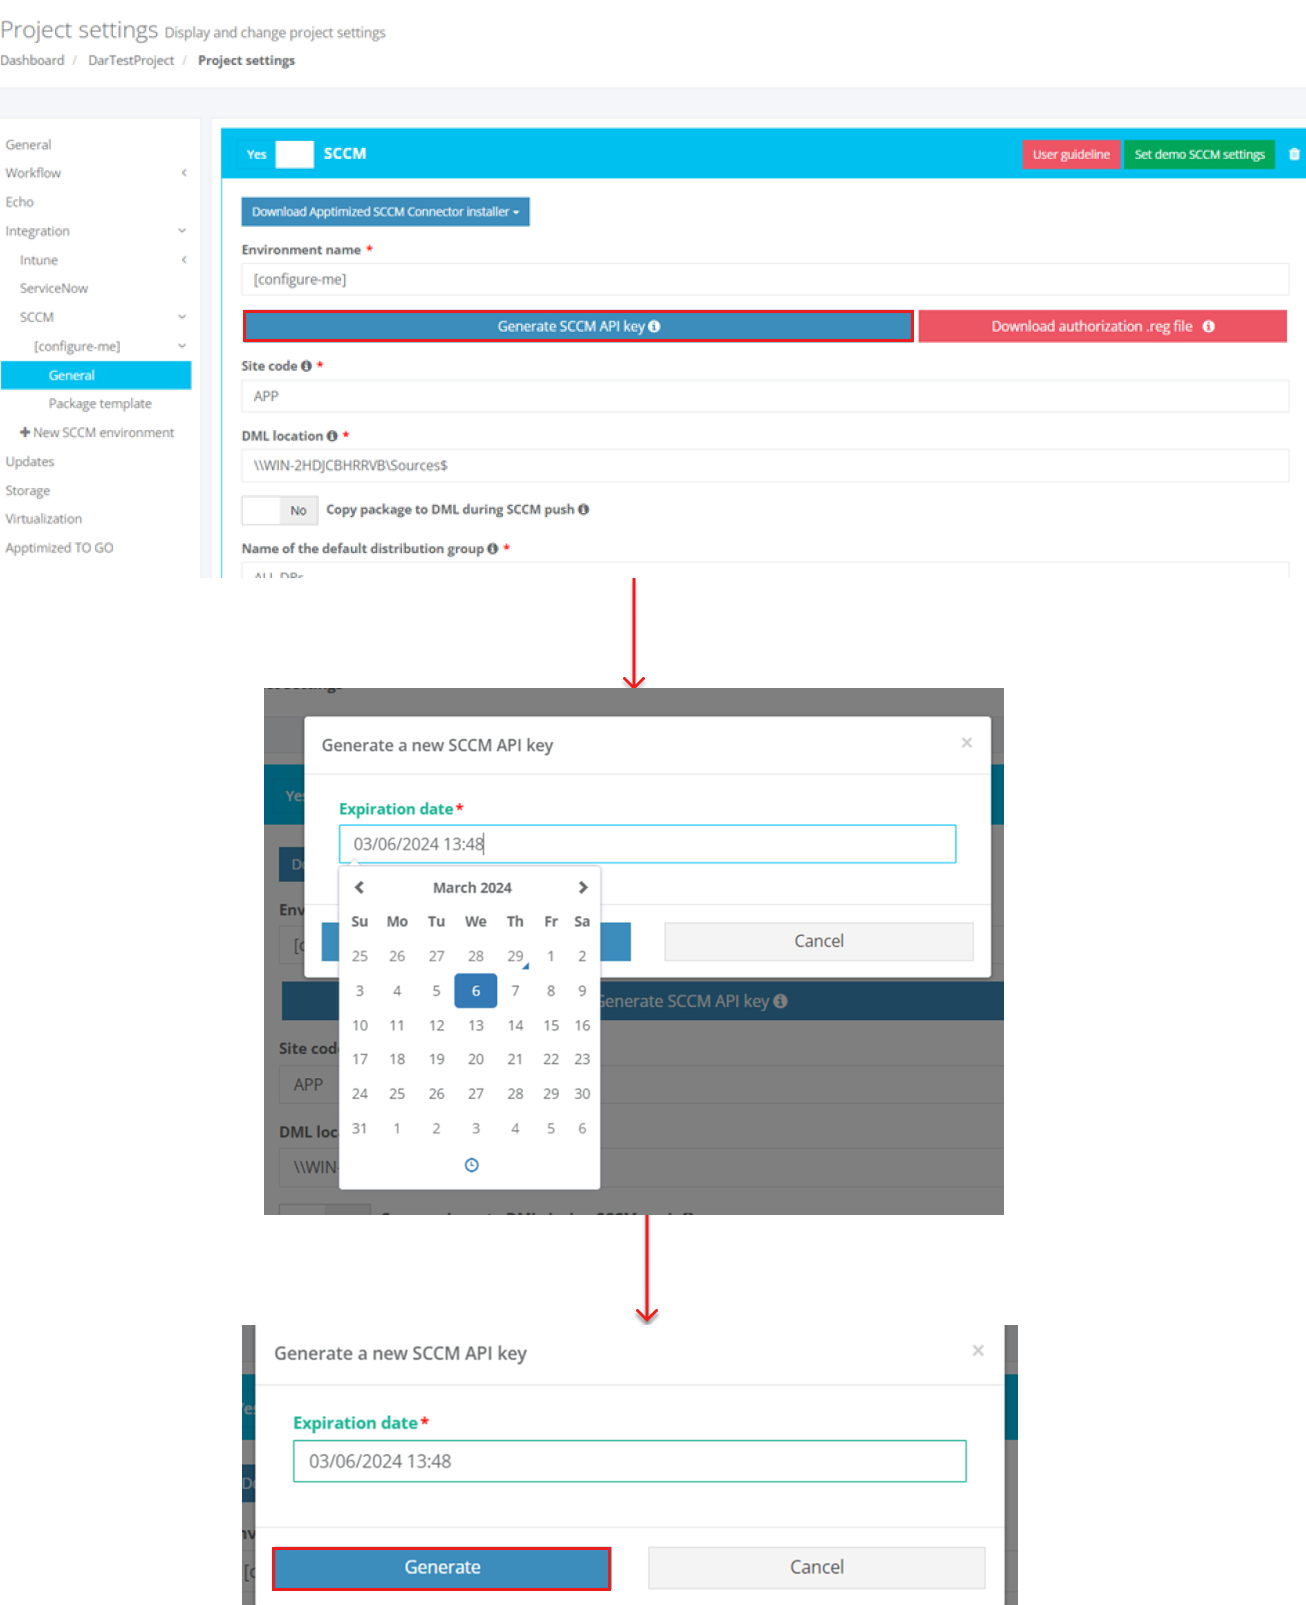
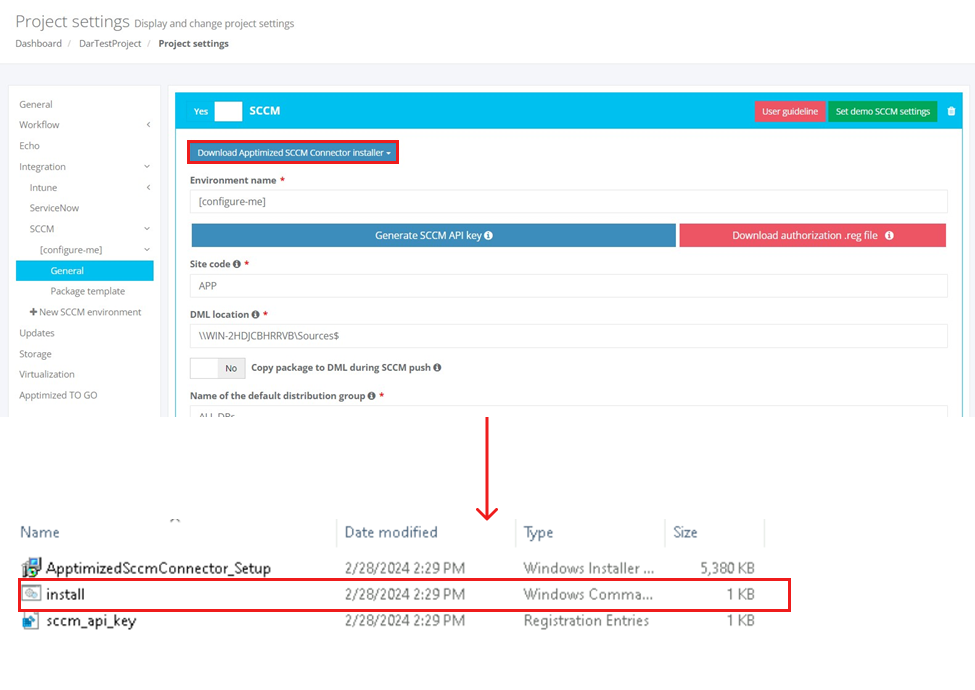
Apptimized SCCM Connector Installer can be downloaded once the required settings are completed.

SCCM API Key also must be generated.
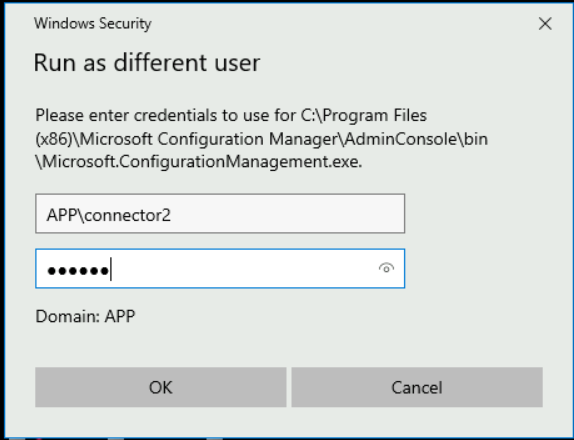
After downloading Apptimized SCCM Connector Installer, a user has to run an Install CMD.
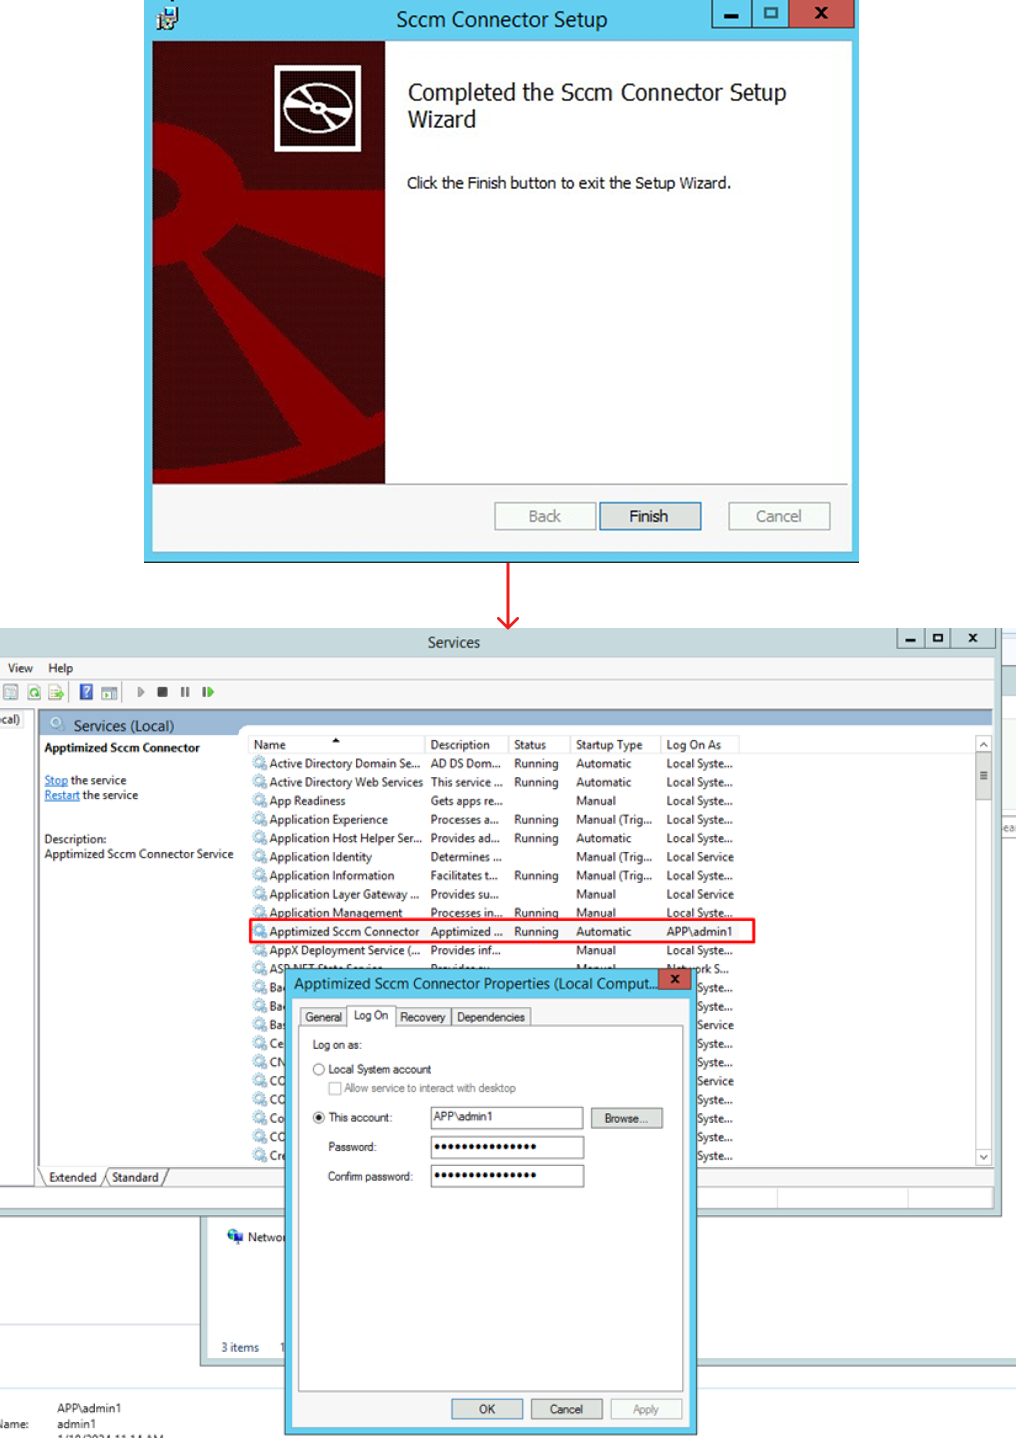
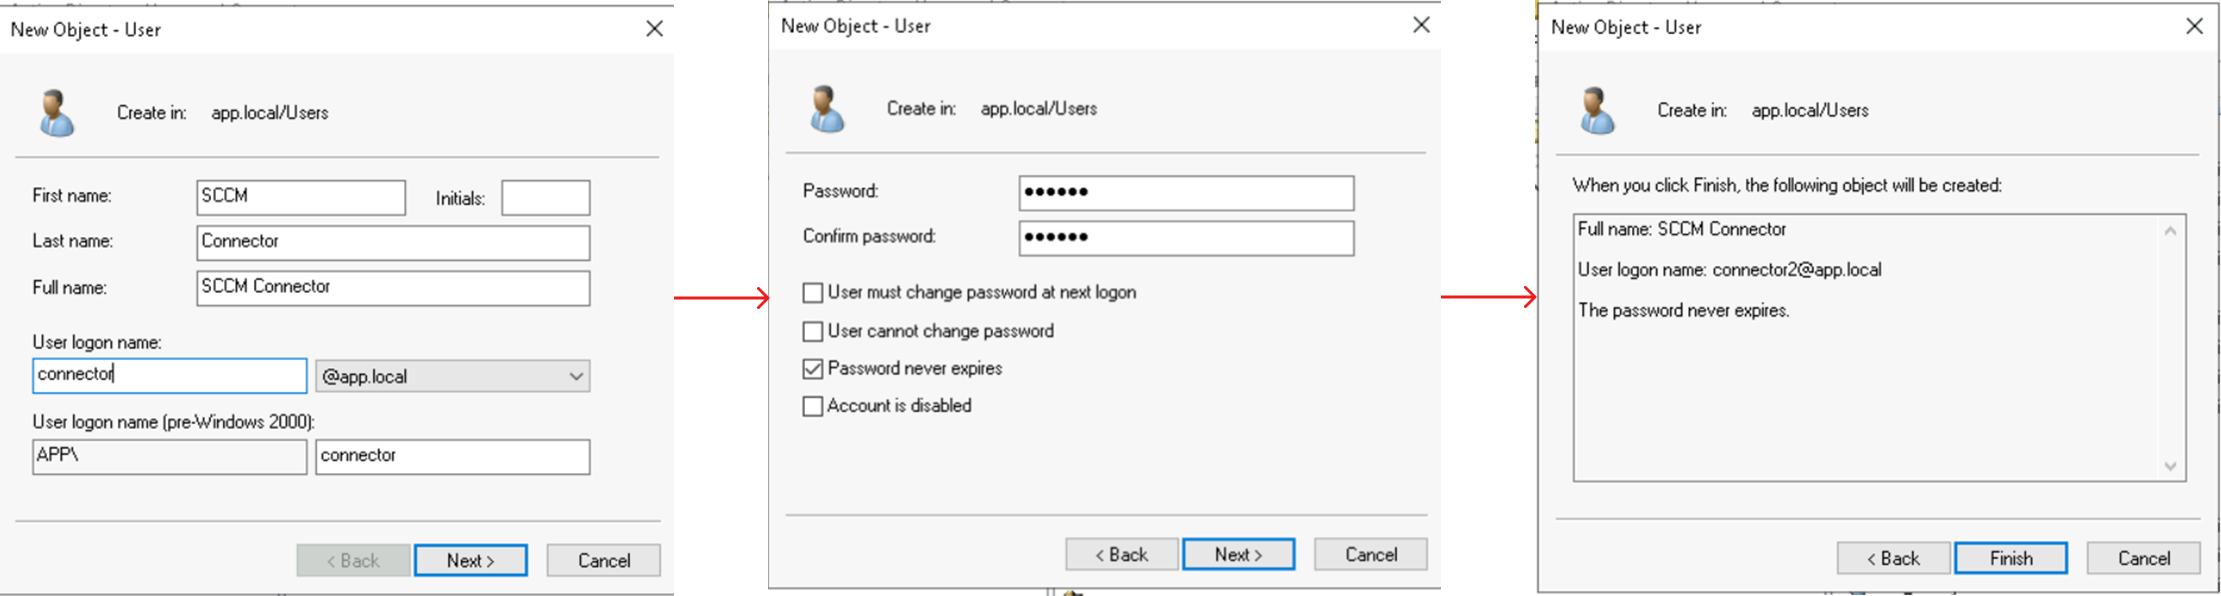
A service with entered credentials is created when finished successfully:
Creating a new user is available under Server Manager > Dashdoard > Tools > Active Directory Users and Computers > New > User.
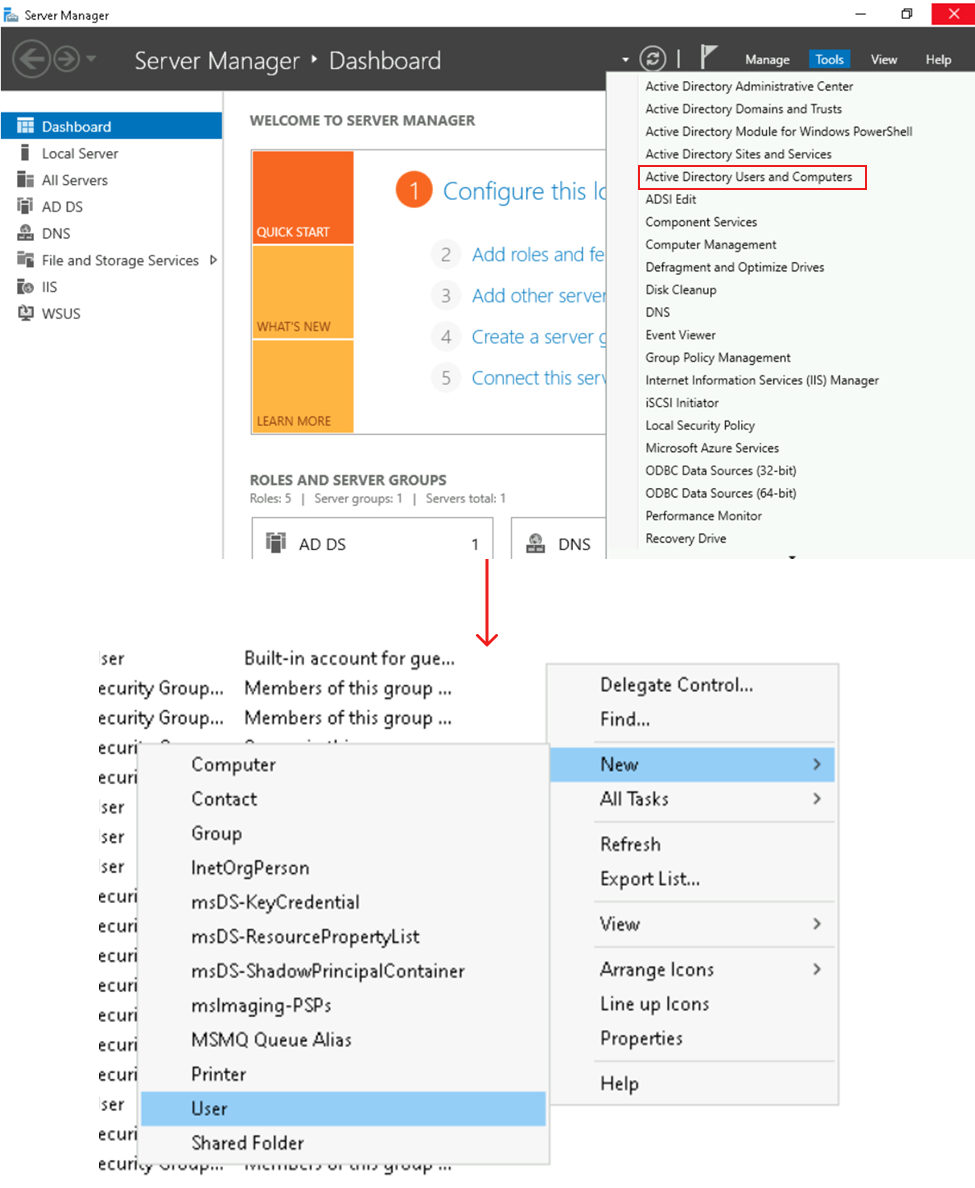
The following fields must be filled with proper information.
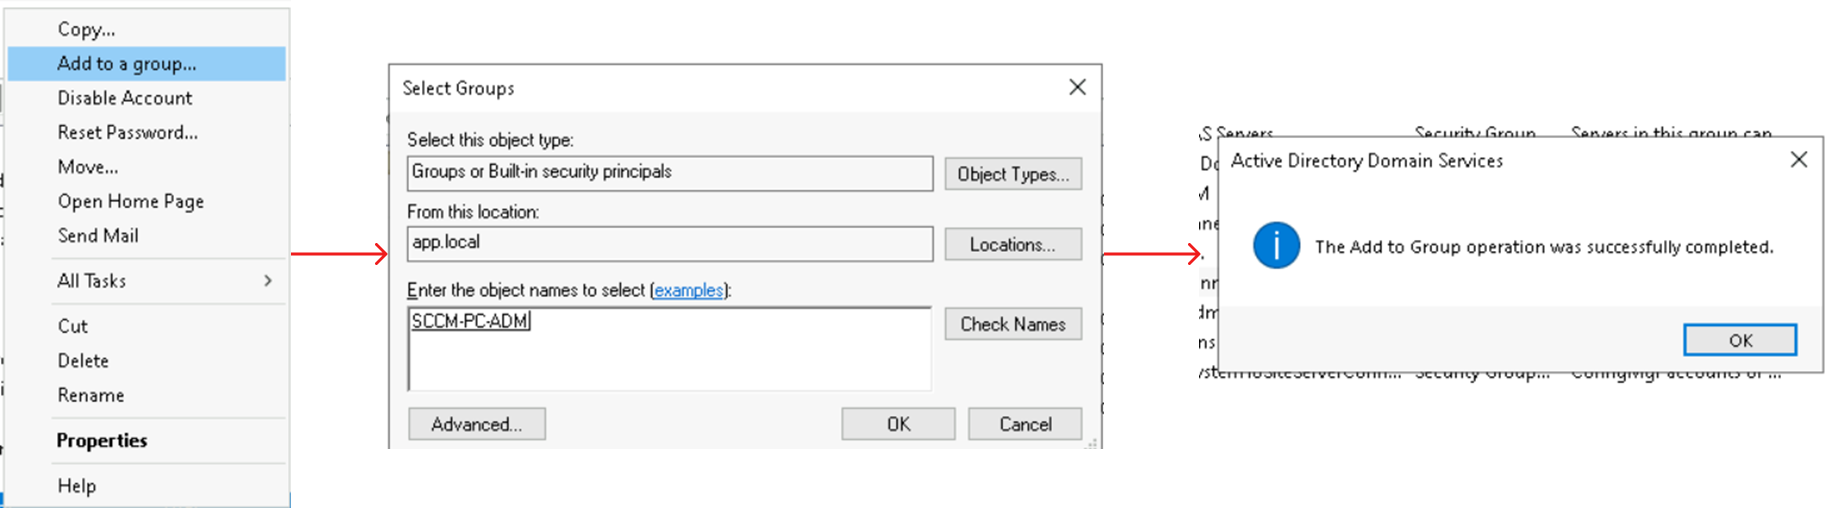
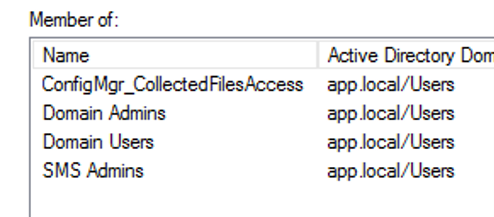
Adding a user to a group is available under “Add to a group”.
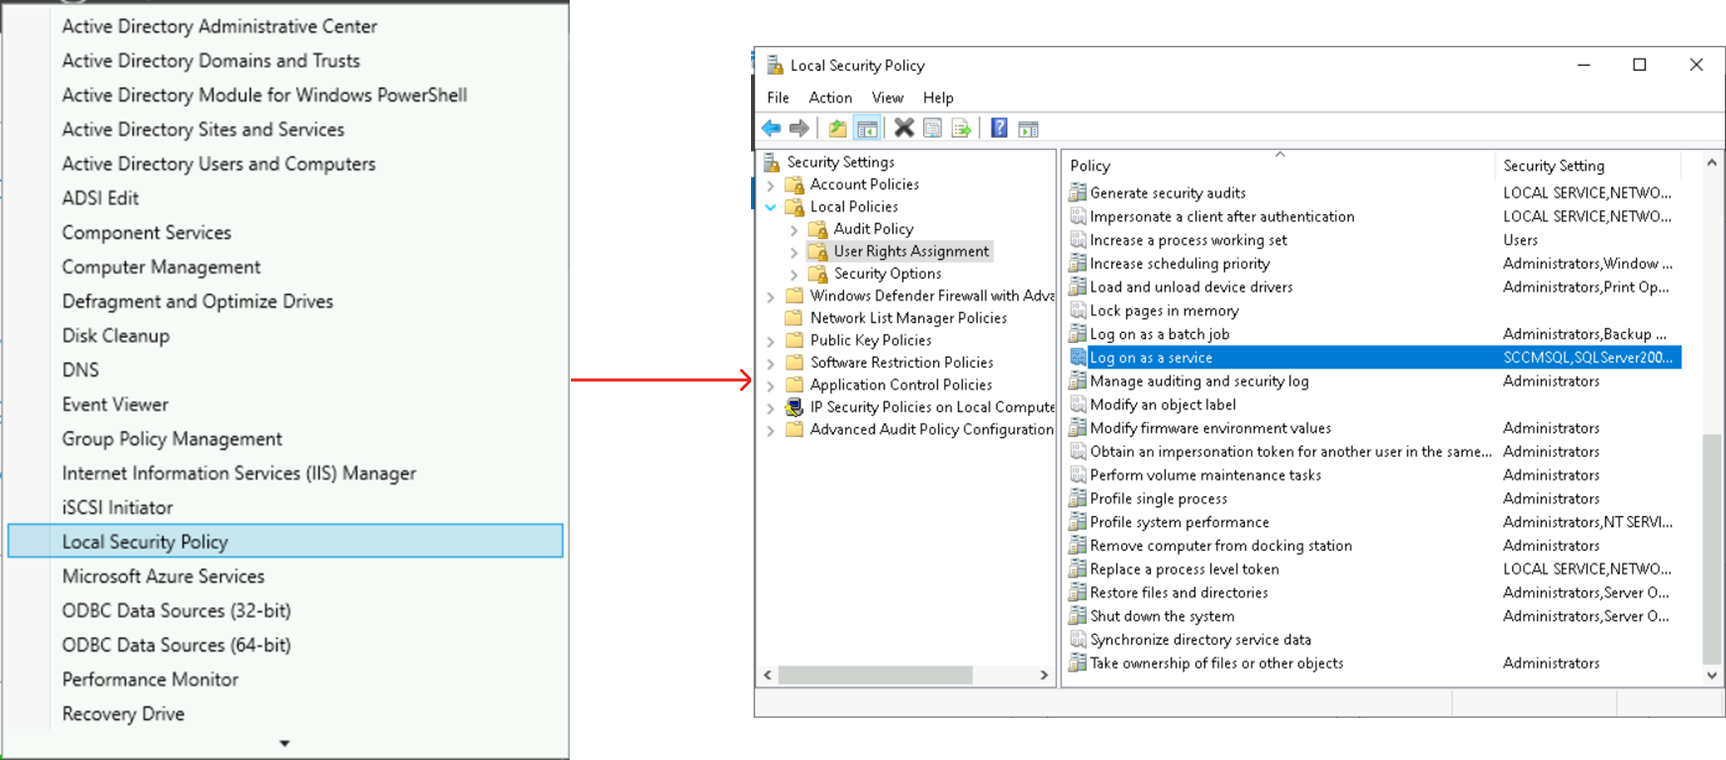
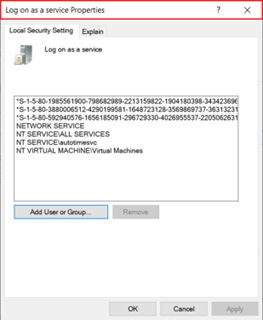
After the previous steps a user must go to Server Manager > Dashdoard > Tools > Local Security > Log on as a service and run the service.
Before installing and pushing an application to SCCM, a user must have certain permissions.
A Security role (Application Administrator) or Configuration Manager.
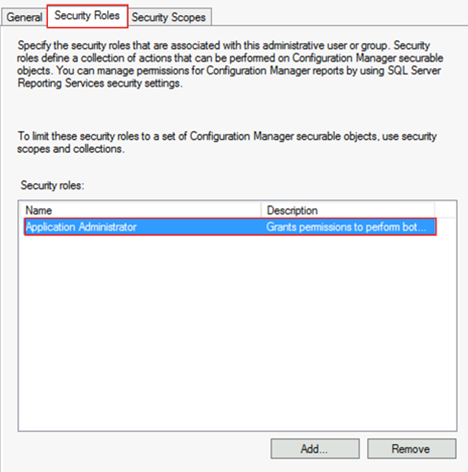
The account also must have the Windows Server Distributed Component Object Model (DCOM) Remote Activation permission for the computer running the Configuration Manager site server and the SMS provider.
The user must be added to a policy called "Log on as a service".
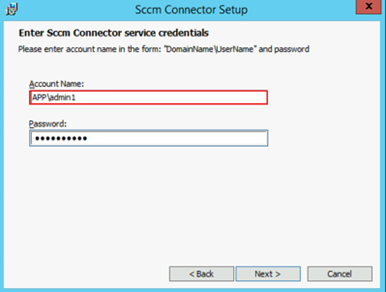
Apptimized shows the following window when successful:
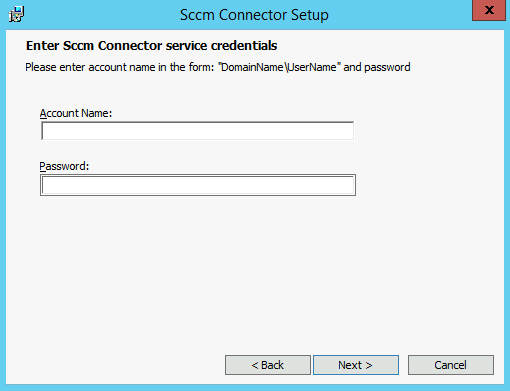
The account name must contain a domain:
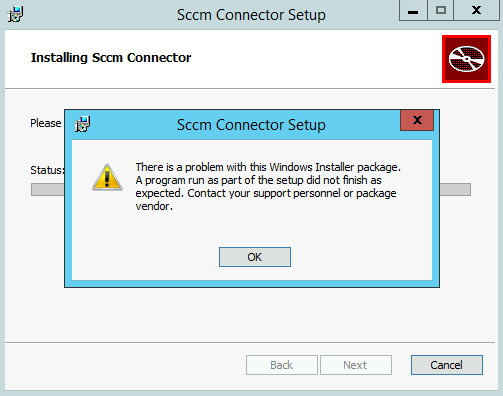
Apptimized shows an error if a user doesn’t exist:
After this action, the user can push the application same as it was in the previous version, even in case he is signed out.
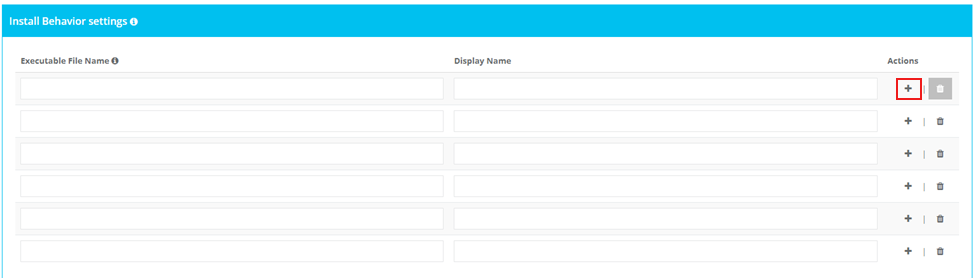
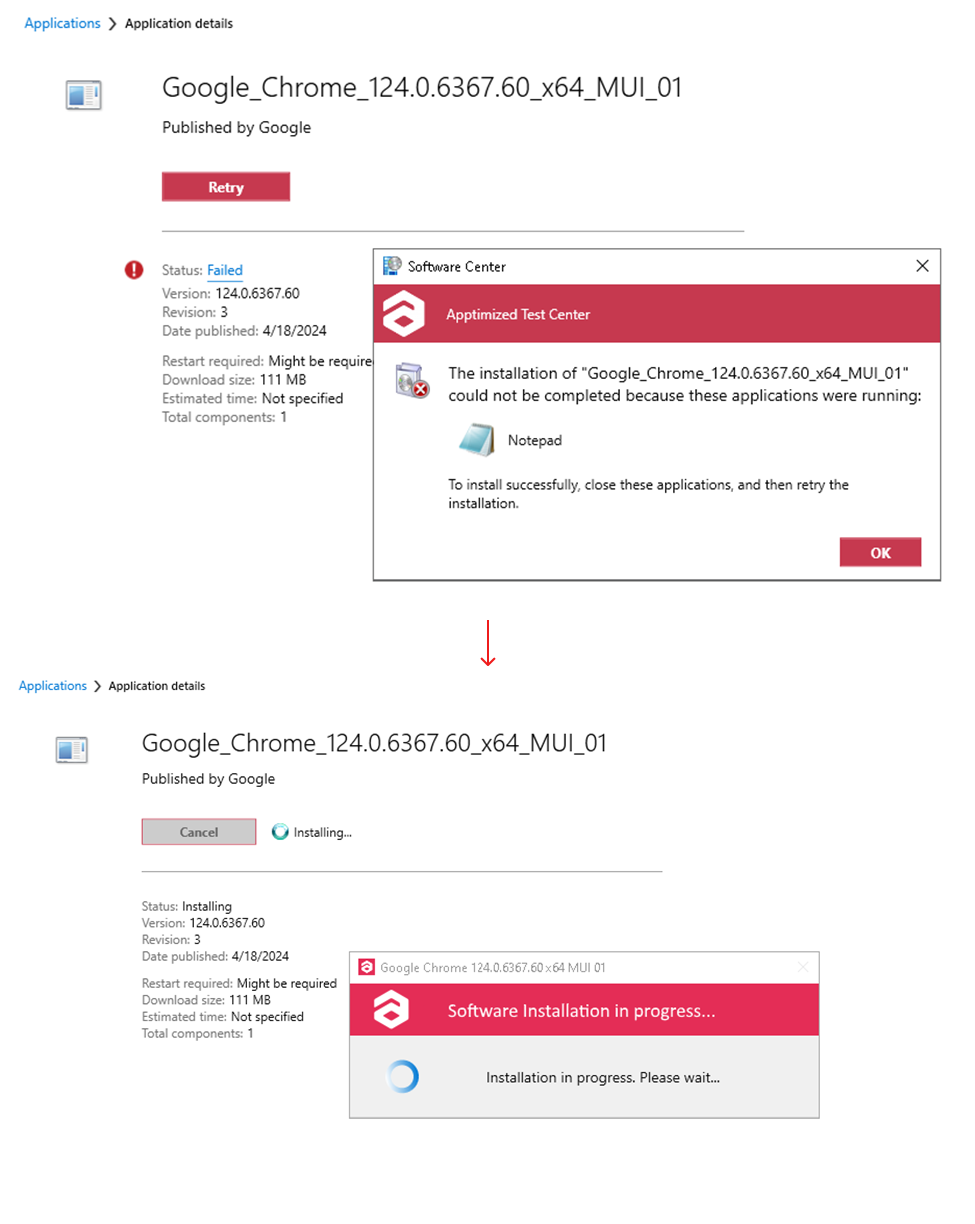
Install Behavior Settings
If needed to close apps before installation a user should go to > Administration > Settings> Integration> SCCM> Project settings >Create Deployment type >Install Behavior Settings and add an Executable File Name and a Display Name.

It is possible more than one apps to be closed. Adding more fields is available under Actions.
After entering the proper names a user must click on a Save button.

A Software Center shows the following when successful:
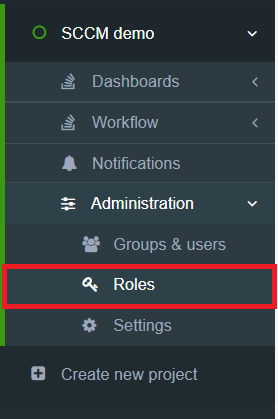
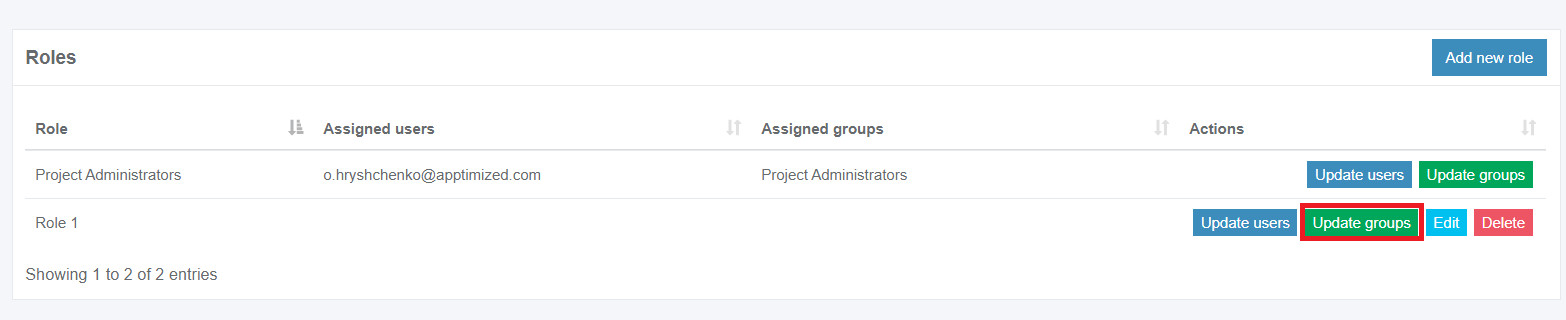
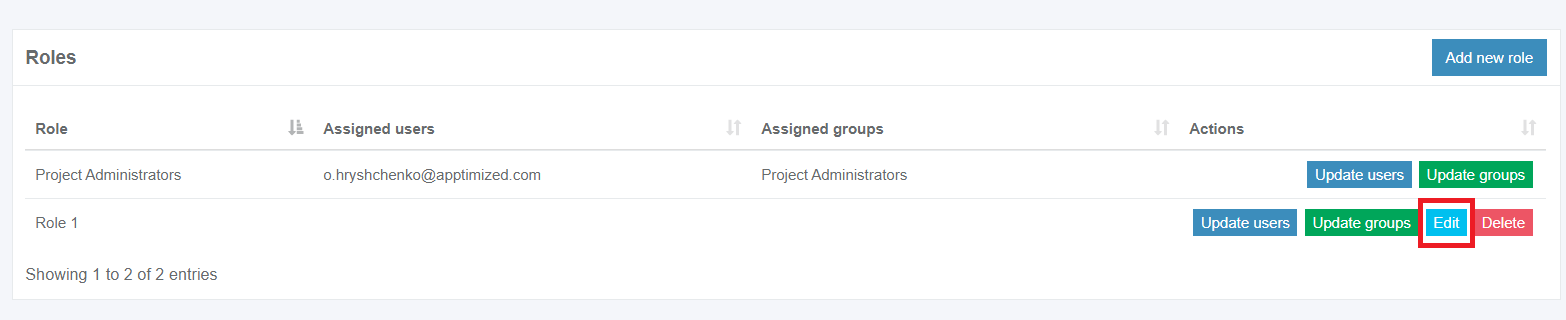
Manage project roles
SCCM Connector requires the assignment of the project user to the role with the required permission. Assign needed permissions under Roles in a project setting.
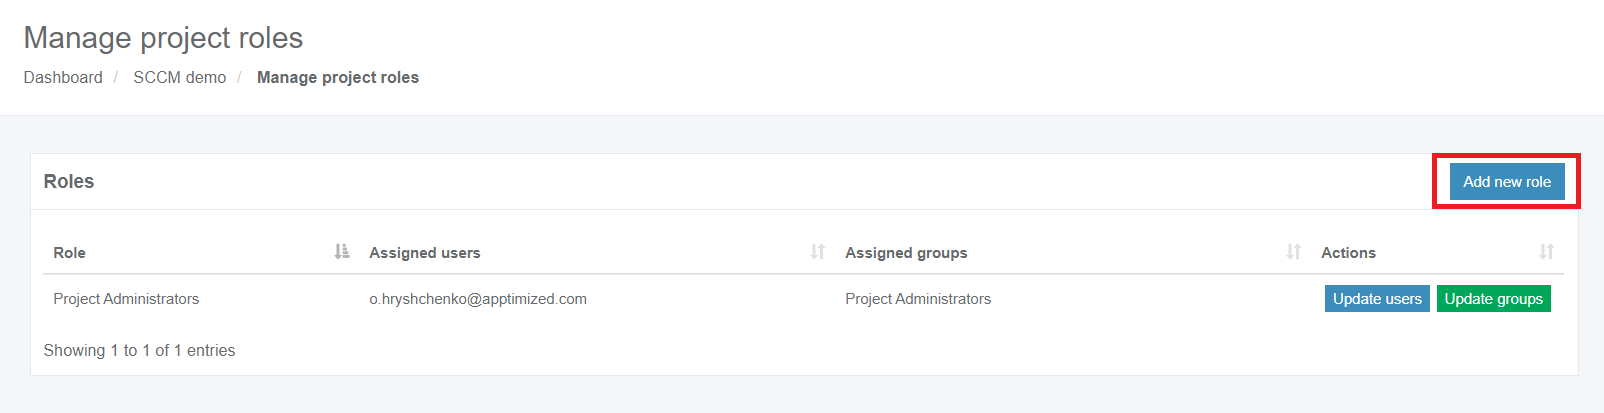
It is possible to add permission to the existing group or create a new one by clicking on the “Add new role” button, as shown on the screenshots below.
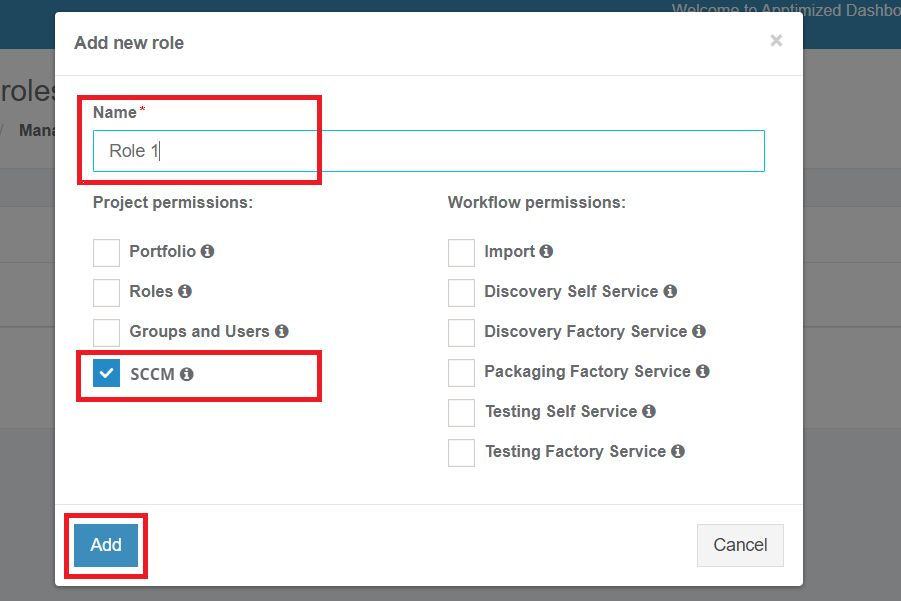
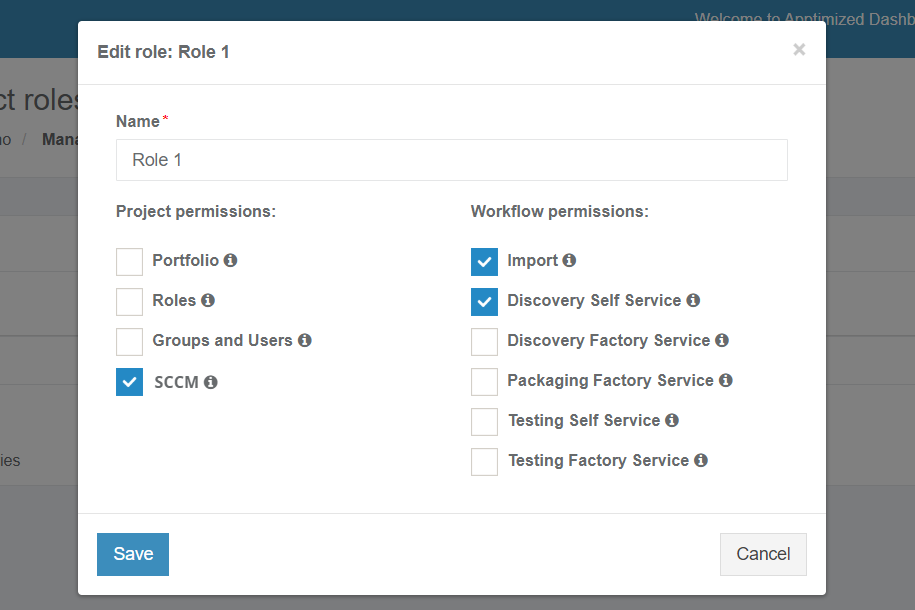
The new role requires its name and SCCM project permission.
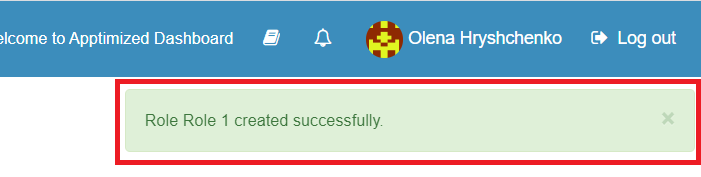
Apptimized shows the following notification when completed successfully:
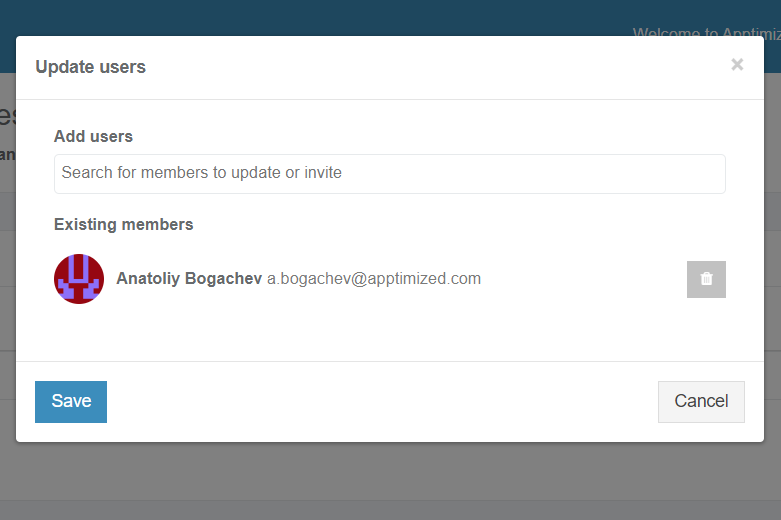
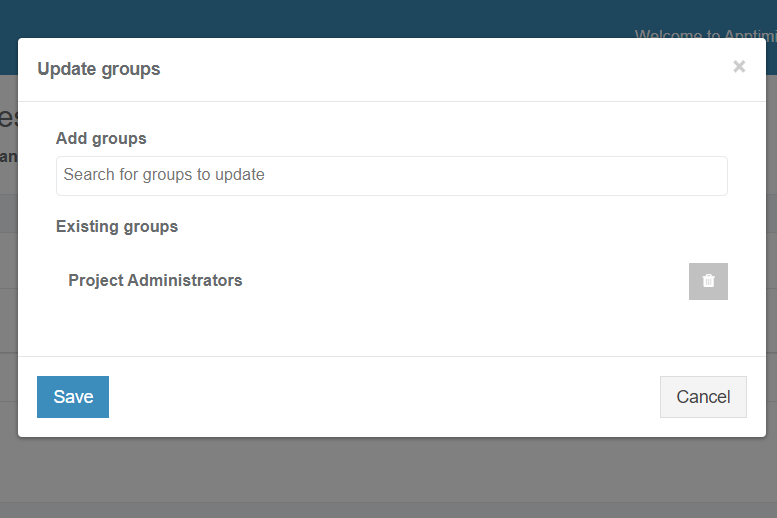
Users can be added to the role via Update users or Update groups screens.

A new group or user can be selected on the next screen, and click on Save persists all changes.
A current role can be changed with the Edit screen and by following the same set of operations as for adding a new role.
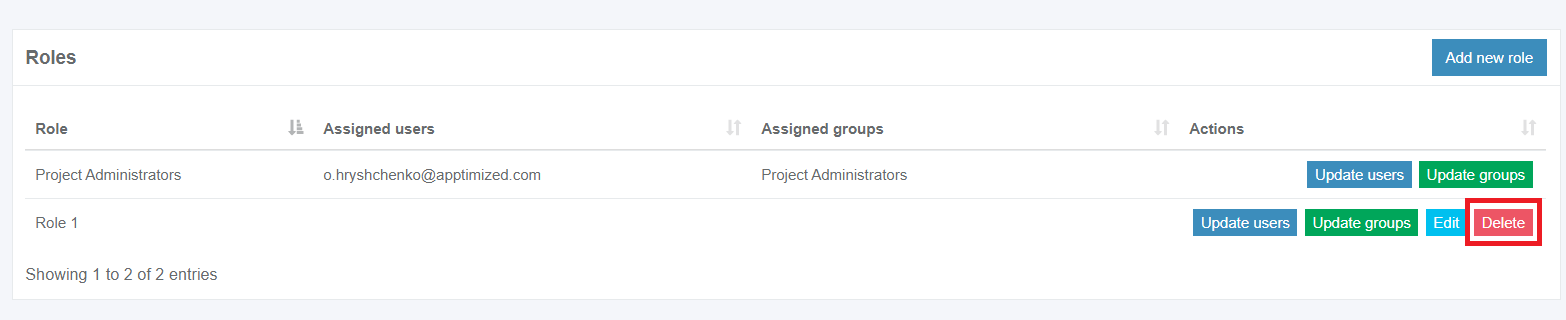
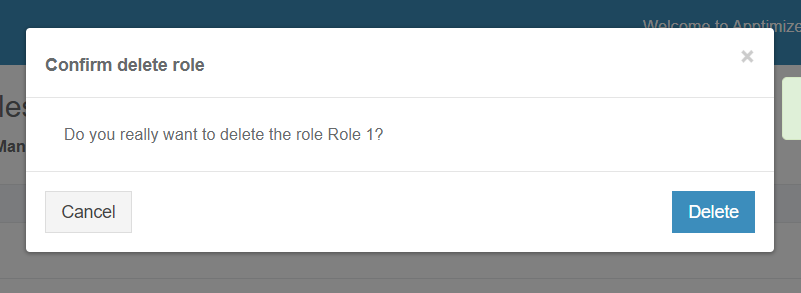
The role can be removed by clicking on the Delete button and after providing a confirmation.
No comments to display
No comments to display