
Azure Tenant VDI Provider Integration
This manual page refers to the Azure-side configuration of the virtualization provider. The Apptimized-side configuration is available under Azure Switch.
Application Registration
The option to register the application under the Azure Portal is available under Azure Active Directory > App registrations > New registration (see Application registrations).
Application (Client) Id, Directory (Tenant) Id, Client Secret are required under the Azure Switch configuration.
Resource group creation
The option to create a resource group is available under portal.azure.com > Resource Groups > Create.
.png)
Microsoft Azure portal shows the following screen when successful:
.png)
The option to set up resource group name is available under the Resource group field.
.png)
The option to select the region for the resource group is available under the Region field.
.png)
Note. Resource Group name & Region must be used in configuring Azure Switch
The option to review the resource group is available under the Review + create button.
.png)
Microsoft Azure portal shows the following screen when successful:
.png)
Note. If the validation was successful, the following notification appears:.png)
The option to create a resource group is available under the Create button.
.png)
Microsoft Azure portal shows the following notification when successful. Created resource group appears in the list of resource groups.
.png)
Resource group permission issuance
The option to give permissions to the resource group is available under Resource group > Choose group > Access control (IAM).
.png)
The option to add Role assignment is available under Add > Add role assignment.
.png)
Microsoft Azure portal shows the following window when successful:
.png)
The option to assign roles is available under the Role drop-down list. The necessary roles for the Azure VDI configuration are: Virtual Machine Contributor, Network Contributor, Disk Snapshot Contributor.
.png)
Note. Only one role can be assigned per one action.
The option to add role assignment to the application is available under the Select field. Selected members will appear below the section.
.png)
The option to submit changes is available under the Save button.
.png)
Virtual Network Creation
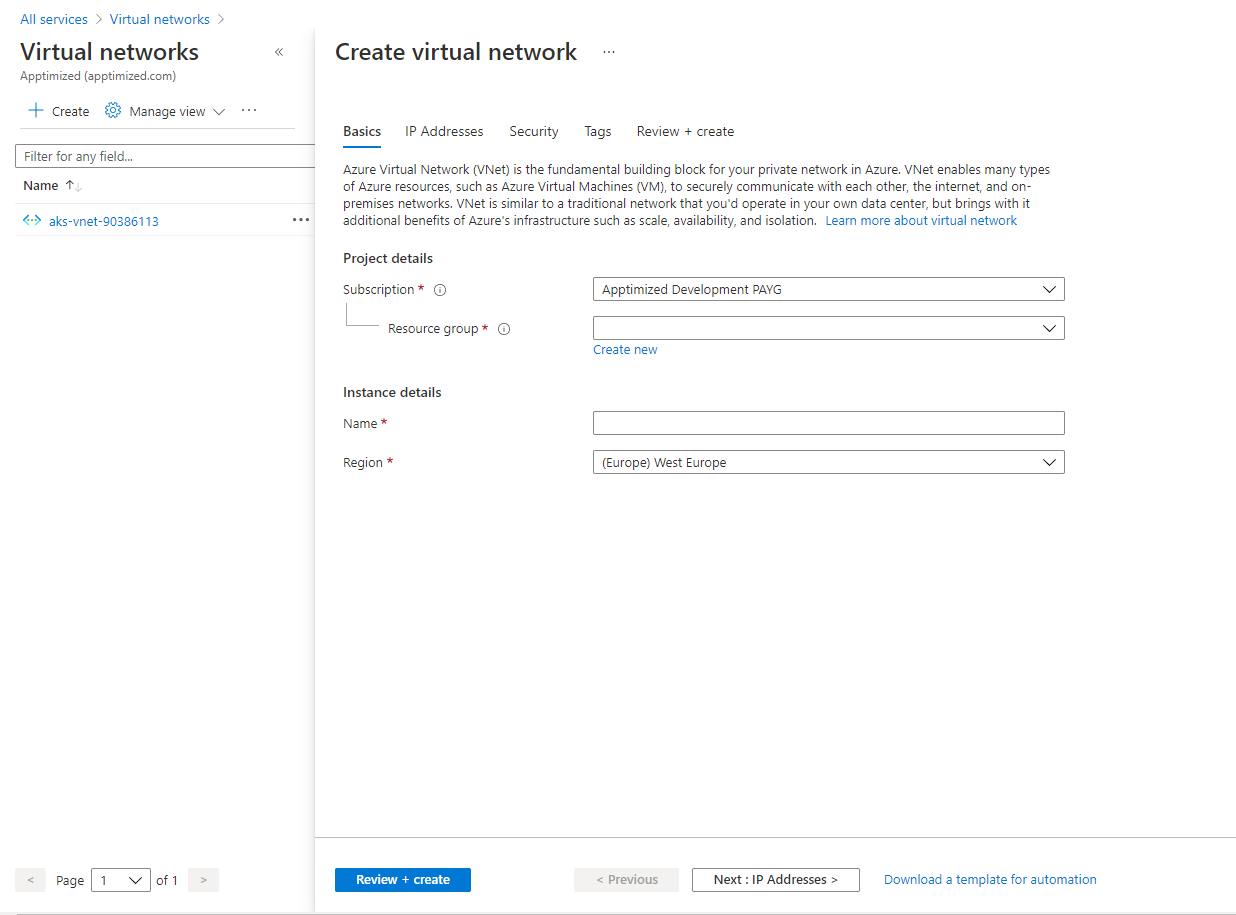
The option to create virtual networks is available under portal.azure.com > Virtual networks > Create.
.png)
Note. The network creation will heavily depend on Azure networking configuration.
Microsoft Azure portal shows the following screen when successful:
The ability to create a virtual network becomes available after setting up Resource group, Name, Region, Address space field & Subnet.
The option to set up Resource group, Name, and Region is available under the Basics tab.
.png)
The option to set up a Resource group is available under the Resource group drop-down list.
.png)
Note. The resource group must be the one that was created in a previous chapter.
The option to set up a Name is available under the Name field.
.png)
The option to set up a Region is available under the Region field.
.png)
Note. The region must be equal to the resource group region.
The option to set up IP Addresses is available under the IP Addresses tab.
.png)
The option to add an IPv4 address is available under the IPv4 address space.
.png)
The option to add a subnet address is available under Add subnet button.
.png)
Microsoft Azure portal shows the following screen when successful:
.png)
The option to add a Subnet name is available under the Subnet name field.
.png)
The option to add the Subnet address range is available under the Subnet address range field.
.png)
The option to finish Add subnet process is available under Add button.
.png)
The option to continue the creation process is available under the Review + create button.
.png)
Microsoft Azure portal shows the following screen when successful:
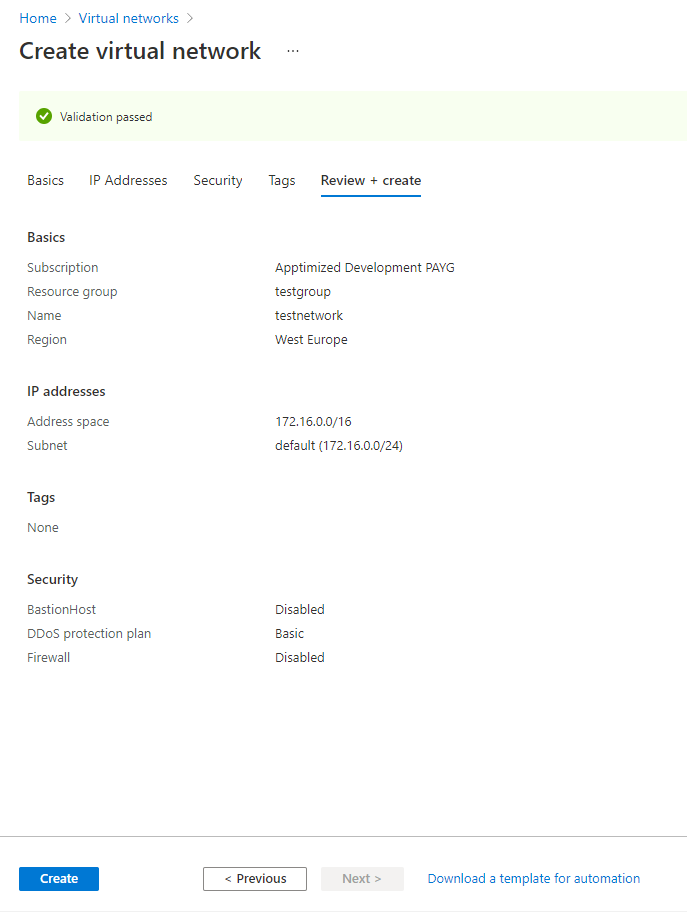
The option to create a virtual network is available under the Create button.
.png)
Microsoft Azure portal shows the following notification when successful:
.png)
Microsoft Azure portal shows the following screen after the creation process is finished:
.png)
Note. Virtual Network name & Subnet name are required under the Azure Switch configuration in Apptimized Portal
Network Security Group Creation
The option to create Network Security Groups is available under portal.azure.com > Network security groups > Create.
.png)
Microsoft Azure portal shows the following screen when successful:
.png)
The option to select a resource group is available under the Resource group drop-down list.
.png)
The option to set up a name is available under the Name field.
.png)
The option to set up a region is available under the Region field.
.png)
The option to review the Network Security Group is available under the Review + Create button.
.png)
Microsoft Azure portal shows the following screen when successful:
.png)
The option to finish the creation process is available under the Create button.
.png)
Microsoft Azure portal shows the following screen when successful:
.png)
Associate subnet with Network Security Group
The option to associate subnet from Virtual network with Network security group is available under portal.azure.com > Network security group > select group > Subnets > Associate.
.png)
Microsoft Azure portal shows the following screen when successful:
.png)
The option to choose a Virtual network is available under the Virtual network drop-down list.
.png)
Microsoft Azure portal shows the following screen when the network was selected:
.png)
The option to choose Subnet is available under the Subnet drop-down list:
.png)
The option to Associate subnet is available under the OK button:
.png)
Microsoft Azure portal shows the following screen when successful:
.png)
Inbound security rule creation
The option to restrict access to VM is available under portal.azure.com > Network Security Group > Inbound security rules > Add.
.png)
Microsoft Azure portal shows the following screen when successful:
.png)
The option to select the Source filter option is available under the Source drop-down list. The required option is IP addresses.
The screenshot below shows the procedure for inbound security role adding (Source drop-down list > Select IP Addresses > Enter 78.47.106.224 address under the Source IP Address / CIDR range field > Select RDP under the Service field > Add button):
.png)
Microsoft Azure portal shows the following screen when successful:
.png)
.vhd File Creation
The option to start .vhd file setup process creation is available under the Hyper-V manager (see Creating a VHD)
The option to convert .vhdx disk format to .vhd is available under Hyper-V Manager > Select computer > Action > Edit disk > Next > Select disk > Next > Convert > Next > VHD > Next > Finish.
.png)
.png)
VM healthiness checkout
The option to check the healthiness and consistency of VM is available under the elevated PowerShell windows and command:
Chkdsk /f
VHD Configuration
VHD configuration consists of setting up the Boot Configuration Data (BCD) settings, the disk SAN policy, the Coordinated Universal Time (UTC), configuring power profile, environmental variables, resetting the Windows services to startup settings, configuring RDP options, Windows Firewall rules, and disabling the Windows Defender under the PowerShell command prompt.
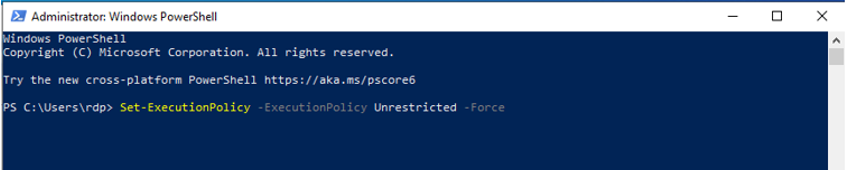
The option to start configuration is available by enabling PowerShell script execution. This is available by entering the PowerShell command: Set-ExecutionPolicy –ExecutionPolicy Unrestricted -Force
The option to set the Boot Configuration Data (BCD) settings is available by entering the PowerShell commands:
bcdedit /set "{bootmgr}" integrityservices enable
bcdedit /set "{default}" device partition=C:
bcdedit /set "{default}" integrityservices enable
bcdedit /set "{default}" recoveryenabled Off
bcdedit /set "{default}" osdevice partition=C:
bcdedit /set "{default}" bootstatuspolicy IgnoreAllFailures
#Enable Serial Console Feature
bcdedit /set "{bootmgr}" displaybootmenu yes
bcdedit /set "{bootmgr}" timeout 5
bcdedit /set "{bootmgr}" bootems yes
bcdedit /ems "{current}" ON
bcdedit /emssettings EMSPORT:1 EMSBAUDRATE:115200
Note. No application should use port 3389. The option to see which ports are used on the VM is available under the command netstat – anob.
The option to set the disk SAN policy to Onlineall is available under the following commands via CMD:
diskpart
san policy=onlineall
exit
The option to set Coordinated Universal Time for Windows is available under the following commands via PowerShell:
Set-ItemProperty -Path 'HKLM:\SYSTEM\CurrentControlSet\Control\TimeZoneInformation' -Name "RealTimeIsUniversal" -Value 1 -Type DWord -Force
Set-Service -Name w32time -StartupType Automatic
The option to set the power profile to high performance is available under the command via PowerShell
powercfg /setactive SCHEME_MIN
The option to set the environmental variables TEMP and TMP to their default values is available under the following commands via PowerShell:
Set-ItemProperty -Path 'HKLM:\SYSTEM\CurrentControlSet\Control\Session Manager\Environment' -Name "TEMP" -Value "%SystemRoot%\TEMP" -Type ExpandString -Force
Set-ItemProperty -Path 'HKLM:\SYSTEM\CurrentControlSet\Control\Session Manager\Environment' -Name "TMP" -Value "%SystemRoot%\TEMP" -Type ExpandString -Force
The option to reset the Windows services startup settings is available under the following commands via PowerShell:
Get-Service -Name bfe | Where-Object { $_.StartType -ne 'Automatic' } | Set-Service -StartupType 'Automatic'
Get-Service -Name dhcp | Where-Object { $_.StartType -ne 'Automatic' } | Set-Service -StartupType 'Automatic'
Get-Service -Name dnscache | Where-Object { $_.StartType -ne 'Automatic' } | Set-Service -StartupType 'Automatic'
Get-Service -Name IKEEXT | Where-Object { $_.StartType -ne 'Automatic' } | Set-Service -StartupType 'Automatic'
Get-Service -Name iphlpsvc | Where-Object { $_.StartType -ne 'Automatic' } | Set-Service -StartupType 'Automatic'
Get-Service -Name netlogon | Where-Object { $_.StartType -ne 'Manual' } | Set-Service -StartupType 'Manual'
Get-Service -Name netman | Where-Object { $_.StartType -ne 'Manual' } | Set-Service -StartupType 'Manual'
Get-Service -Name nsi | Where-Object { $_.StartType -ne 'Automatic' } | Set-Service -StartupType 'Automatic'
Get-Service -Name TermService | Where-Object { $_.StartType -ne 'Manual' } | Set-Service -StartupType 'Manual'
Get-Service -Name MpsSvc | Where-Object { $_.StartType -ne 'Automatic' } | Set-Service -StartupType 'Automatic'
Get-Service -Name RemoteRegistry | Where-Object { $_.StartType -ne 'Automatic' } | Set-Service -StartupType 'Automatic'
The option to turn on RDP and update remote-desktop registry settings is available under the following actions:
- Accessing remote access at the system settings is available under Control panel > Allow remote access to your computer > Allow remote connections to this computer - Apply
.png)
- Enabling Remote Desktop Protocol under the PowerShell commands:
Set-ItemProperty -Path 'HKLM:\SYSTEM\CurrentControlSet\Control\Terminal Server' -Name "fDenyTSConnections" -Value 0 -Type DWord –Force
Set-ItemProperty -Path 'HKLM:\SOFTWARE\Policies\Microsoft\Windows NT\Terminal Services' -Name "fDenyTSConnections" -Value 0 -Type DWord –Force - Setting up RDP port (3389) under the PowerShell command:
Set-ItemProperty -Path 'HKLM:\SYSTEM\CurrentControlSet\Control\Terminal Server\Winstations\RDP-Tcp' -Name "PortNumber" -Value 3389 -Type DWord –Force - Enabling network interface listener under the PowerShell command:
Set-ItemProperty -Path 'HKLM:\SYSTEM\CurrentControlSet\Control\Terminal Server\Winstations\RDP-Tcp' -Name "LanAdapter" -Value 0 -Type DWord -Force - Configuring the network-level-authentication (NLA) mode for the RDP connections under the PowerShell commands:
Set-ItemProperty -Path 'HKLM:\SYSTEM\CurrentControlSet\Control\Terminal Server\WinStations\RDP-Tcp' -Name "UserAuthentication" -Value 1 -Type DWord –Force
Set-ItemProperty -Path 'HKLM:\SYSTEM\CurrentControlSet\Control\Terminal Server\WinStations\RDP-Tcp' -Name "SecurityLayer" -Value 1 -Type DWord –Force
Set-ItemProperty -Path 'HKLM:\SYSTEM\CurrentControlSet\Control\Terminal Server\WinStations\RDP-Tcp' -Name "fAllowSecProtocolNegotiation" -Value 1 -Type DWord -Force - Setting up the keep-alive value under the PowerShell commands:
Set-ItemProperty -Path 'HKLM:\SOFTWARE\Policies\Microsoft\Windows NT\Terminal Services' -Name "KeepAliveEnable" -Value 1 -Type DWord –Force
Set-ItemProperty -Path 'HKLM:\SOFTWARE\Policies\Microsoft\Windows NT\Terminal Services' -Name "KeepAliveInterval" -Value 1 -Type DWord –Force
Set-ItemProperty -Path 'HKLM:\SYSTEM\CurrentControlSet\Control\Terminal Server\Winstations\RDP-Tcp' -Name "KeepAliveTimeout" -Value 1 -Type DWord -Force - Reconnecting under the PowerShell commands:
Set-ItemProperty -Path 'HKLM:\SOFTWARE\Policies\Microsoft\Windows NT\Terminal Services' -Name "fDisableAutoReconnect" -Value 0 -Type DWord –Force
Set-ItemProperty -Path 'HKLM:\SYSTEM\CurrentControlSet\Control\Terminal Server\Winstations\RDP-Tcp' -Name "fInheritReconnectSame" -Value 1 -Type DWord –Force
Set-ItemProperty -Path 'HKLM:\SYSTEM\CurrentControlSet\Control\Terminal Server\Winstations\RDP-Tcp' -Name "fReconnectSame" -Value 0 -Type DWord -Force - Limiting the number of concurrent connections under the PowerShell command:
Set-ItemProperty -Path 'HKLM:\SYSTEM\CurrentControlSet\Control\Terminal Server\Winstations\RDP-Tcp' -Name "MaxInstanceCount" -Value 4294967295 -Type DWord -Force - Removing self-signed certificates tied to the DRP listener under the PowerShell command:
if ((Get-Item -Path 'HKLM:\SYSTEM\CurrentControlSet\Control\Terminal Server\WinStations\RDP-Tcp').Property -contains "SSLCertificateSHA1Hash")
{
Remove-ItemProperty -Path 'HKLM:\SYSTEM\CurrentControlSet\Control\Terminal Server\WinStations\RDP-Tcp' -Name "SSLCertificateSHA1Hash" -Force
}
.png)
The option to configure or disable Windows firewall rules is available under the following actions:
- Turning on Windows firewall on the three profiles (domain, standard, public) under the PowerShell command:
Set-NetFirewallProfile -Profile Domain, Public, Private -Enabled True - Allowing WinRM through the firewall profiles and enabling the PowerShell remote service under the PowerShell commands:
Enable-PSRemoting –Force
Set-NetFirewallRule -DisplayName "Windows Remote Management (HTTP-In)" -Enabled True - Enabling the firewall rules allowing the RDP traffic under the PowerShell command:
Set-NetFirewallRule -DisplayGroup "Remote Desktop" -Enabled True - Enabling the file and printer sharing rule allowing the VM to respond to a ping command inside the virtual network under the PowerShell command:
Set-NetFirewallRule -DisplayName "File and Printer Sharing (Echo Request - ICMPv4-In)" -Enabled True
The option to install VM extensions is available under the Azure Virtual Machine Agent (see Azure Virtual Machine Agent).
The option to disable Windows Defender is available under the following PowerShell script:
# Disable Firewall
Start-Process "$($env:windir)\System32\netsh.exe" -ArgumentList "advfirewall set allprofiles state off";
#Disable Windows Defender
New-ItemProperty "hklm:\SOFTWARE\Policies\Microsoft\Windows Defender" -Name "DisableAntiSpyware" -Value 1 -Force;
Remove-ItemProperty "hklm:\SOFTWARE\Microsoft\Windows\CurrentVersion\Run" -Name "SecurityHealth" -Force;
Remove-ItemProperty "hklm:\SOFTWARE\Microsoft\Windows\CurrentVersion\Run" -Name "WindowsDefender" -Force;
# Disabling password complexity
secedit /export /cfg c:\secpol.cfg
(GC C:\secpol.cfg).Replace("PasswordComplexity = 1", "PasswordComplexity = 0") | Out-File C:\secpol.cfg
secedit /configure /db c:\windows\security\local.sdb /cfg c:\secpol.cfg /areas SECURITYPOLICY
rm -force c:\secpol.cfg -confirm:$false
# Configure Computer power to better perfomance and disable turn off display
Start-Process "powercfg" -ArgumentList "/SETACTIVE 8c5e7fda-e8bf-4a96-9a85-a6e23a8c635c" -Wait;
Start-Process "powercfg" -ArgumentList "/CHANGE monitor-timeout-ac 0" -Wait;
# Show file extensions in File Explorer
New-ItemProperty "hkcu:\Software\Microsoft\Windows\CurrentVersion\Explorer\Advanced" -Name "HideFileExt" -Value 0 -Force;
# Set password to the Administrator acc and autologon
$computer=$env:COMPUTERNAME;
$userid="{user_name}"; #Enter your username
$password="{password}"; #Enter your password
$user=[adsi]("WinNT://$($computer)/$($userid), user");
$user.psbase.invoke("SetPassword", $password);
New-ItemProperty "hklm:\SOFTWARE\Microsoft\Windows NT\CurrentVersion\Winlogon" -Name "AutoAdminLogon" -Value "1" -Force;
New-ItemProperty "hklm:\SOFTWARE\Microsoft\Windows NT\CurrentVersion\Winlogon" -Name "DefaultUserName" -Value $userid -Force;
New-ItemProperty "hklm:\SOFTWARE\Microsoft\Windows NT\CurrentVersion\Winlogon" -Name "DefaultPassword" -Value $password -Force;
The option to disable the “allow PC to be discoverable on this network” dialog is available by adding the following registry key under the Registry Editor:
HKEY_LOCAL_MACHINE\System\CurrentControlSet\Control\Network\NewNetworkWindowOff
The option to disable UAC (User Account Control) is available under User Account Control settings:
.png)
The option to turn on .NET Framework 3.5 is available under the .NET Framework installer (see Installation Guide).
The option to install the APE driver and other software is available by the following link.
Note. It is recommended to turn off Windows updates on VM.
Virtual Image (VHD) Uploading
The option to upload .vhd to blob storage is available under the Storage account container.
The option to create Storage account is available under portal.azure.com > Storage Accounts > Create > Select resource group > Set up account name > Set up resource group region > Review + create > Create.
.png)
.png)
Microsoft Azure Portal shows the following screen when successful:
.png)
The option to create container inside the Storage account is available under portal.azure.com > Storage Account > Select storage account > Containers > Create > Set the name of container > Create.
.png)
.png)
Microsoft Azure Portal shows the following screen when successful:
.png)
The option to upload .vhd file to container is available under portal.azure.com > Storage Accounts > select storage account > Containers > select the Container > Upload > Select file > Select Blob type – Page type > Mark Upload .vhd files as page blobs > Upload.
.png)
.png)
Microsoft Azure portal shows the following screen when successful:
.png)
The option to copy URL of the uploaded file is available under portal.azure.com > Storage Accounts > select Storage Account > Container > Select container > Select file > Copy URL. This is needed for VM Image creation under the Apptimized Portal.
.png)
Azure disk snapshot configuration
The option to configure Azure disk snapshot is available after the VM creation and configuration.
The option to create VM on the portal.azure.com is available under Services > Virtual Machines (see Quickstart - Create a Windows VM in the Azure portal - Azure Virtual Machines | Microsoft Docs )
Note. RDP must be enabled on VM (add a link to RDP mentioned part of the doc).
The option to configure the VM is available under the following actions.
Azure VM snapshot creation
The option to create a snapshot of Azure VM under Microsoft Azure Portal is available under portal.azure.com > Virtual Machines > select VM > Disks > select disk > Create snapshot

Microsoft Azure portal shows the following screen when successful:

The option to create snapshot is available by following actions: selection Resource group > setting the Snapshot name > Selection the Source disk > setting Encryption settings > setting Networking settings > Review + create > Create
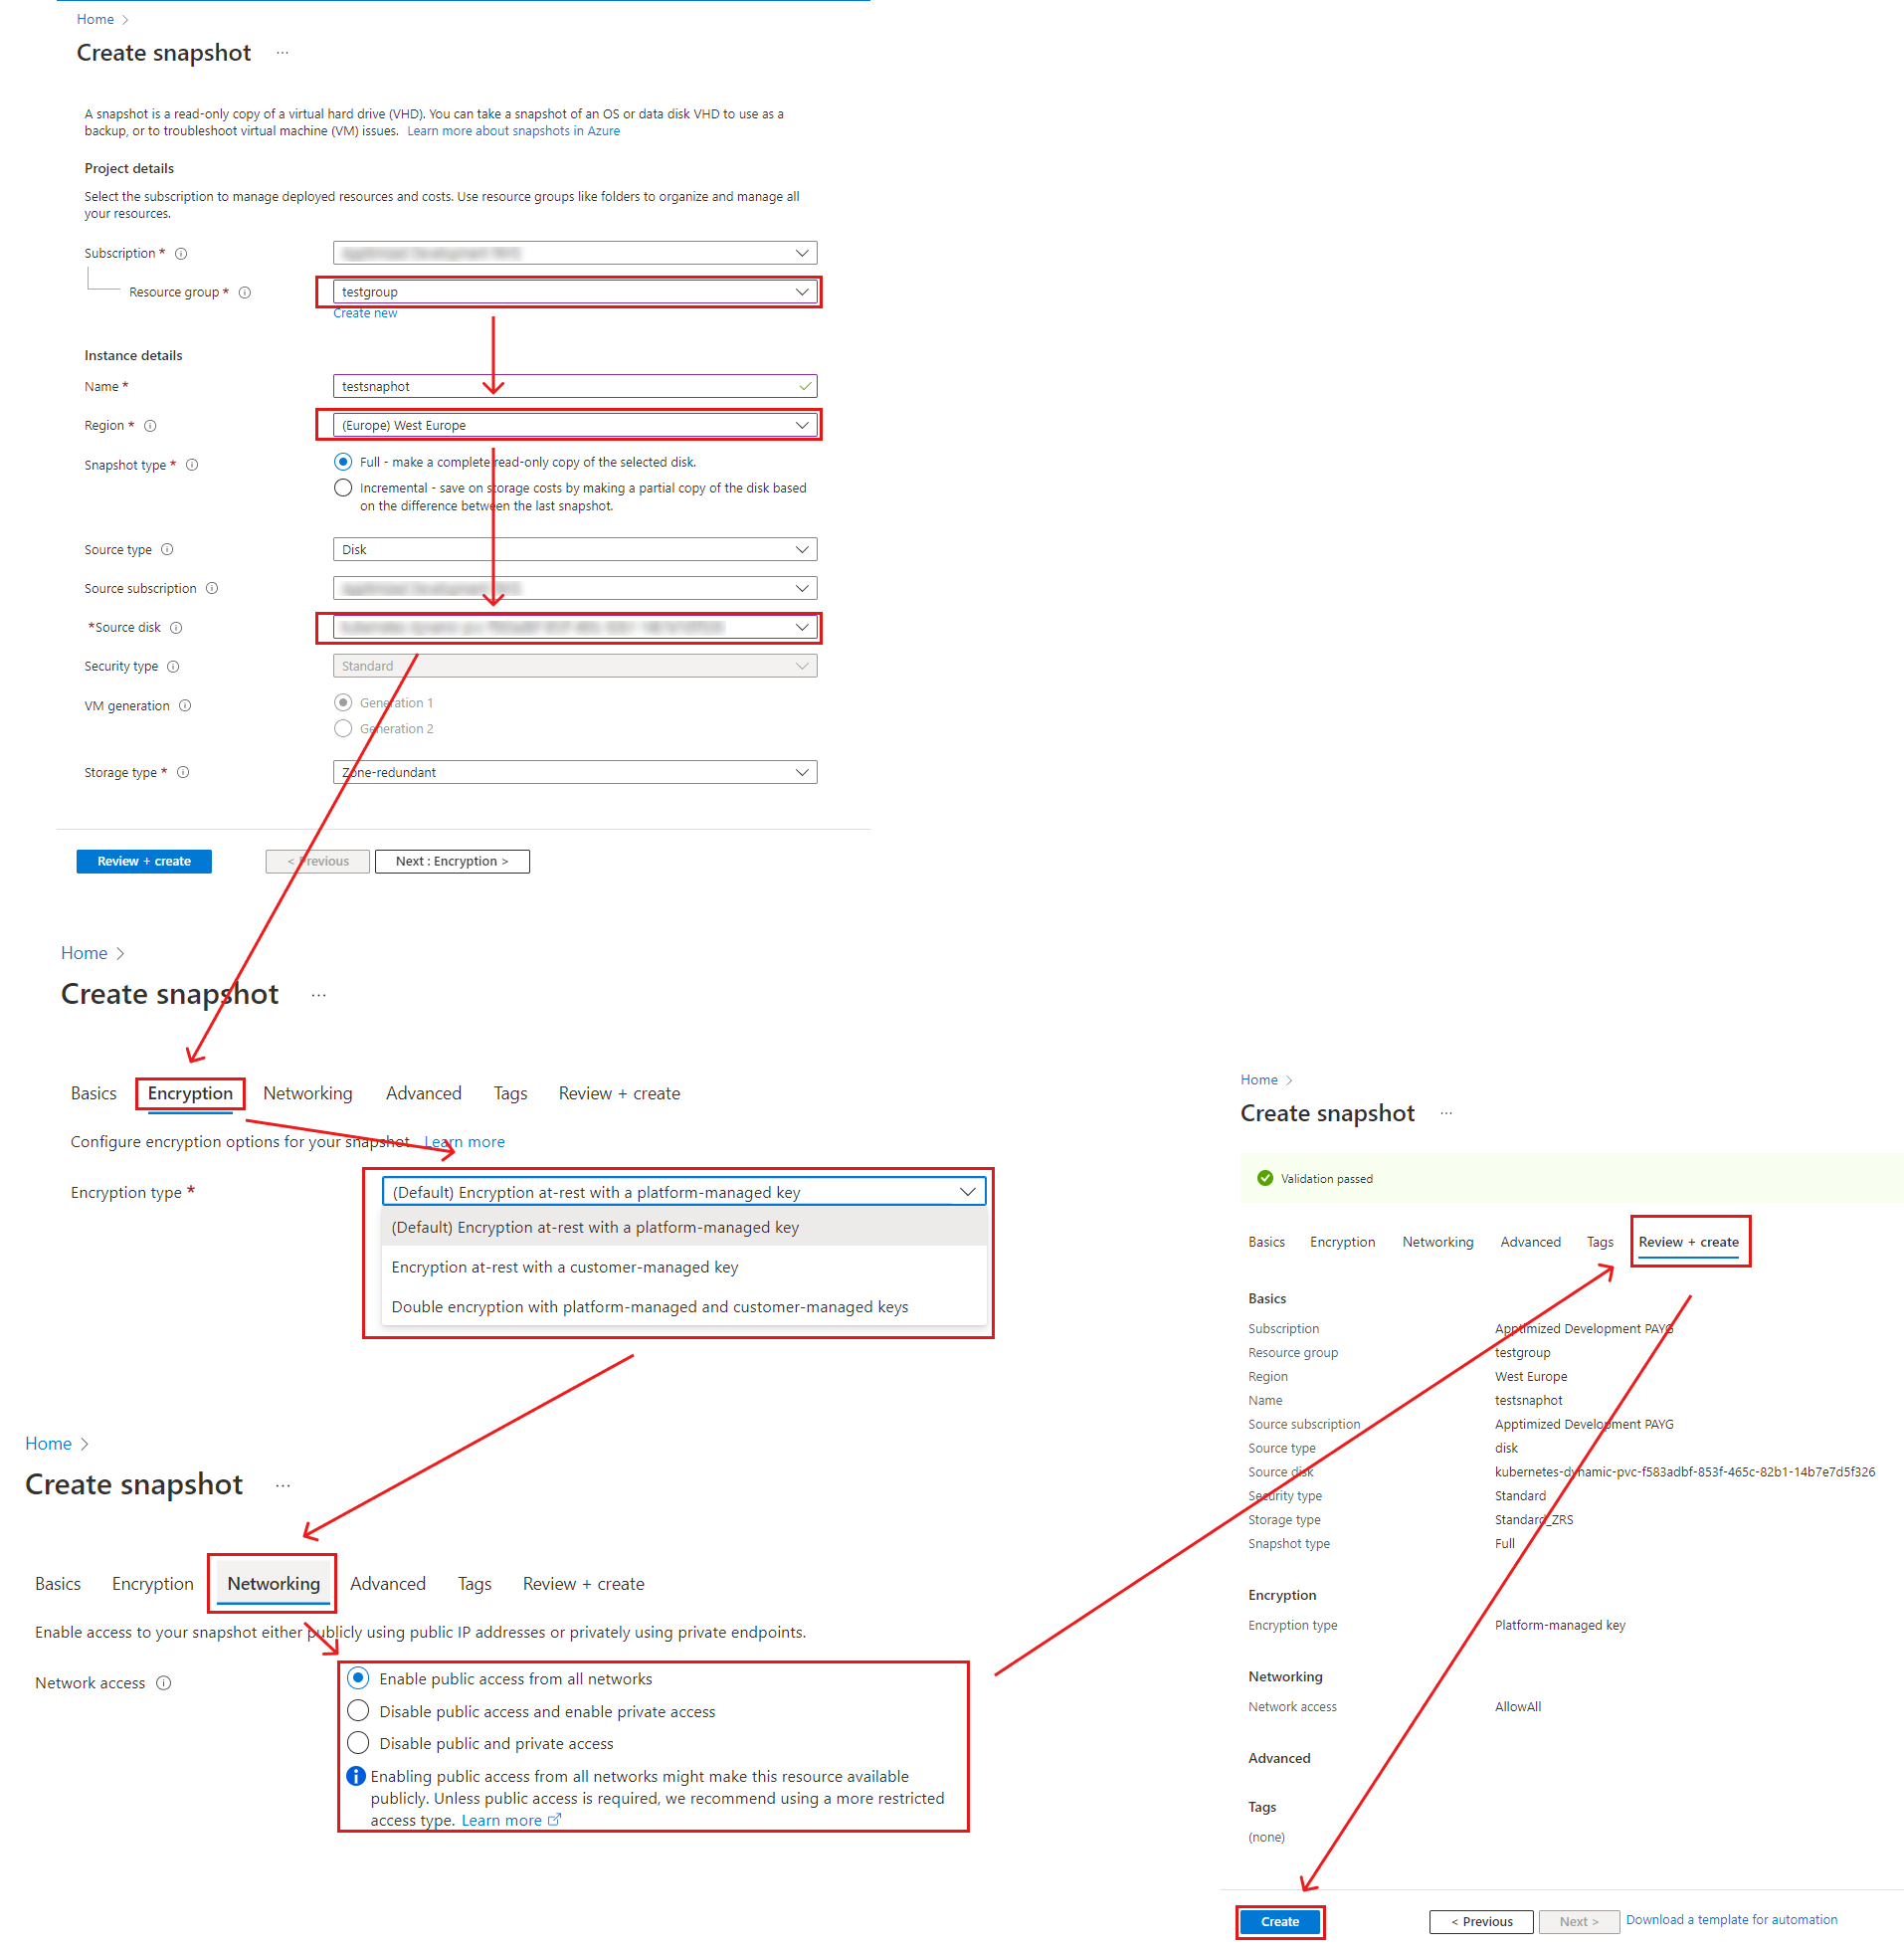
Microsoft Azure portal shows the following notification when successful:
.png)
Copying the snapshot name is required for VM image creation under Apptimized Portal
No comments to display
No comments to display