On-boarding
Log in
Apptimized portal is available at https://app.apptimized.com/
Apptimized portal supports login via single sign-on.
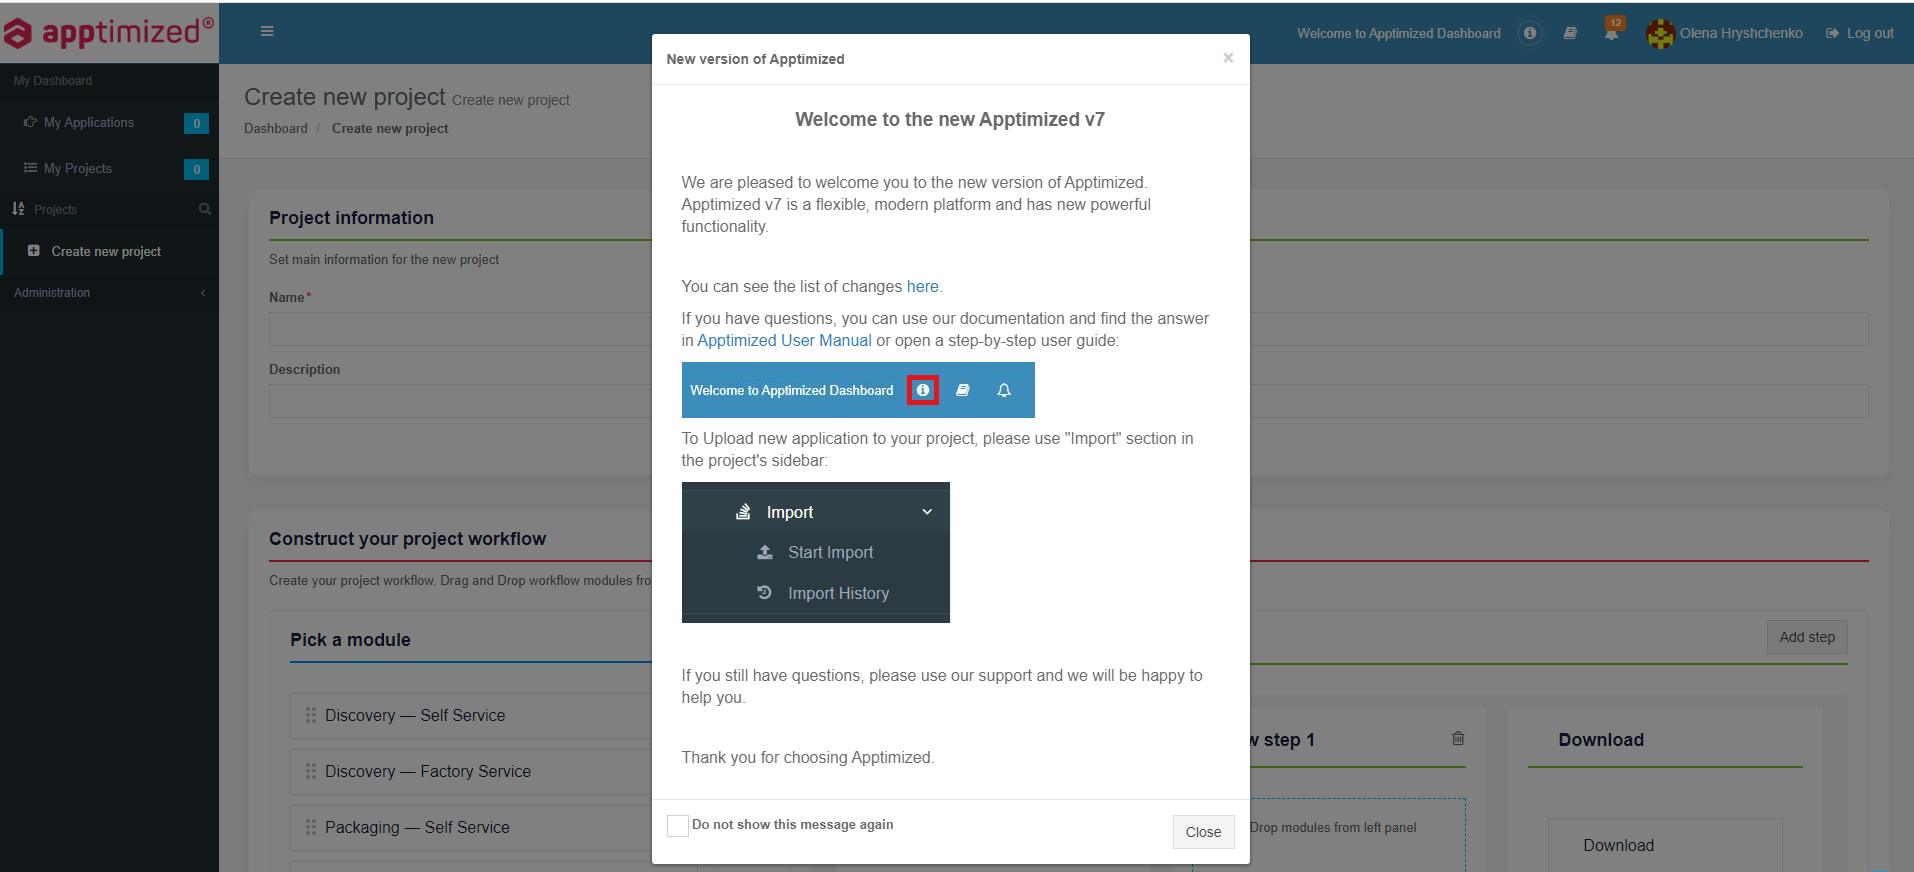
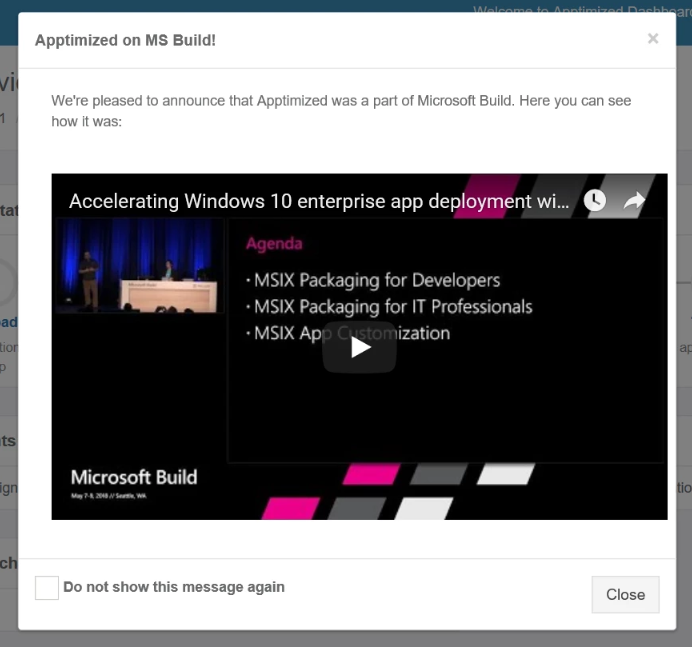
Apptimized shows the Welcome screen guide message when the user logs in:
The option to disable the guide notifications is available under Do not show this message again checkbox.
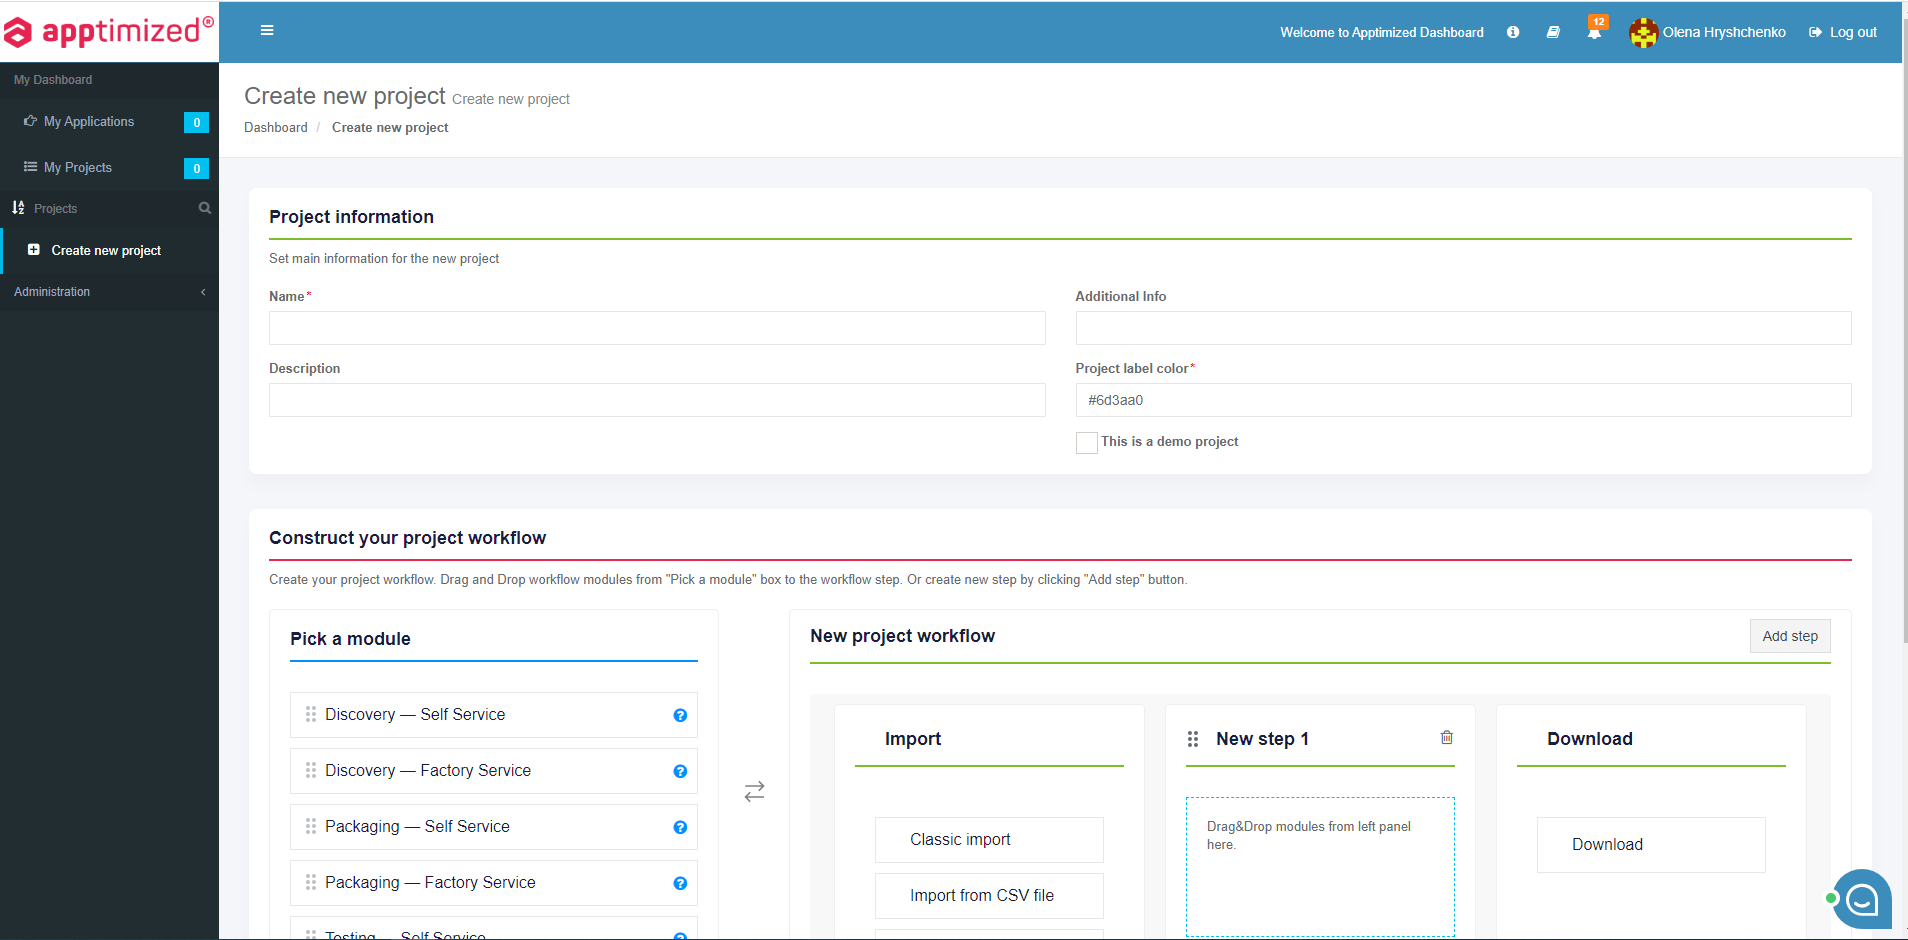
When a user does not have an assigned project, Apptimized shows the Create new page screen:
A manual to create a project is available at the chapter Create project.
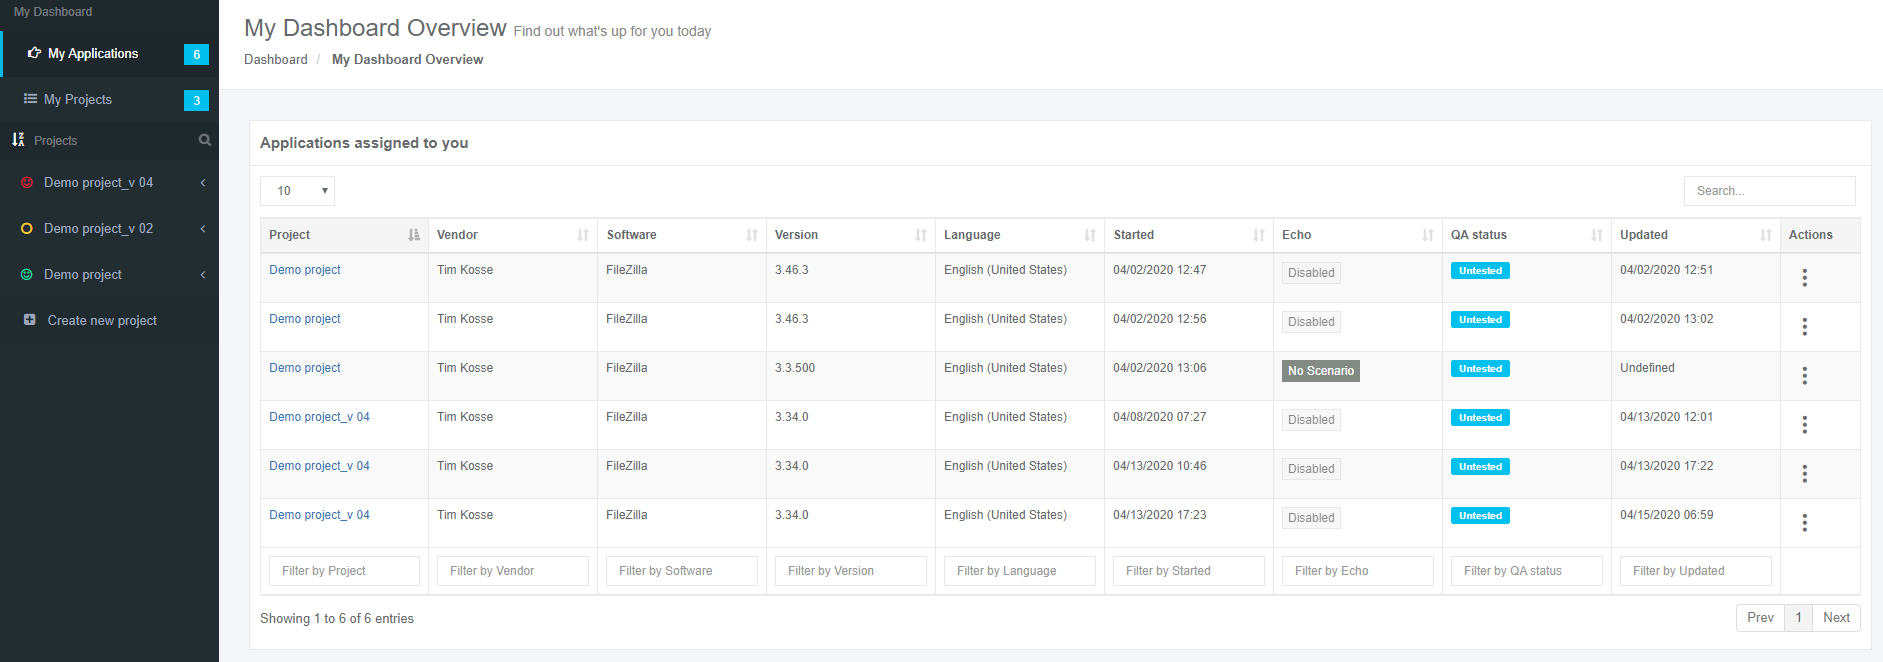
When a user has an assigned project, Apptimized shows the Project list page screen:
A project assigns to a user by a project administrator.
User Guides
The User Guides enable a user to check the step-by-step instruction of using the Apptimized platform and solutions.
The option to check the user guides is available under the Information button.
Apptimized solution guides are also available in PDF format.
| Solution | Description | User Guide |
| Apptimized Workspace | Packaging Self-service to package and test applications from Apptimized portfolio (check the Packaging). |  |
| Apptimized Catalogue | Pre-packaged applications on-demand (check the Catalogue). |  |
Dashboard settings
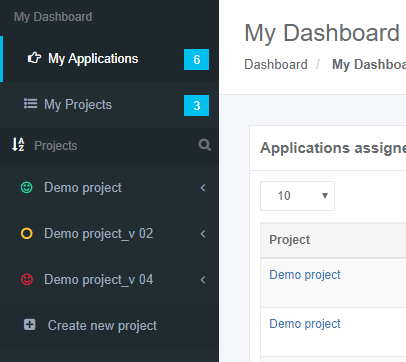
My Dashboard page provides information about all applications and projects that are assigned to a user or created by a user.
Applications overview is available under the My Applications page:
Projects overview is available under the My Projects page:
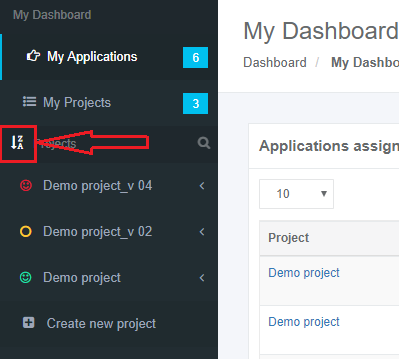
The option to filter projects alphabetically (i.e., from A to Z or from Z to A) is available under the filtering symbol:
Keyword search mode available (Loupe symbol > Enter a search keyword):
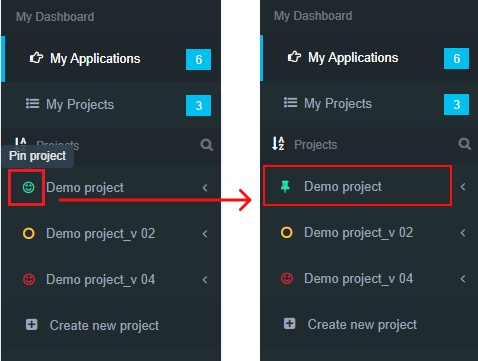
The option to pin a project available. The project pins when clicking on its icon:
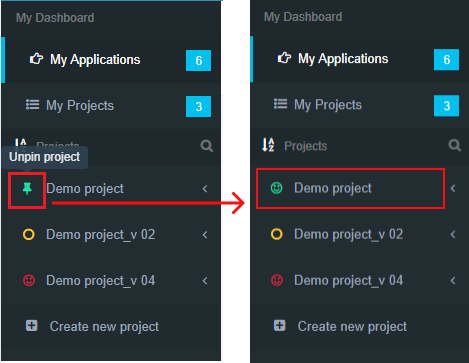
The option to unpin a project available. The project unpins when clicking on its icon:
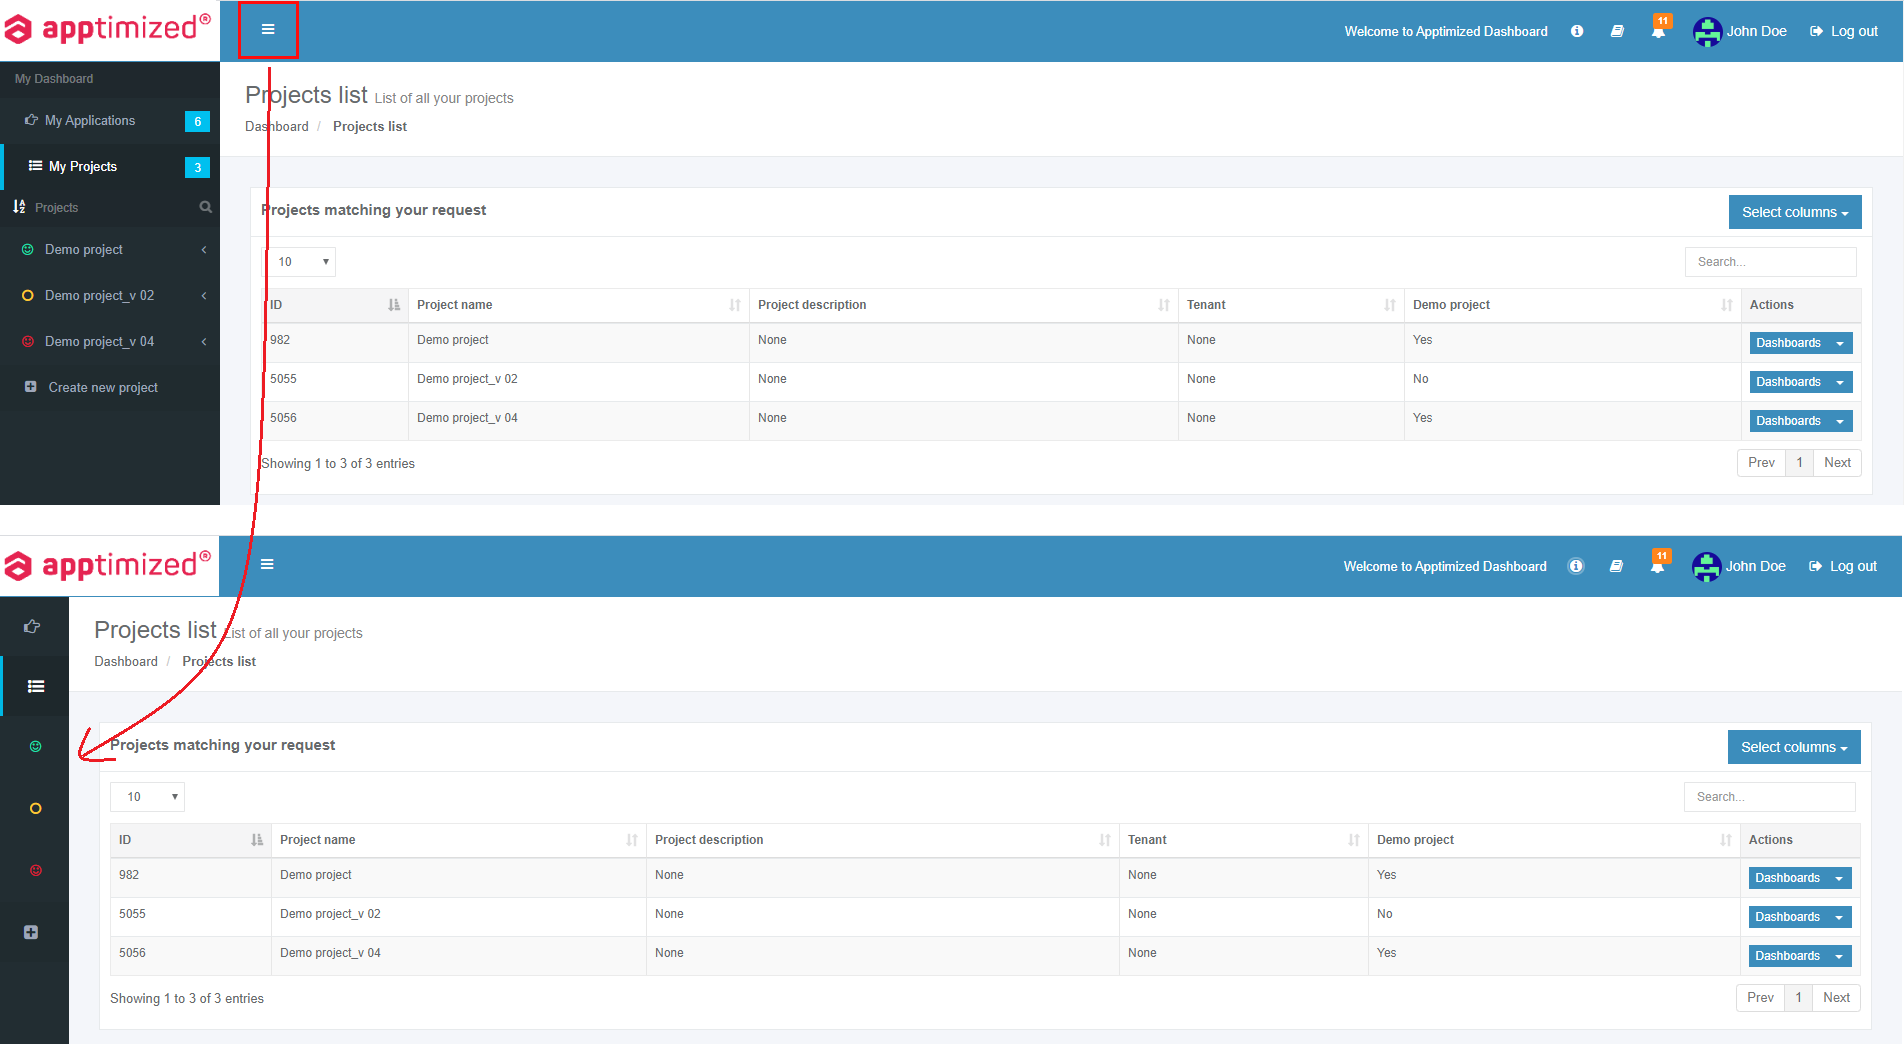
The option to extend the workspace is available under the symbol:
The workspace reverts to the initial state when clicking the symbol.
Notifications
Apptimized Email notifications
Apptimized provides email notifications:
1. Account activation request;
2. Account activation confirmation;
3. Account creation confirmation;
4. Password recovery;
5. Discovery/Packaging/Testing activities:
- The request status changes;
- New comment on the request;
- New attachment on the request
6. Update Monitoring:
- New version available;
- Application vulnerability identification.
7. Step execution (If someone in a project doesn`t have the permission to step activities);
8. Project invitation.
Apptimized system notifications
System notifications inform project members about system maintenance or troubles, the short-term shutdown of all or parts of the system, new releases, etc.
System notifications create by a Global Administrator to all project members. Apptimized provides a system notification as a banner – a small line on the top of the page. A system notification remains pinned and available for selected users (a Global Administrator defines them) as long as a user is logged in or as long as Global Administrator set to show it.
System notifications’ types are described in the table below:
Table 1. Types of system notifications
Apptimized modal window notifications
Modal window notification appears when a user logs in.
The option to disable the modal window notification is available under the Do not show this message again checkbox.
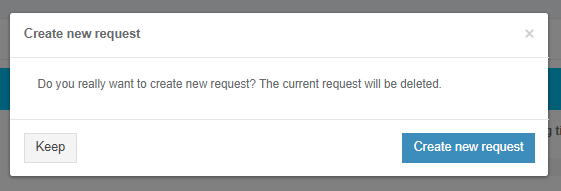
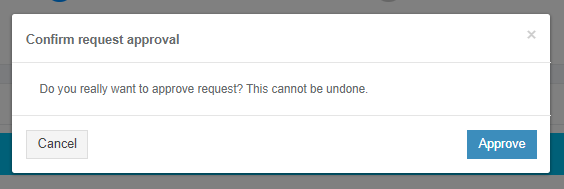
Modal window notification appears when a user needs to confirm an action (i.e., create /delete confirmation, task finishing confirmation, task restarting confirmation, etc.).
Project notification settings
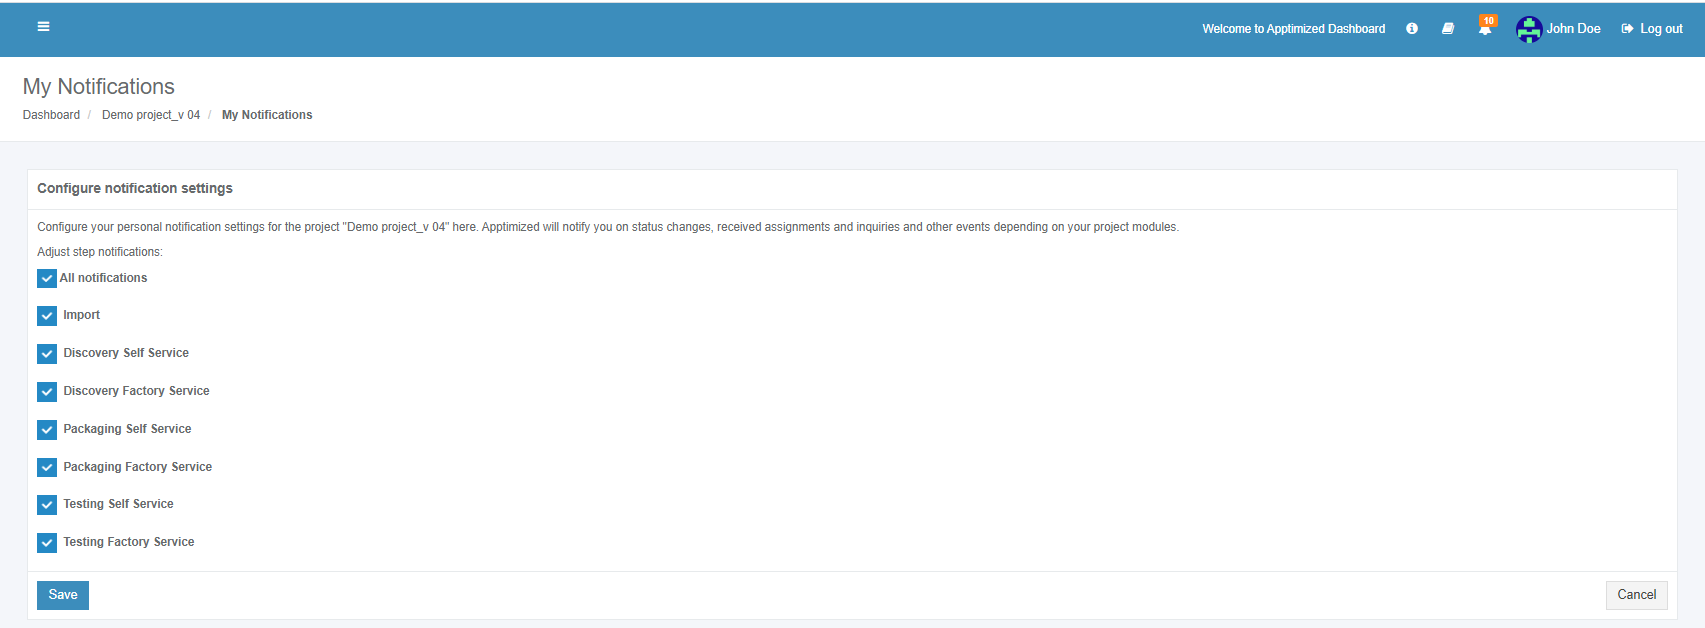
The project notifications settings are available in the project menu under Notifications.
The screenshot below shows the default settings for the project’s notifications:
To exclude notification types from the project, uncheck boxes next to the name not required in use.
Review a profile
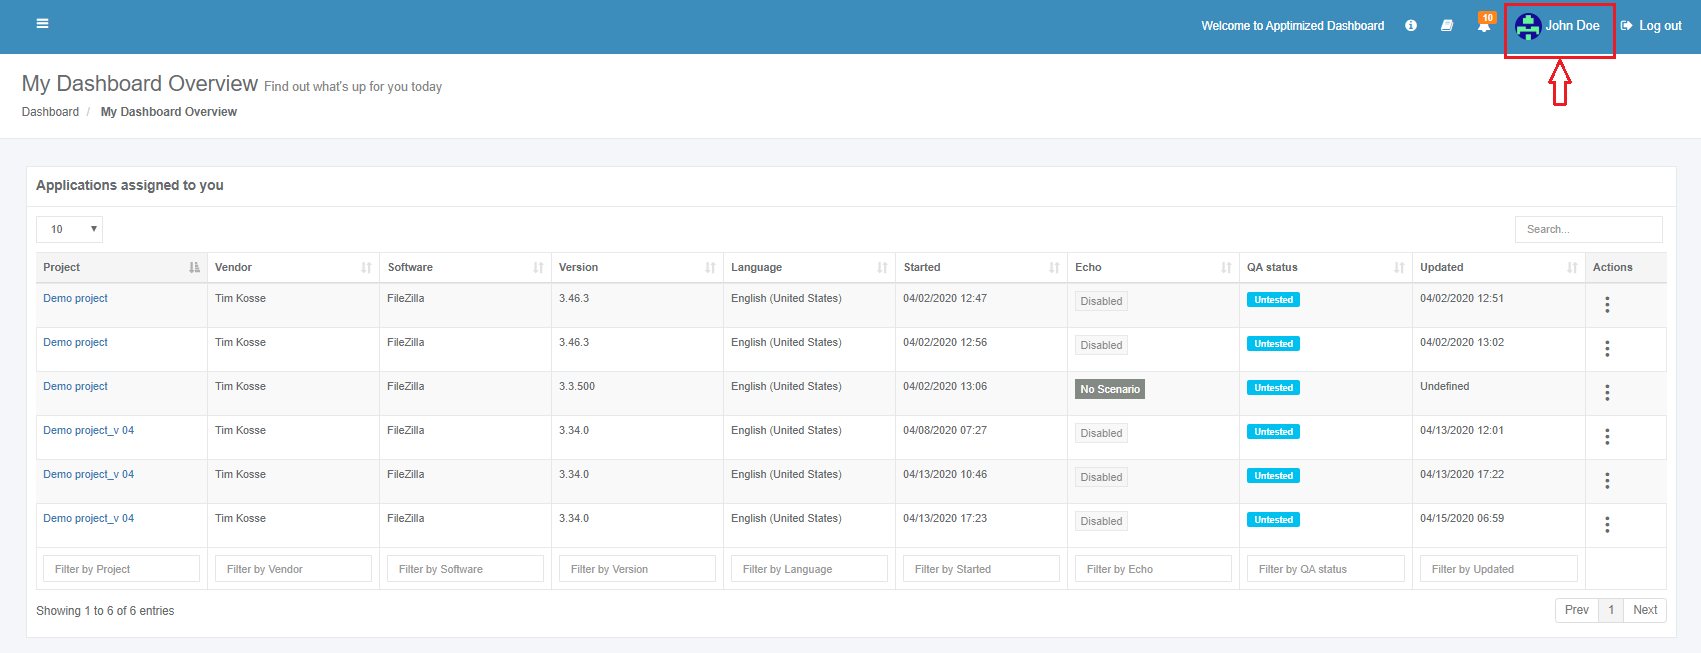
The entry point to the user's profile configurations is available Apptimized portal menu under the user’s avatar and name:
Apptimized shows the following screen when successful:
Two options available: User profile and Portal configuration.
User profile
Apptimized redirects a user to SSO application when clicking the User profile option.
This application enables a user:
- To secure login with single credentials.
- To configure the user’s profile settings.
- To export personal data.
- To delete an account.
Portal configuration
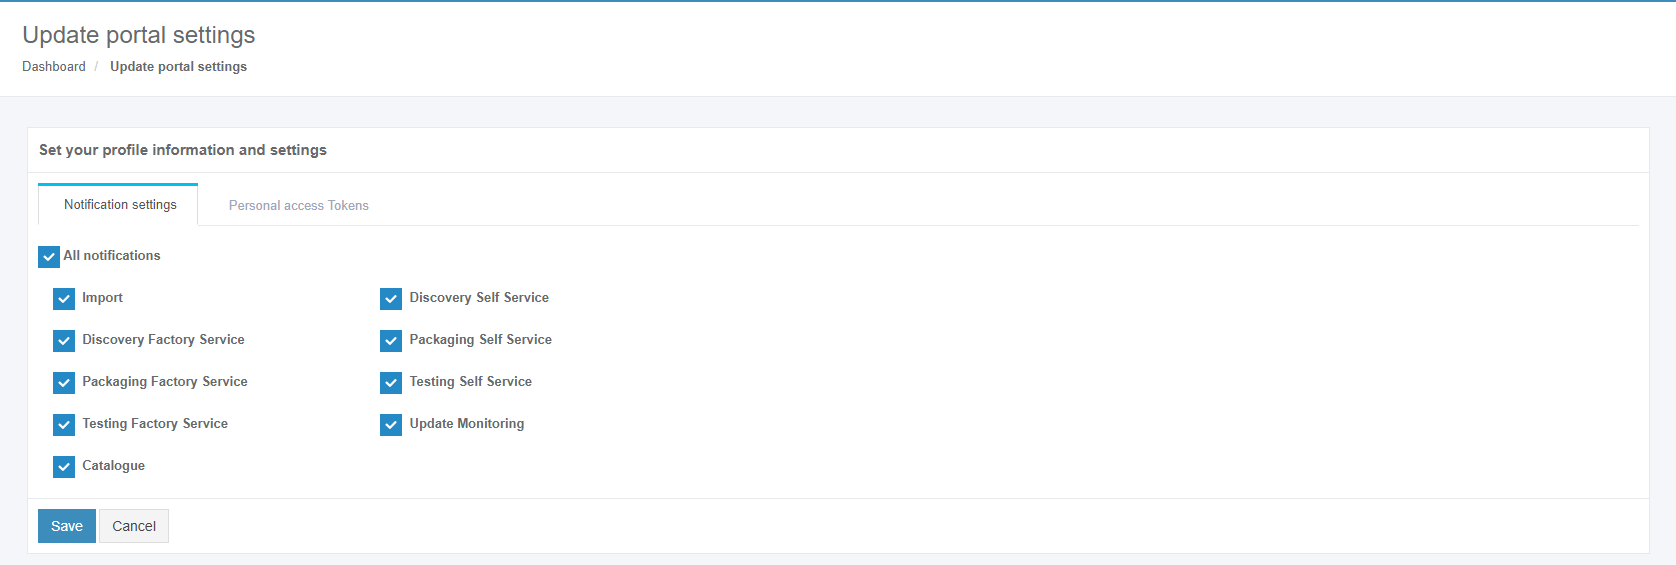
Apptimized shows the following screen when successful:
Two tabs available: Notification settings and Personal access tokens.
Notification settings
To disable the notification, uncheck the box in front of the notification’s name not need in use.
The changes to the profile apply when clicking on the Save button.
Personal access tokens
Personal access tokens can be used instead of a login and password for REST APIs and transferred in the authorization header to access REST APIs.
The list of personal access tokens is empty by default.
The following screenshot shows the Apptimized screen when tokens exist:
Tokens data is grouped into the following categories:
- Token name
- Token creation date
- Token expiration date
- Actions
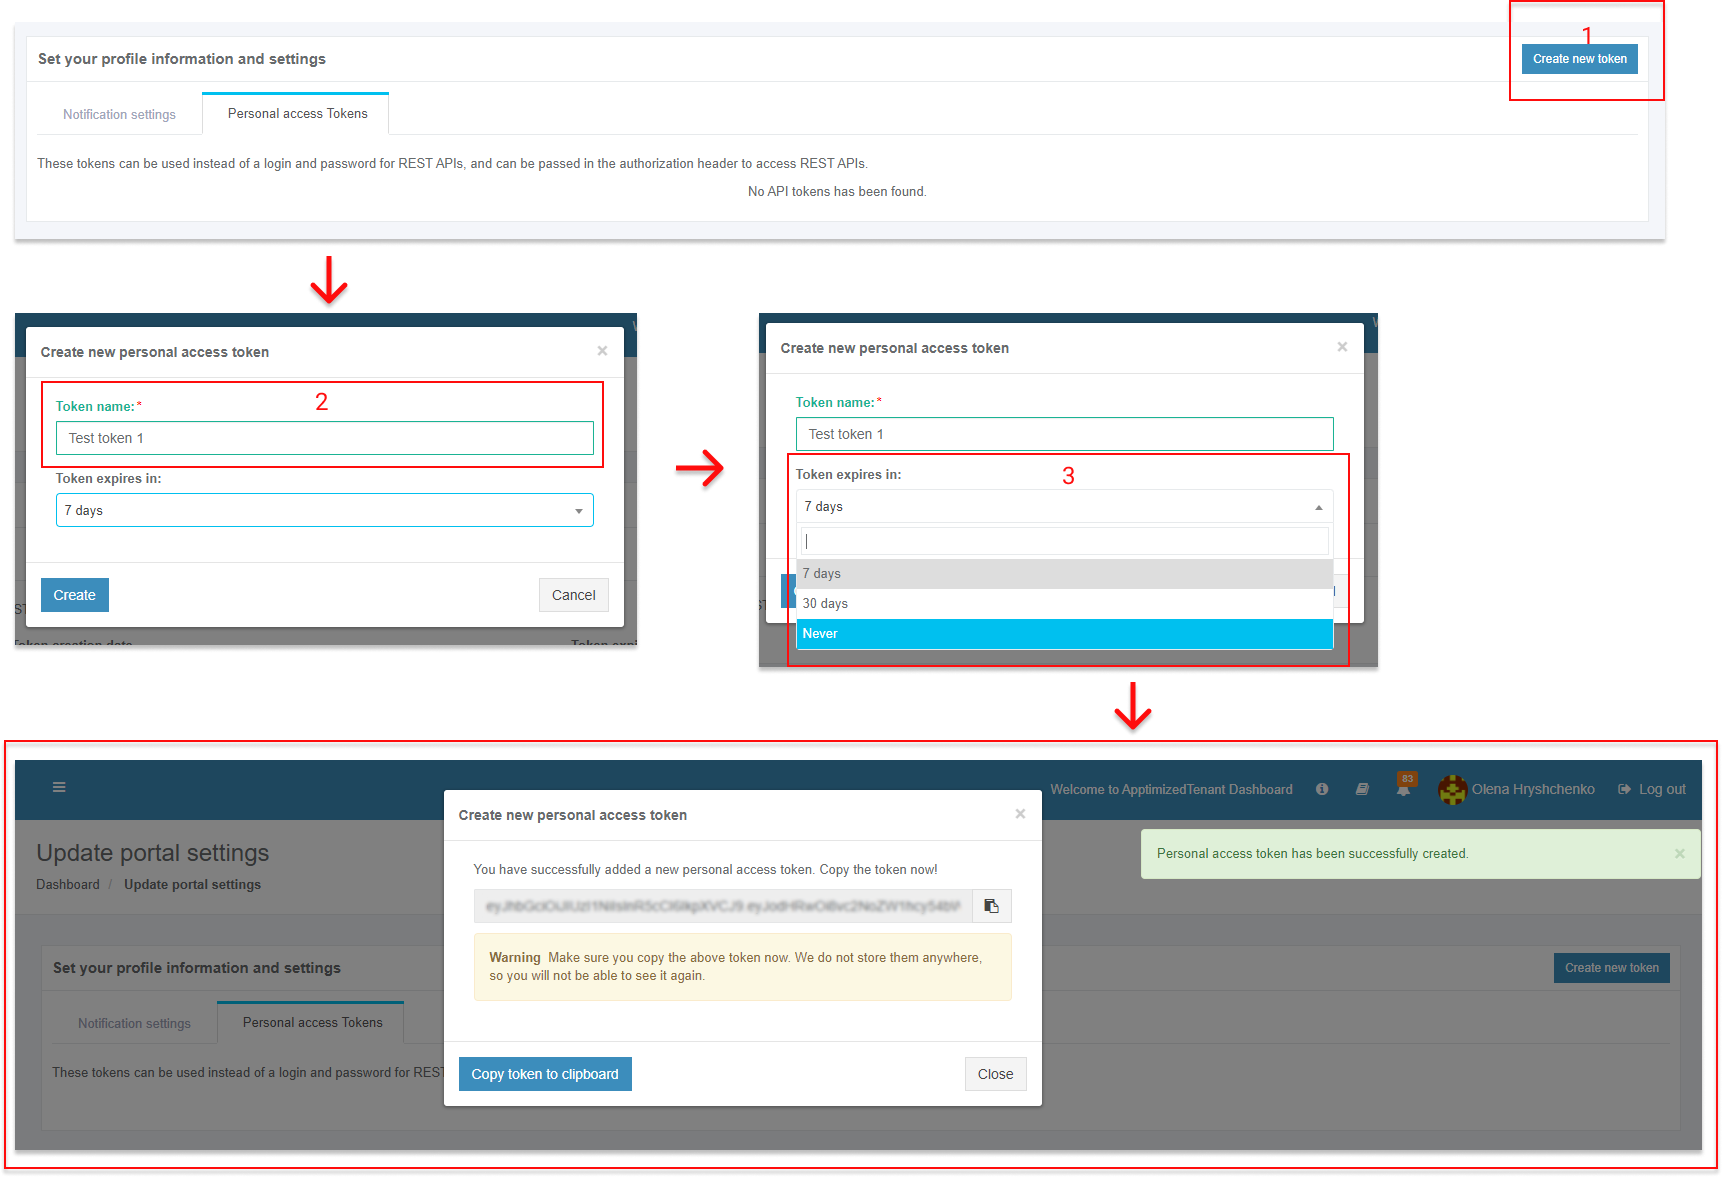
The option to create a token is available under the Create new token button > Create new personal access token modal window > Token name field > Token expires in (Select the value from the drop-down list) > Save button:
- Note. A user needs to copy the token to the clipboard before closing the modal window. This option is available under the Copy token to clipboard button or Copy icon:
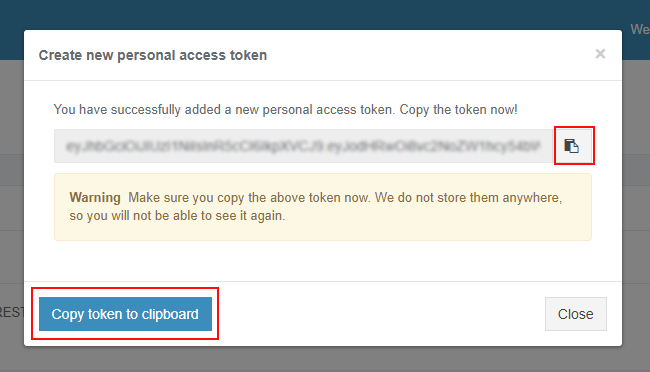
Apptimized shows the following notification when successful:
Apptimized shows the following screen when successful:
The option to delete token from user's account is available under the Actions column > Delete button > Confirm delete token modal window > Delete button.
Apptimized shows the following notification:

