IntuneWin Bulk Conversion
IntuneWin Bulk Conversion feature allows users to migrate their SCCM packages to intunewin format using an automated tool.
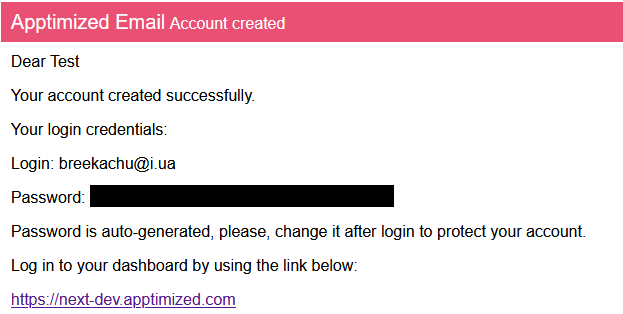
Apptimized sends the follow-up email when the user has accessed the IntuneWin Bulk Conversion feature:
Trial Project Overview
Apptimized shows the first project filled with the top 10 most wanted applications:
A user can now process converting these applications to IntuneWin format or can give it a try and upload his own packages for a conversion.
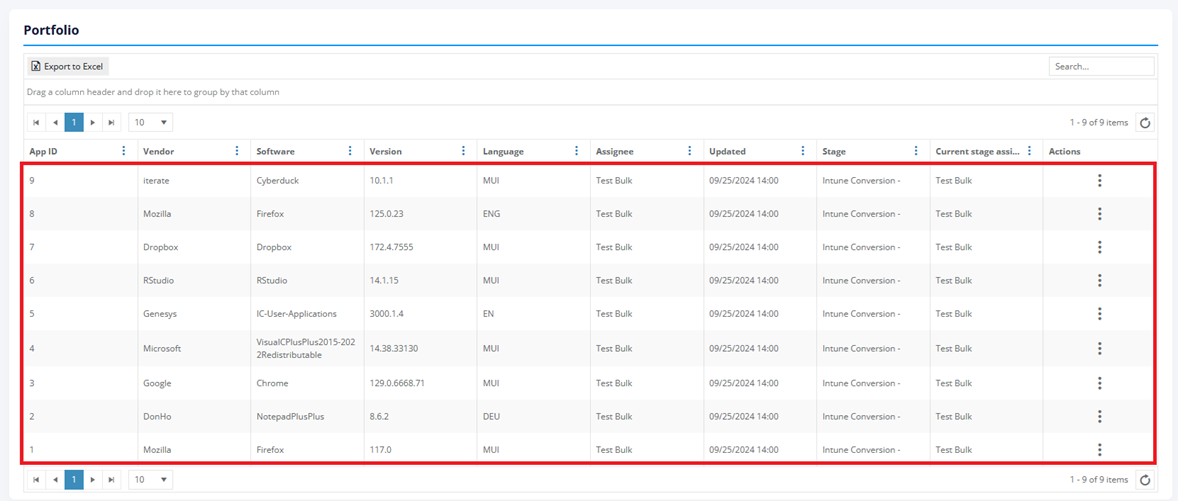
The project is already configured to work with the conversion with the predefined settings.
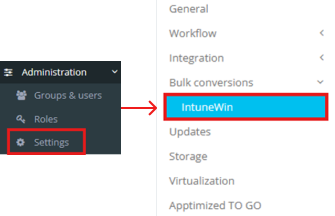
To check the conversion settings, the user should go to Administration > Settings > Bulk Conversions > IntuneWin
This page shows all the configurations applied to all newly created conversion in the project.
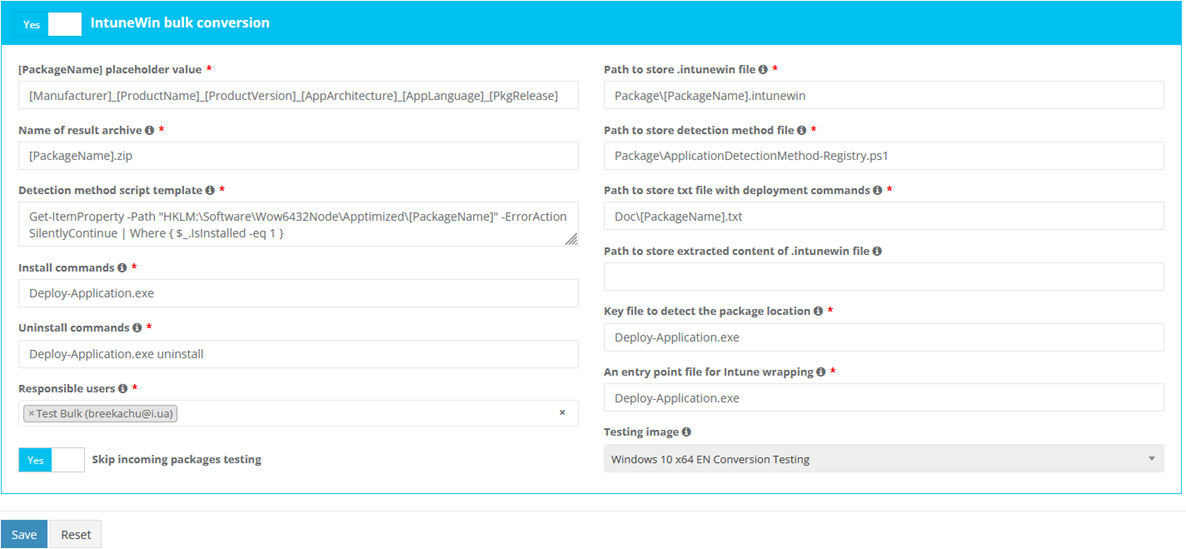
Table 1. IntuneWin Bulk Conversion Settings
|
Option |
Details |
|
[PackageName] placeholder value |
This option shows a construction of the PackageName that will be applied to the result package |
|
Name of result archive |
This option provides a result package archive name template |
|
Detection method script template |
This option shows a PowerShell script template which will be used to check if the package is installed or uninstalled |
|
Path to store .intunewin file |
This option shows the Intunewin file location in the result package structure |
|
Path to store detection method file |
This option shows a detection method file location in the result package structure |
|
Path to store txt file with deployment commands |
This option provides information about txt file with deployment commands location in the result package structure |
|
Path to store extracted content of .intunewin file |
This option shows the Intunewin package extracted content location in the result package structure |
|
Key file to detect the package location |
This option shows the file name in the source archive that points to the level where the package is located (e.g. Deploy-Application.exe for PSADT packages) |
|
An entry point file for Intune wrapping |
This option provides a file name used for intunewin conversion as an entry point (usually, it's an installation file without arguments) |
|
Install commands |
This option provides the installation file name with arguments |
|
Uninstall commands |
This option provides the uninstallation file name with arguments |
|
Responsible people to receive notifications |
This field gives information about people who will receive an email notification if the conversion for the particular application fails |
|
Testing image |
This option allows choosing the image that will be used for testing incoming packages |
|
Skip incoming packages testing |
If this option is enabled, the applications will be converted without incoming packages testing |
Bulk Conversion Creation
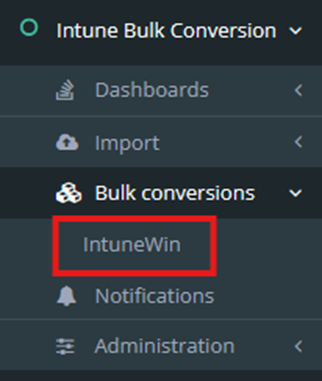
To create the first Bulk Conversion a user should go to Bulk conversions > IntuneWin.
The following screen will be displayed:
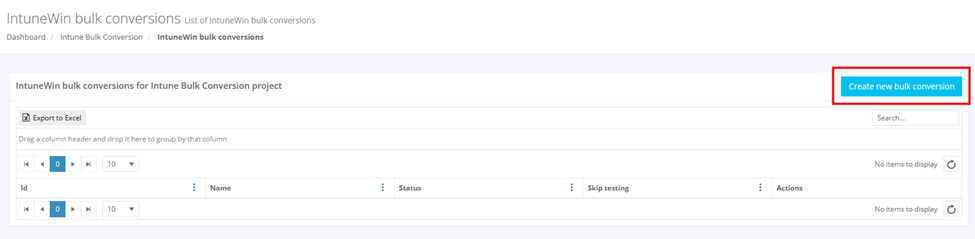
On this page all Bulk Conversions a user creates will be displayed.
The "Create Bulk Conversion" button should be pressed to proceed.
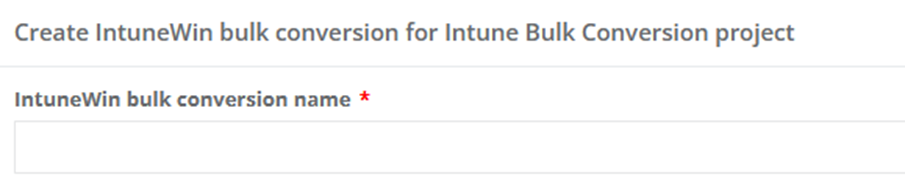
A user has to enter a name of a conversion in the following field:
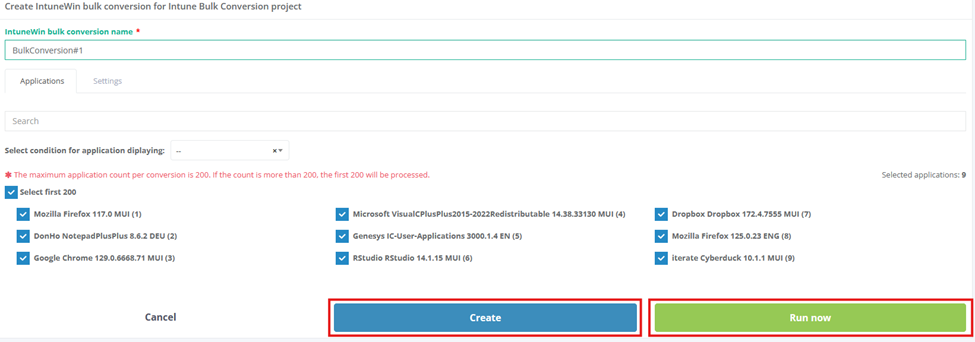
Selecting applications for converting to the .intunewin format is available in the next window:
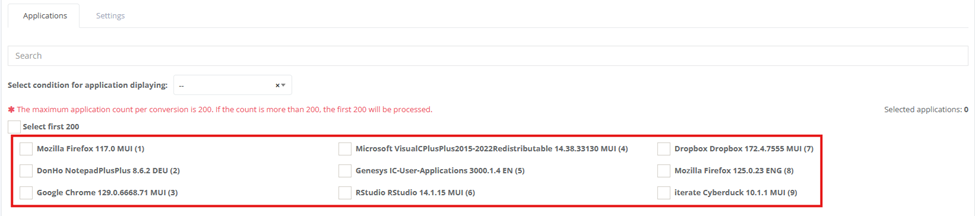
The maximum application count per conversion is 200. If the count is more than 200, the first 200 will be processed.
There is also a possibility to overwrite bulk conversion settings to apply changes only for the current conversion using the “Settings tab”.
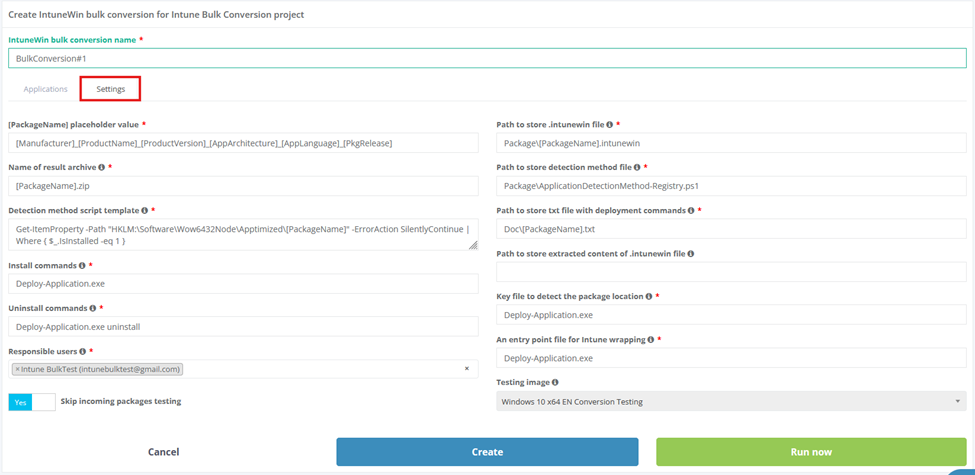
When the bulk conversion configuration is finished, the user can click on “Create” button to save the changes and run conversion later or “Run now” button to start conversion immediately.
Bulk Conversion Processing
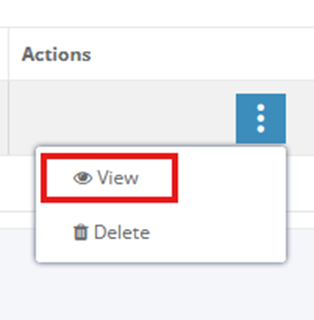
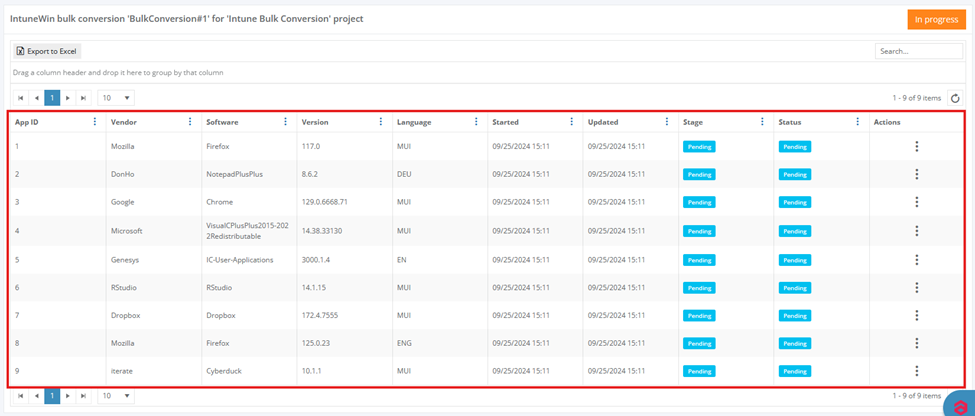
A newly created bulk conversion is listed on the page with the “In progress” status.

A user can click on the “View” action button to review the bulk conversion details.
The list contains every application that is part of the conversion. Applications are currently in the "Pending" stage, which indicates they are being queued up for processing.
When hovering over the “Pending” status, information about the position in queue and estimated launch time will be shown.
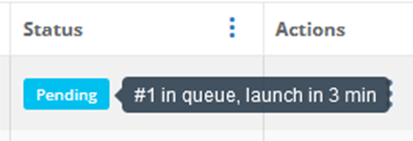
Table 2. Stages
|
Stage |
Details |
|
Pending |
The application in the queue and is ready to be converted |
|
Testing |
The incoming app is going to be tested to make sure installation and uninstallation works properly |
|
Wrapping |
The application is being wrapped to the. intunewin format |
Table 3. Statuses
|
Status |
Details |
|
Pending |
The application in the queue and is ready to be converted |
|
In progress |
The current stage is in progress |
|
Skipped |
If the “Skip incoming packages testing” option is enabled in conversion settings, the status will be set to the “Testing stage” |
|
Failed |
A conversion is failed for some reason |
|
Removed |
The application is removed from bulk conversion and should be processed manually |
|
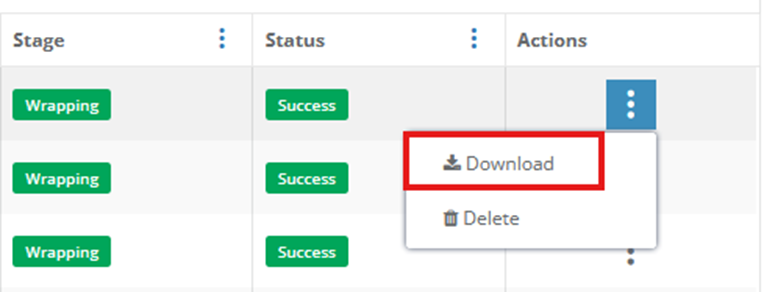
Success |
A conversion is finished successfully |
When the conversion completes, a user will receive corresponding email notification:

As a result, Bulk Conversion Status will be set to “Completed”.

 \
\
Importing Own Packages
In addition to working with predefined packages in the trial project, it is possible to import own packages to attempt converting them to the .intunewin format.
To learn how to import the packages into the project, please follow this link .
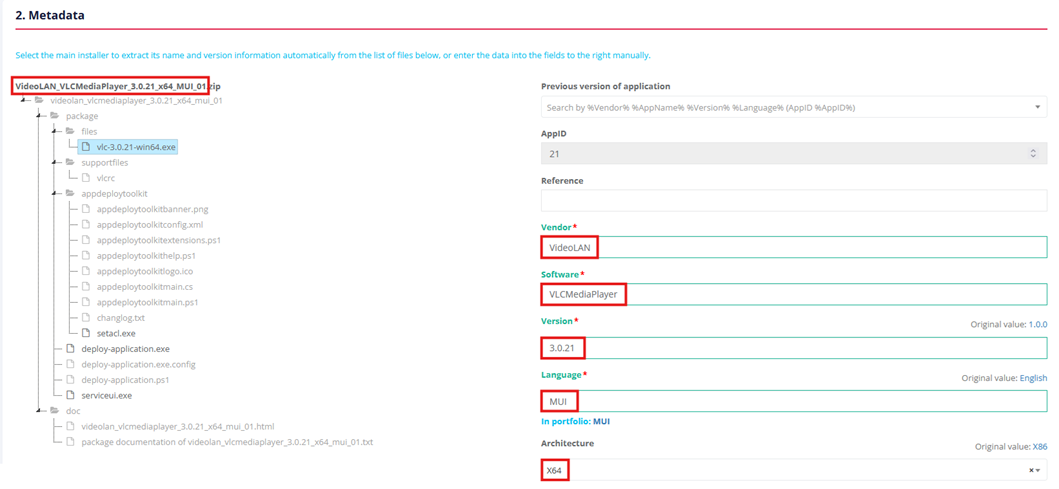
It's important to note that the application metadata and the PackageName components used in the package should match exactly.
 Prior to start converting the imported packages, it’s important to review the conversion settings if anything should be changed. If a user struggles with understanding which settings should be changed, he should contact Apptimized support team.
Error Handling
In case the conversion for the particular application fails, a user will receive an email notification with detailed information about the issue:
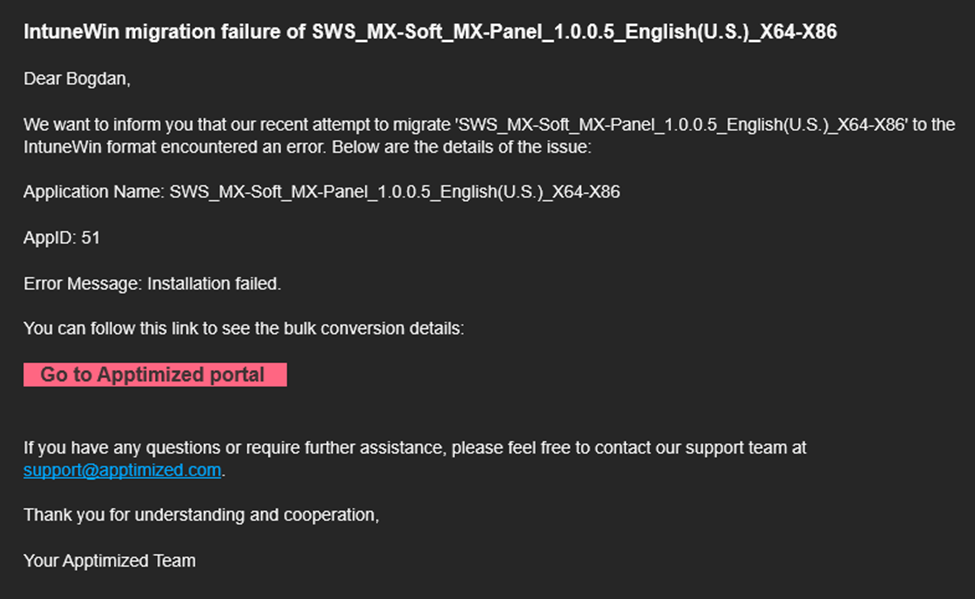
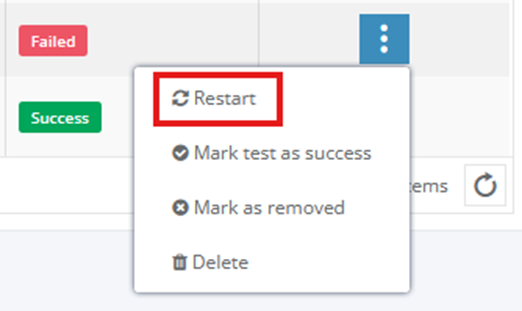
The conversion item status will be changed to 'Failed'.
The hint with explanation of the reason for the failure will be shown:

In case the installation or uninstallation of incoming package fails as shown on the screenshot above, it’s required to check the package and fix problems manually.
After the package is fixed, the archive should be re-uploaded to the Portfolio item. A user should go to Dashboards > Portfolio.
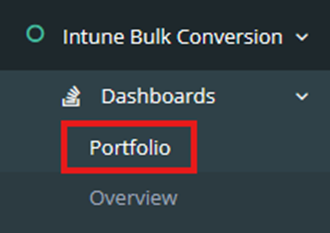
Finding a failed application in the Dashboard list is available by clicking on the “Settings” action button.
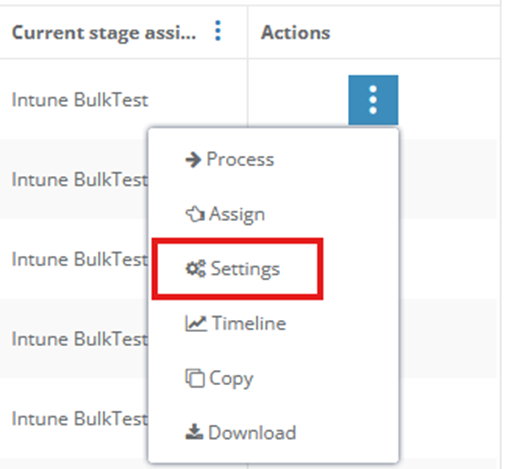
A user should click on the “Reupload source” button and re-upload fixed package archive.

To restart the conversion process for the following item, a user goes back to Bulk Conversion > “Restart” action button.