Apptimized TO GO integration
Prerequisites and limitations
The following prerequisites apply for Apptimized TO GO:
- endpoint PC or VM with access to the 80 and 443 port of app.apptimized.com host;
- Microsoft Windows Desktop (Windows 7 and above) or Server OS (Windows Server 2012 R2 and above) with installed .NET Framework 4.6.1;
- un on a local PC by the local administrator;
- Firewall white list:
|
URL/IP for whitelist |
Description |
|
https://app.apptimized.com/ |
URL for access to Apptimized |
|
https://rdproxy.apptimized.com/ |
URL for working with RDP connections in Apptimized |
|
https://cdn.apptimized.com |
URL for download files from Apptimized |
|
*.chatlio.com |
URL for access to support chat |
|
195.201.82.88; 195.201.170.90 |
IP addresses for working with Apptimized VM’s |
Enable Apptimized TO GO?GO
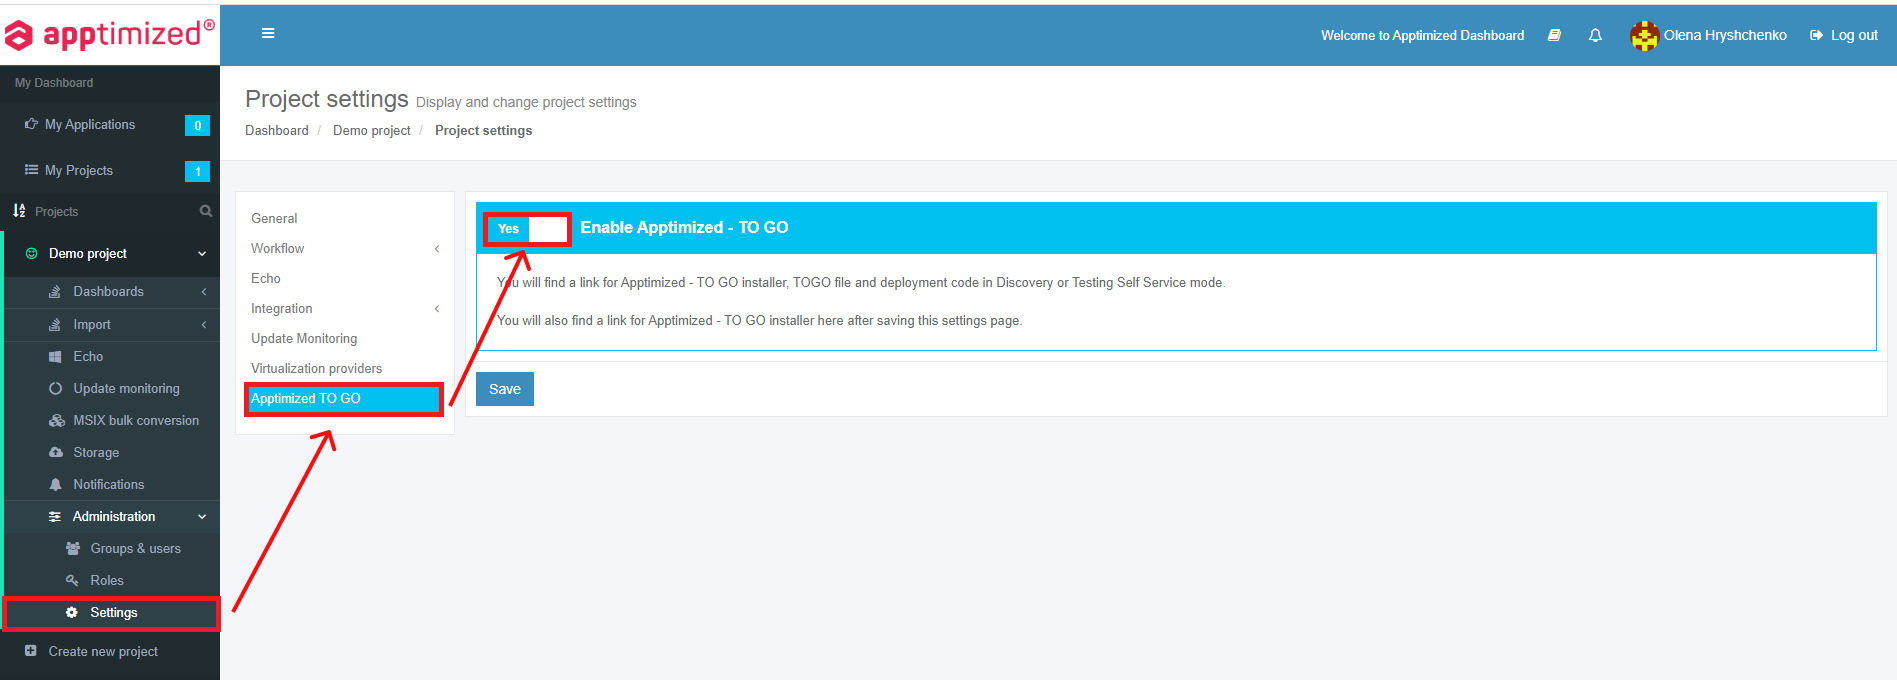
The one-time configuration is available for project administrators under Settings in the project menu > Apptimized TO GO section. Apptimized - TO GO becomes active when switched on.
Settings are persisted on click to Save button.
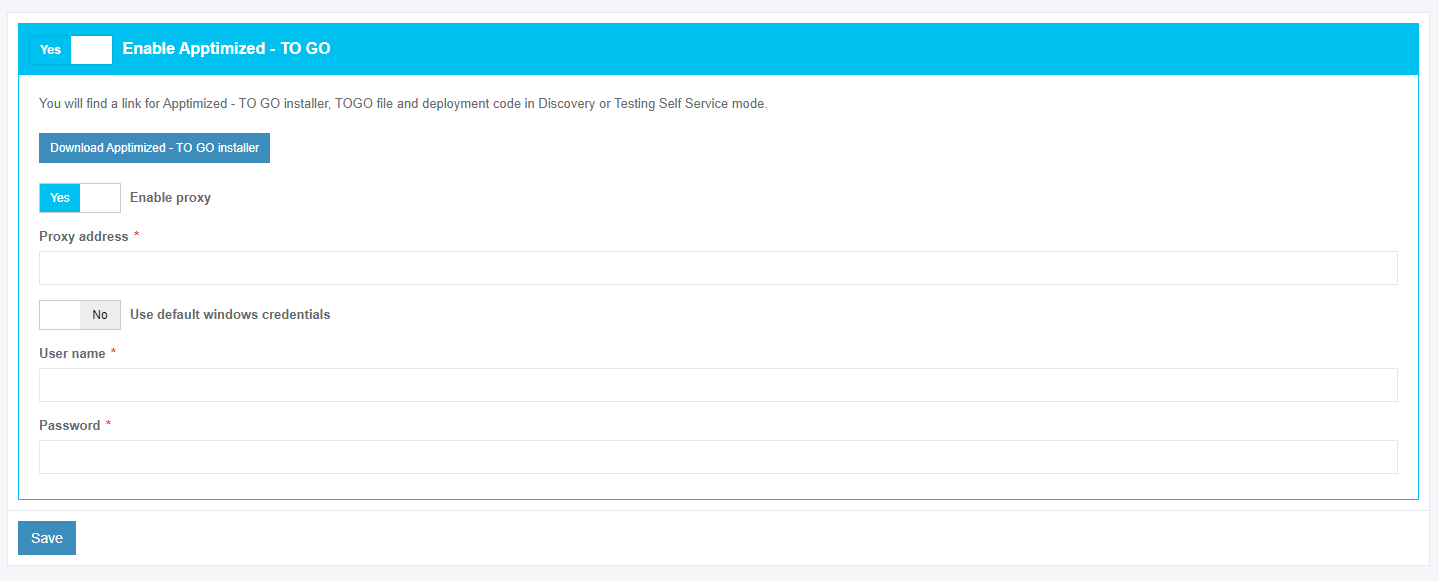
If the endpoint connects to the internet via the proxy server, configure the connection by turning on Enable proxy and selecting Use default windows credentials or providing credentials in Username and Password fields.
Settings are persisted on click to Save button.
In case of success, Apptimized shows the following notification:
Apptimized TO GO installer
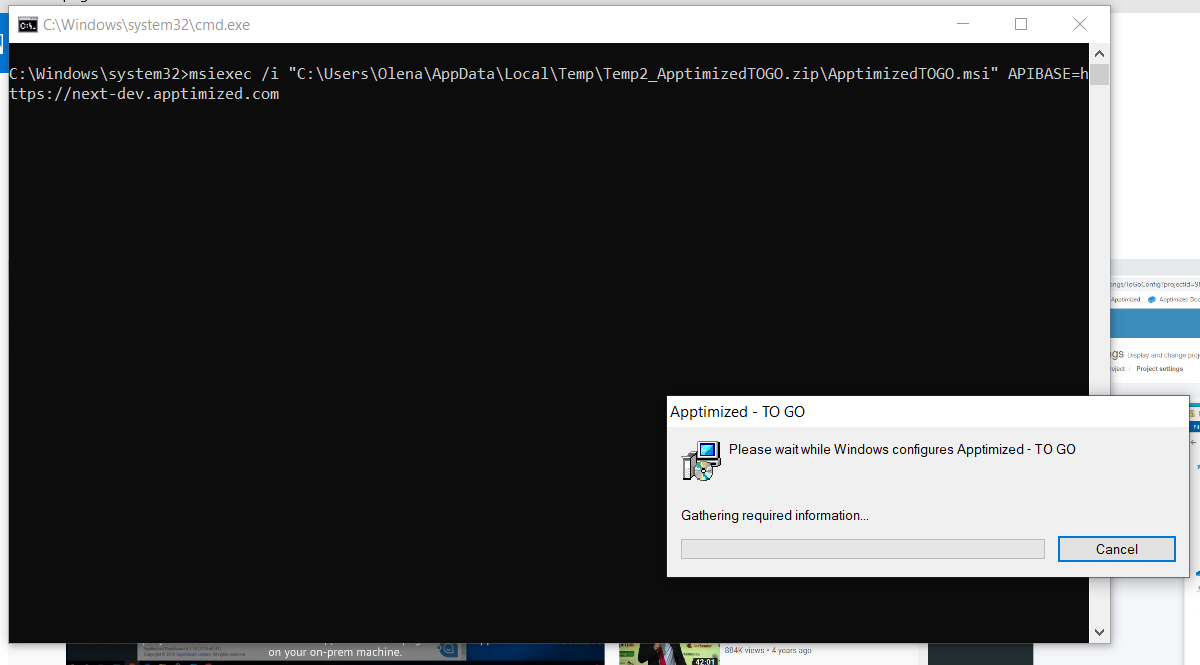
The integration procedure ends up with the installation of Apptimized TO GO Agent to the endpoint PC.
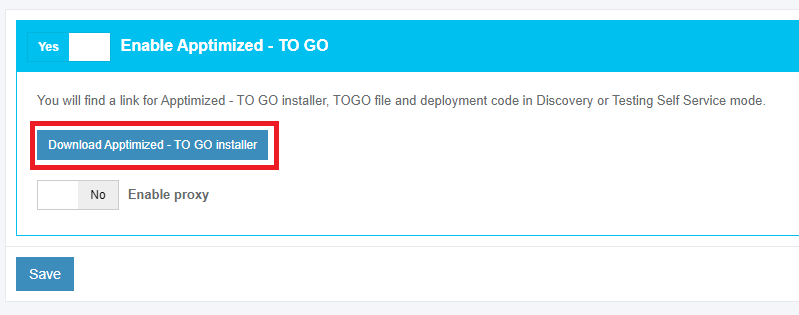
The installer is available for project administrators under Settings in project menu > Apptimized TO GO section > Download Apptimized - TO GO installer button.
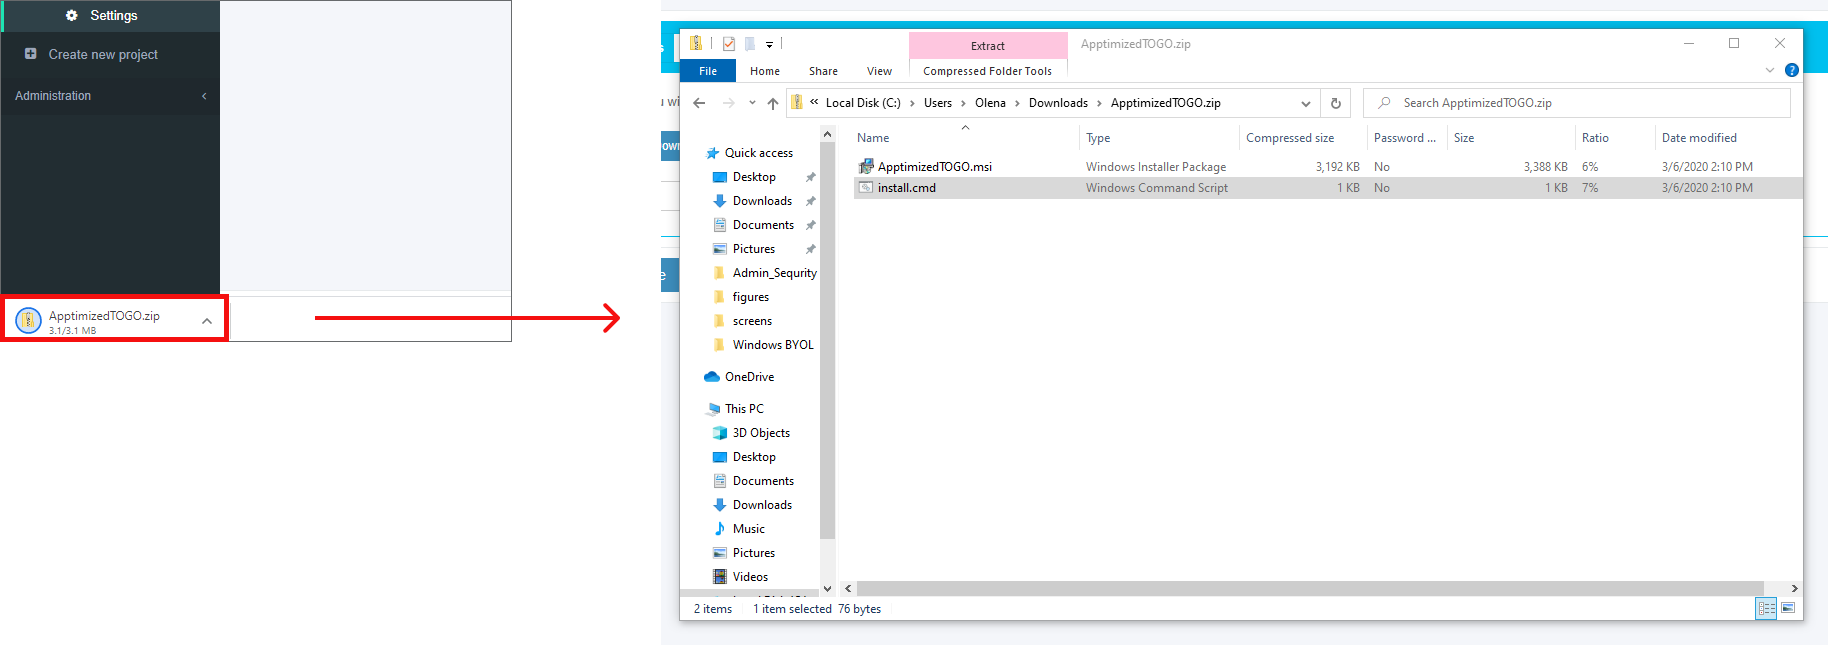
The installer comes compressed in the ApptimizedTOGO.zip archive.
Installation starts by launching install.cmd.
Apptimized TO GO agent installs silently and takes few minutes to complete.
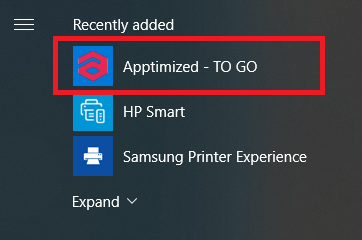
Apptimized TO GO agent launches from the Start menu:
Application import
To run the Discovery or Testing process via Apptimized TO GO the application must be imported to the project.
The option to start the import is called “Classic import”. It is available under Import in project menu > Start Import section > Classic import option.
The initial preparation process may take a while. In case of success, Apptimized shows the Upload sources and discovery document step.
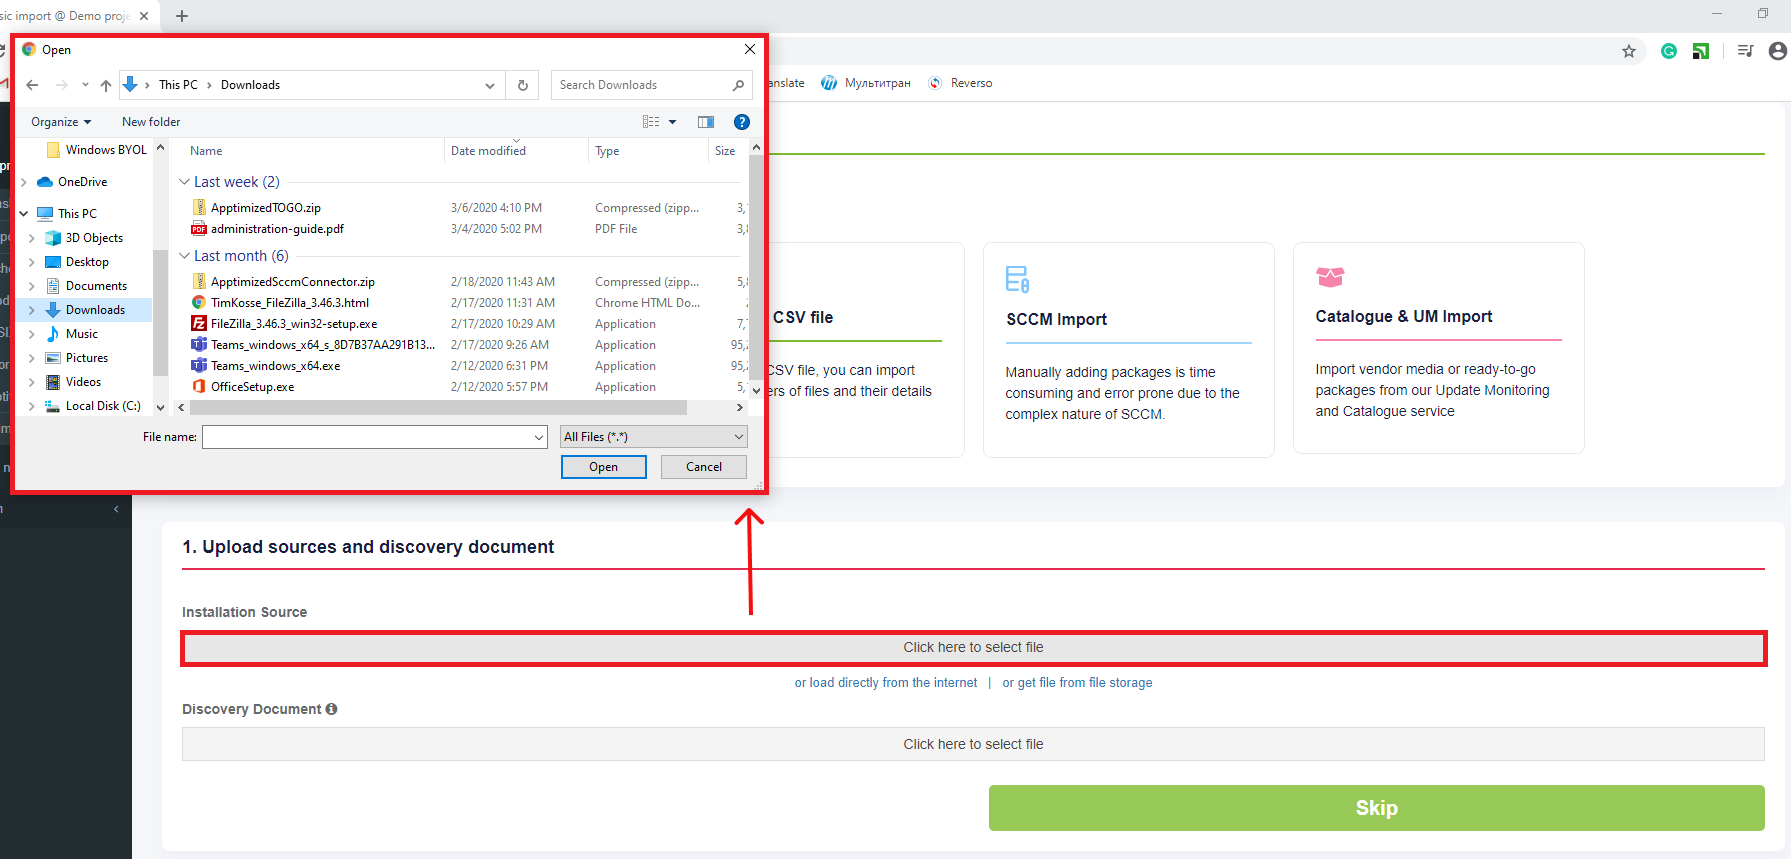
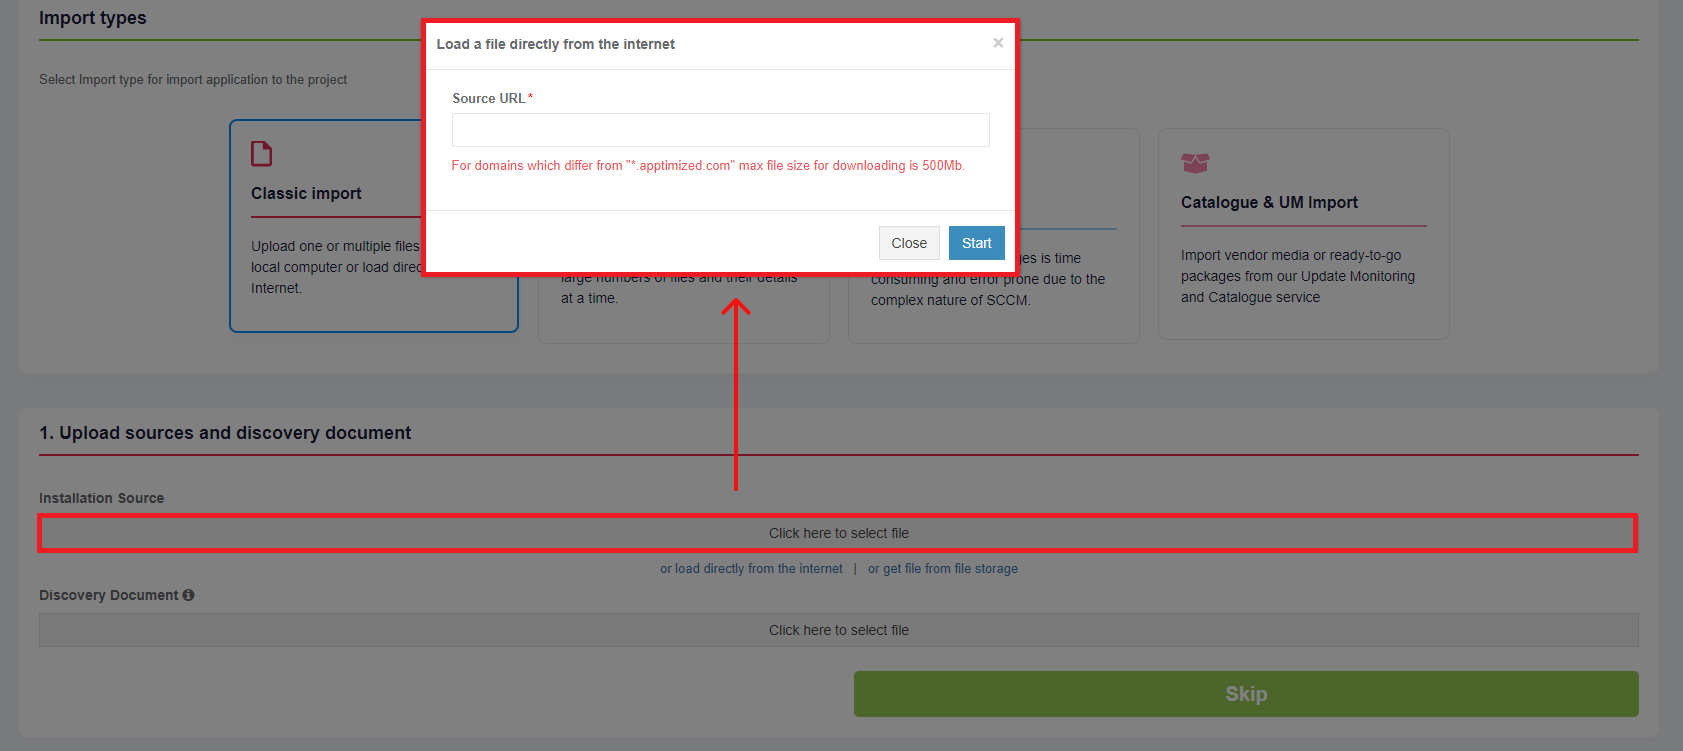
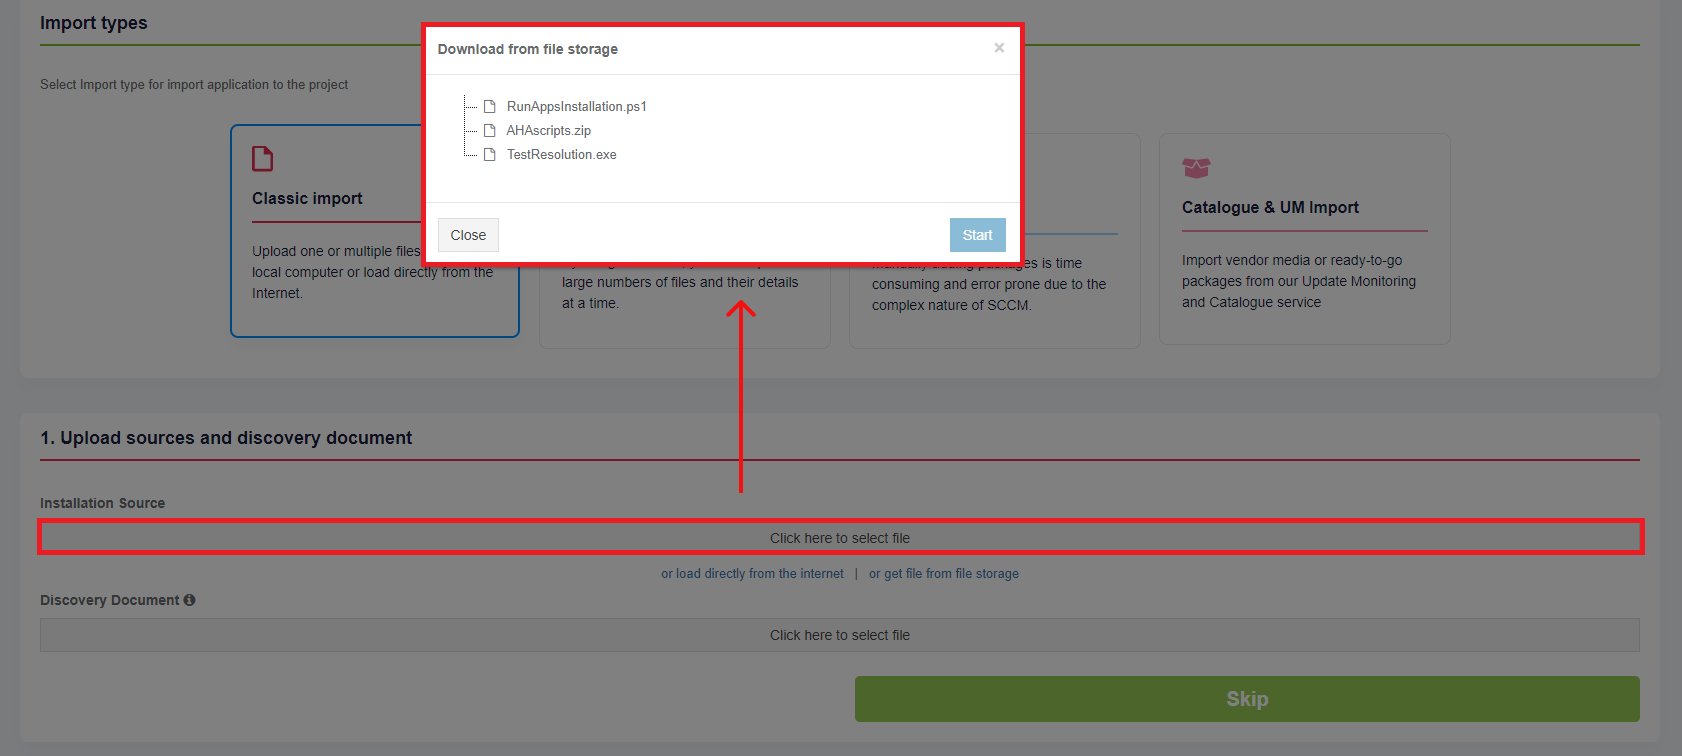
Three options to upload Installation Source are available:
- Upload application file from customer's PC;
- Upload application file from the Internet;
- Upload application file from the file storage.
The Installation Source uploading progress is shown as follows:
The uploading time depends on the application's size. When the download of the application is completed, the customer can start uploading another application. Five application uploads are available for one session.
Uploading Discovery Document is optional. A discovery document can be generated in previous sessions.
One discovery document upload is available for one session.
The Upload sources and discovery document step finalizes by clicking on the Next button.
Apptimized shows the Metadata step when successful.
The process reverts to the previous step by clicking on the Upload sources and discovery document button.
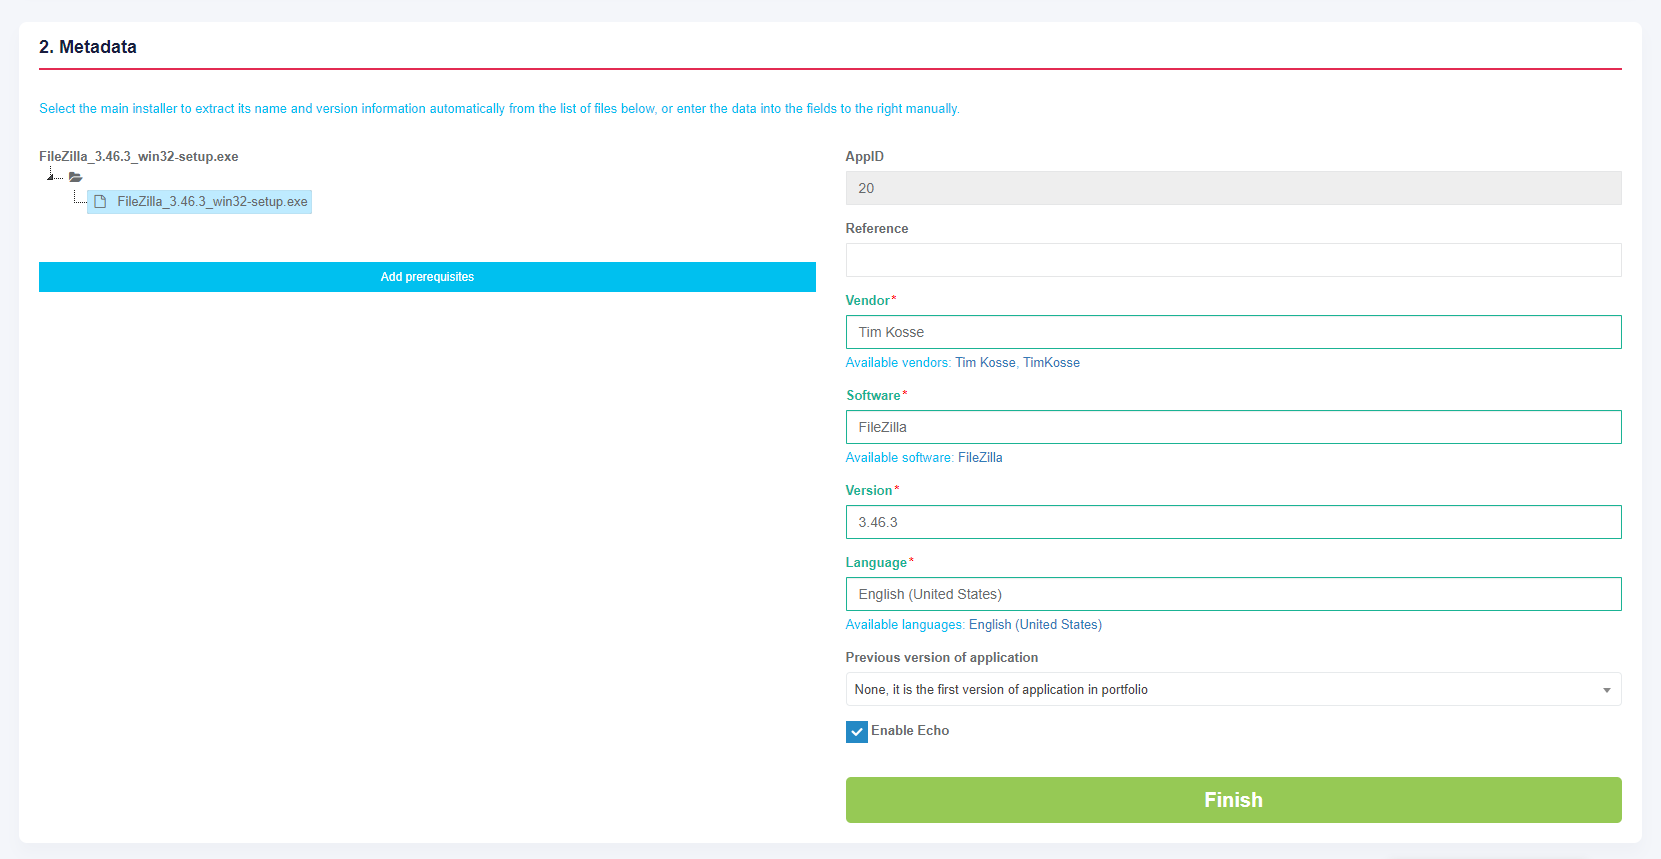
To extract the application metadata automatically a customer can select the main installer from the list on the left or can enter the metadata manually into the fields on the right. All required fields have * in front of their label.
The following metadata will be provided:
Table 1. Application metadata
|
Metadata |
Details |
|
Application ID |
The application ID is a unique identifier generated automatically for every application during its upload. Application ID provides application identification. |
|
Reference |
This field is optional and can stay blank. This field provides additional comments from a customer to the Apptimized portal (i.e. internal application ID). |
|
Vendor |
This field defines the vendor name (i.e. Tim Kosse). This is a required field. |
|
Software |
This field defines the application name (i.e. FileZilla). This is a required field. |
|
Version |
This field defines the application version (i.e. 3.46.3). This is a required field. |
|
Language |
This field defines the application language (i.e. English (United States)). This is a required field. |
|
A previous version of an application |
This field defines if the previous version of the application is available in the portfolio. The default value is None, it is the first version of the application in the portfolio. A click opens a dropdown list to select the previous version of the application from the list. |
|
Enable Echo |
This option defines if Echo is needed to be enabled. The Echo is enabled by default. Learn more about Echo. |
The prerequisites can be added by clicking on the Add prerequisites button.
A prerequisite may be a specific application that must be installed before the target application.
A field "Select media type for …" is filled automatically can be changed if needed.
A prerequisite is added by clicking on the Save button. Apptimized shows the following notification when successful:
Current prerequisites can be changed by clicking on the Edit prerequisites button and by following the same set of operations as for adding a prerequisite.
The Metadata step finalizes by clicking on the Finish button.
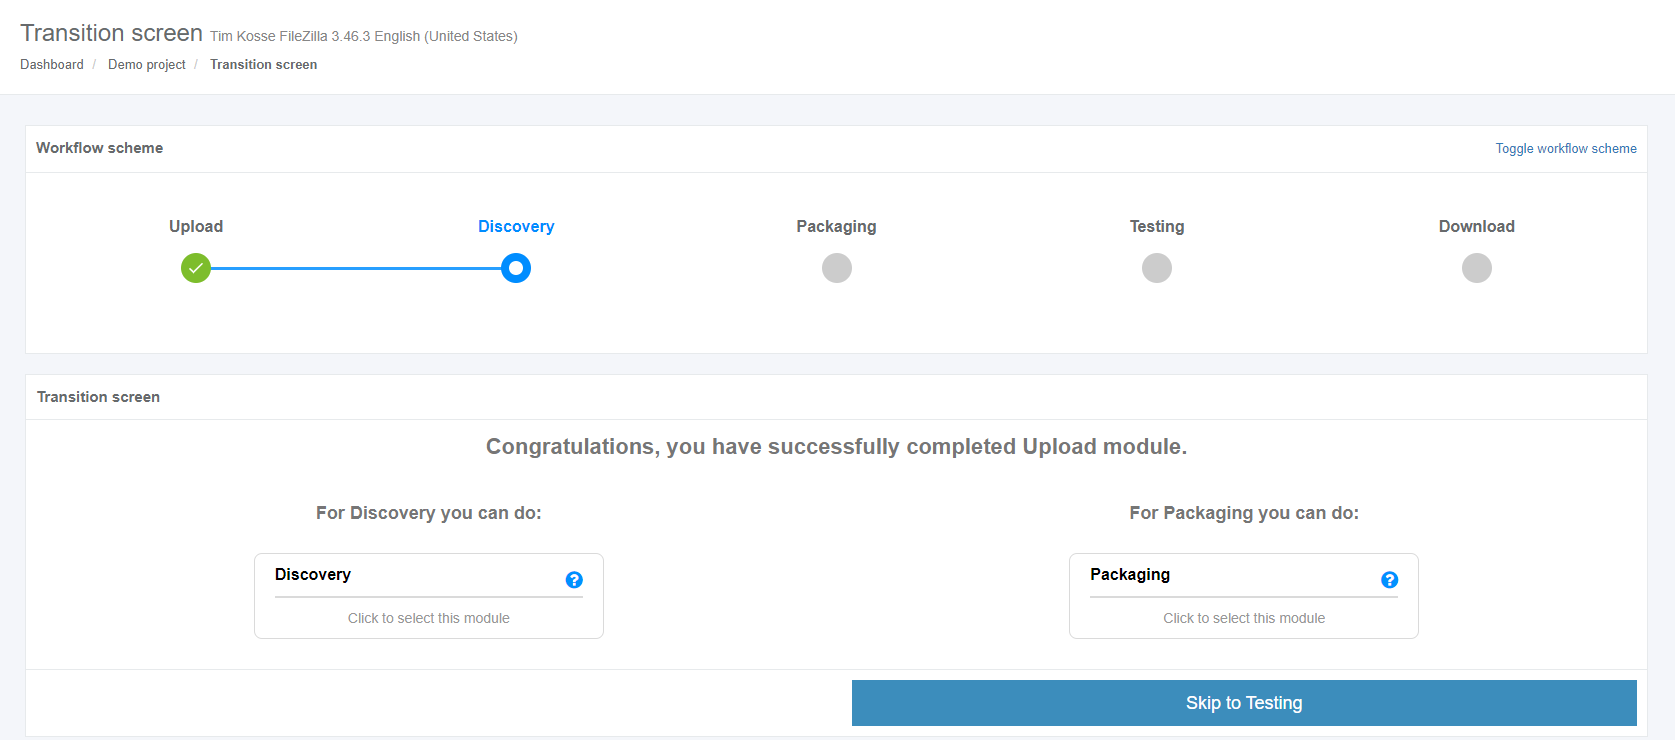
A Transition screen for application immediately appears where the Workflow scheme and modalities for interaction with the application (namely discovery, packaging, testing) are available.
Apptimized TO GO can be used only for Discovery and Testing.

