# Apptimized TO GO Agent integration

#### Enable Apptimized TO GO agent

The one-time configuration is available for project administrators under **Settings** in the project menu &gt; **Apptimized TO GO** section. Apptimized - TO GO becomes active when switched on.

[![to_go_02_2.png](https://docs.apptimized.com/uploads/images/gallery/2020-03/scaled-1680-/ja7IqWTFZpix6JCP-to_go_02_2.png)](https://docs.apptimized.com/uploads/images/gallery/2020-03/ja7IqWTFZpix6JCP-to_go_02_2.png)

Settings are persisted on click to **Save** button.

[![to_go_04_1.png](https://docs.apptimized.com/uploads/images/gallery/2020-03/scaled-1680-/l7hlXAX6o1rk0YGb-to_go_04_1.png)](https://docs.apptimized.com/uploads/images/gallery/2020-03/l7hlXAX6o1rk0YGb-to_go_04_1.png)

If the endpoint connects to the internet via the proxy server, configure the connection by turning on **Enable proxy** and selecting **Use default windows credentials** or providing credentials in **Username** and **Password** fields.

Settings are persisted on click to **Save** button.

In case of success, Apptimized shows the following notification:

[![to_go_03.png](https://docs.apptimized.com/uploads/images/gallery/2020-03/scaled-1680-/SddXnRmc5HQHEwUS-to_go_03.png)](https://docs.apptimized.com/uploads/images/gallery/2020-03/SddXnRmc5HQHEwUS-to_go_03.png)

#### Apptimized TO GO agent installer

The integration procedure ends up with the installation of Apptimized TO GO Agent to the endpoint PC.

The installer is available for project administrators under **Settings** in project menu &gt; **Apptimized TO GO** section &gt; **Download Apptimized - TO GO installer** button.

[![to_go_04.png](https://docs.apptimized.com/uploads/images/gallery/2020-03/scaled-1680-/TNoacvnnOp2xLNH1-to_go_04.png)](https://docs.apptimized.com/uploads/images/gallery/2020-03/TNoacvnnOp2xLNH1-to_go_04.png)

The installer comes compressed in the **ApptimizedTOGO.zip** archive.

[![to_go_05_3.png](https://docs.apptimized.com/uploads/images/gallery/2020-03/scaled-1680-/amraP3I4OJmVQKfM-to_go_05_3.png)](https://docs.apptimized.com/uploads/images/gallery/2020-03/amraP3I4OJmVQKfM-to_go_05_3.png)

Installation starts by launching **install.cmd.**

**Apptimized TO GO** agent installs silently and takes few minutes to complete.

[![to_go_06.png](https://docs.apptimized.com/uploads/images/gallery/2020-03/scaled-1680-/JphYHtqCInoizON4-to_go_06.png)](https://docs.apptimized.com/uploads/images/gallery/2020-03/JphYHtqCInoizON4-to_go_06.png)

**Apptimized TO GO** agent launches from the Start menu:

[![to_go_07.png](https://docs.apptimized.com/uploads/images/gallery/2020-03/scaled-1680-/E7Uyu6wsJbGp2Lk0-to_go_07.png)](https://docs.apptimized.com/uploads/images/gallery/2020-03/E7Uyu6wsJbGp2Lk0-to_go_07.png)

####  

#### Application import

To run the **Discovery** or **Testing** process via **Apptimized TO GO** the application must be imported to the project.

The option to start the import is called “**Classic import**”. It is available under **Import** in project menu &gt; **Start Import** section &gt; **Classic import** option.

[![to_go_08_2.png](https://docs.apptimized.com/uploads/images/gallery/2020-03/scaled-1680-/UZhQoLS0zqkVZq2I-to_go_08_2.png)](https://docs.apptimized.com/uploads/images/gallery/2020-03/UZhQoLS0zqkVZq2I-to_go_08_2.png)

The initial preparation process may take a while. In case of success, Apptimized shows the **Upload sources and discovery document** step.

[![to_go_09.png](https://docs.apptimized.com/uploads/images/gallery/2020-03/scaled-1680-/c3nEbDex5kJhgwqo-to_go_09.png)](https://docs.apptimized.com/uploads/images/gallery/2020-03/c3nEbDex5kJhgwqo-to_go_09.png)

Three options to upload **Installation Source** are available:

- Upload application file from customer's PC;

[![to_go_10_1.png](https://docs.apptimized.com/uploads/images/gallery/2020-03/scaled-1680-/6NVJj2N85iCJXVbP-to_go_10_1.png)](https://docs.apptimized.com/uploads/images/gallery/2020-03/6NVJj2N85iCJXVbP-to_go_10_1.png)

- Upload application file from the Internet;

[![to_go_10_2.png](https://docs.apptimized.com/uploads/images/gallery/2020-03/scaled-1680-/9cIKk4pBr35ZimZB-to_go_10_2.png)](https://docs.apptimized.com/uploads/images/gallery/2020-03/9cIKk4pBr35ZimZB-to_go_10_2.png)

- Upload application file from the file storage.

[![to_go_10_3.png](https://docs.apptimized.com/uploads/images/gallery/2020-03/scaled-1680-/LDm4uNLJnFxaEqlF-to_go_10_3.png)](https://docs.apptimized.com/uploads/images/gallery/2020-03/LDm4uNLJnFxaEqlF-to_go_10_3.png)

The **Installation Source** uploading progress is shown as follows:

[![to_go_11.png](https://docs.apptimized.com/uploads/images/gallery/2020-03/scaled-1680-/1xMzEPX7lMeXgGqY-to_go_11.png)](https://docs.apptimized.com/uploads/images/gallery/2020-03/1xMzEPX7lMeXgGqY-to_go_11.png)

The uploading time depends on the application's size. When the download of the application is completed, the customer can start uploading another application. **Five** application uploads are available for one session.

Uploading **Discovery** **Document** is optional. A discovery document can be generated in previous sessions.

**One** discovery document upload is available for **one** session.

The **Upload sources and discovery document** step finalizes by clicking on the **Next** button.

Apptimized shows the **Metadata** step when successful.

[![to_go_12.png](https://docs.apptimized.com/uploads/images/gallery/2020-03/scaled-1680-/RIzmmDhx5RAzUN6P-to_go_12.png)](https://docs.apptimized.com/uploads/images/gallery/2020-03/RIzmmDhx5RAzUN6P-to_go_12.png)

The process reverts to the previous step by clicking on the **Upload sources and discovery document** button.

[![to_go_13.png](https://docs.apptimized.com/uploads/images/gallery/2020-03/scaled-1680-/bedL3VjubW42vE3E-to_go_13.png)](https://docs.apptimized.com/uploads/images/gallery/2020-03/bedL3VjubW42vE3E-to_go_13.png)

To extract the application metadata automatically a customer can select the main installer from the list on the left or can enter the metadata manually into the fields on the right. All required fields have <span style="color: #ff0000;">\*</span> in front of their label.

The following metadata will be provided:

Table 1. Application metadata

<table border="1" id="bkmrk-metadata-details-app" style="height: 580px; width: 816px;" width="816"><tbody><tr><td style="width: 224px;">**Metadata**

</td><td style="width: 591px;">**Details**

</td></tr><tr><td style="width: 224px;">Application ID

</td><td style="width: 591px;">The application ID is a unique identifier generated automatically for every application during its upload.

Application ID provides application identification.

</td></tr><tr><td style="width: 224px;">Reference

</td><td style="width: 591px;">This field is optional and can stay blank.

This field provides additional comments from a customer to the Apptimized portal (i.e. internal application ID).

</td></tr><tr><td style="width: 224px;">Vendor

</td><td style="width: 591px;">This field defines the vendor name (i.e. Tim Kosse).

This is a required field.

</td></tr><tr><td style="width: 224px;">Software

</td><td style="width: 591px;">This field defines the application name (i.e. FileZilla).

This is a required field.

</td></tr><tr><td style="width: 224px;">Version

</td><td style="width: 591px;">This field defines the application version (i.e. 3.46.3).

This is a required field.

</td></tr><tr><td style="width: 224px;">Language

</td><td style="width: 591px;">This field defines the application language (i.e. English (United States)).

This is a required field.

</td></tr><tr><td style="width: 224px;">A previous version of an application

</td><td style="width: 591px;">This field defines if the previous version of the application is available in the portfolio.

The default value is **None, it is the first version of the application in the portfolio**.

A click opens a dropdown list to select the previous version of the application from the list.

</td></tr><tr><td style="width: 224px;">Enable Echo

</td><td style="width: 591px;">This option defines if Echo is needed to be enabled.

The Echo is enabled by default.

</td></tr></tbody></table>

The prerequisites can be added by clicking on the **Add prerequisites** button.

<p class="callout info"> A prerequisite may be a specific application that must be installed before the target application.</p>

A field "**Select media type for** …" is filled automatically can be changed if needed.

A prerequisite is added by clicking on the **Save** button. Apptimized shows the following notification when successful:

[![to_go_16.png](https://docs.apptimized.com/uploads/images/gallery/2020-03/scaled-1680-/uynQC32RqzBfxMhM-to_go_16.png)](https://docs.apptimized.com/uploads/images/gallery/2020-03/uynQC32RqzBfxMhM-to_go_16.png)

Current prerequisites can be changed by clicking on the **Edit** **prerequisites** button and by following the same set of operations as for adding a prerequisite.

[![to_go_15.png](https://docs.apptimized.com/uploads/images/gallery/2020-03/scaled-1680-/8hkyypxwFMXxJN1Z-to_go_15.png)
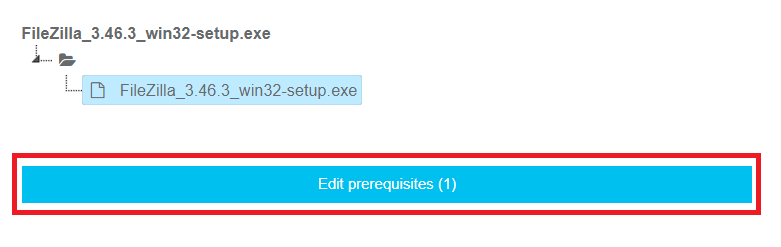
](https://docs.apptimized.com/uploads/images/gallery/2020-03/8hkyypxwFMXxJN1Z-to_go_15.png)

The **Metadata** step finalizes by clicking on the **Finish** button.

A **Transition screen** for application immediately appears where the **Workflow scheme** and modalities for interaction with the application (namely discovery, packaging, testing) are available.

[![to_go_17.png](https://docs.apptimized.com/uploads/images/gallery/2020-03/scaled-1680-/MUPMaHIf3KkZXkcC-to_go_17.png)
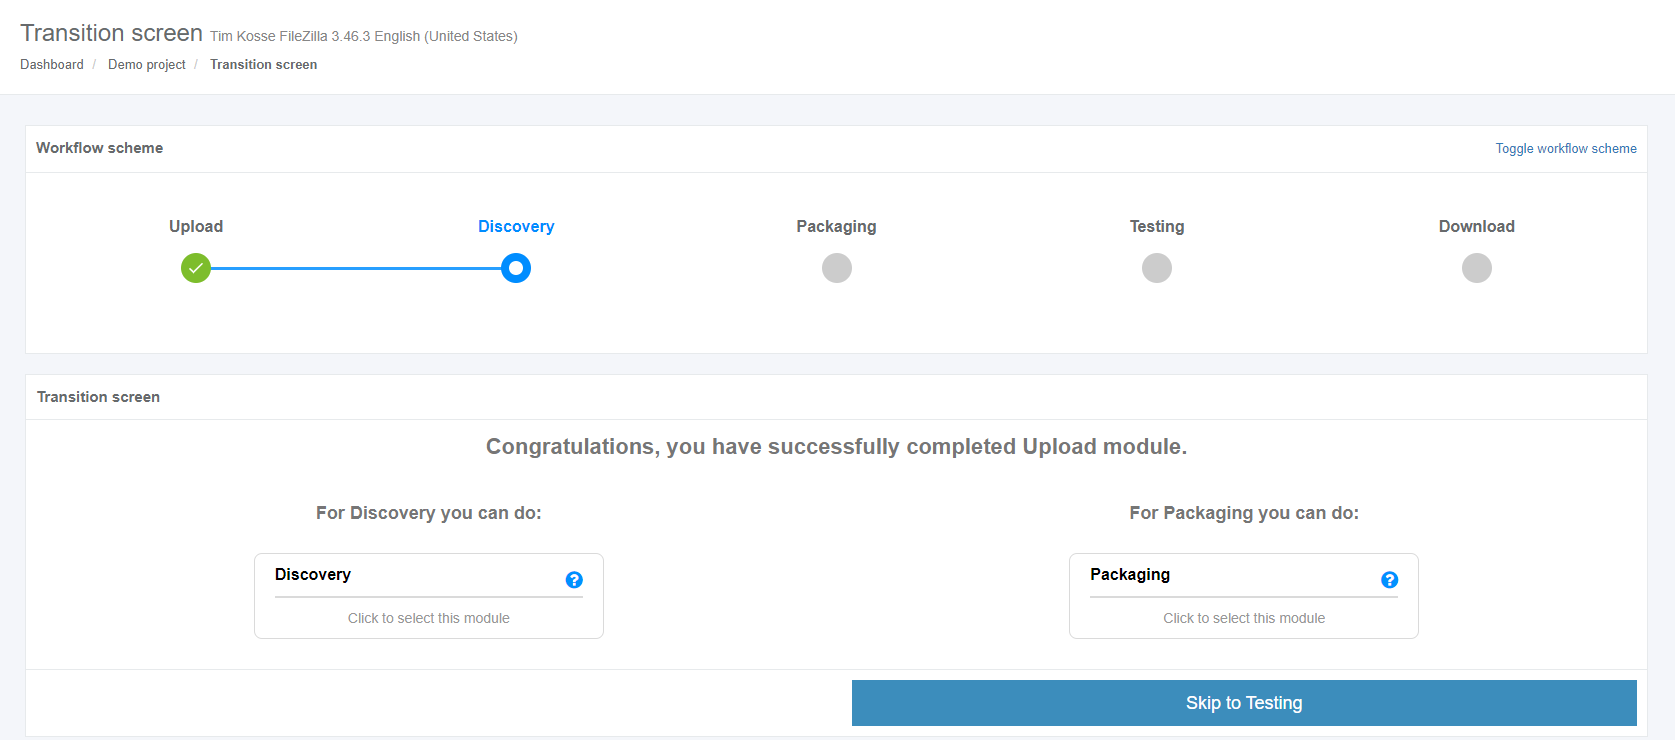
](https://docs.apptimized.com/uploads/images/gallery/2020-03/MUPMaHIf3KkZXkcC-to_go_17.png)

**Apptimized TO GO** can be used only for **Discovery** and **Testing**.