SCCM User Guide
Push to SCCM as Application
Push to SCCM as Application
Deployment starts from the project portfolio.
The application should have a package file produced during the Packaging step (Factory or Self-Service). If the required file is missing, Apptimized shows the notification.
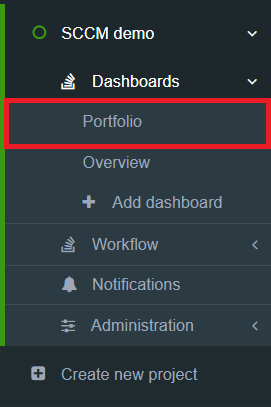
After locating the application in the list, the deployment process can be triggered by clicking the extended menu in the Actions column and selecting Push to SCCM as Application.
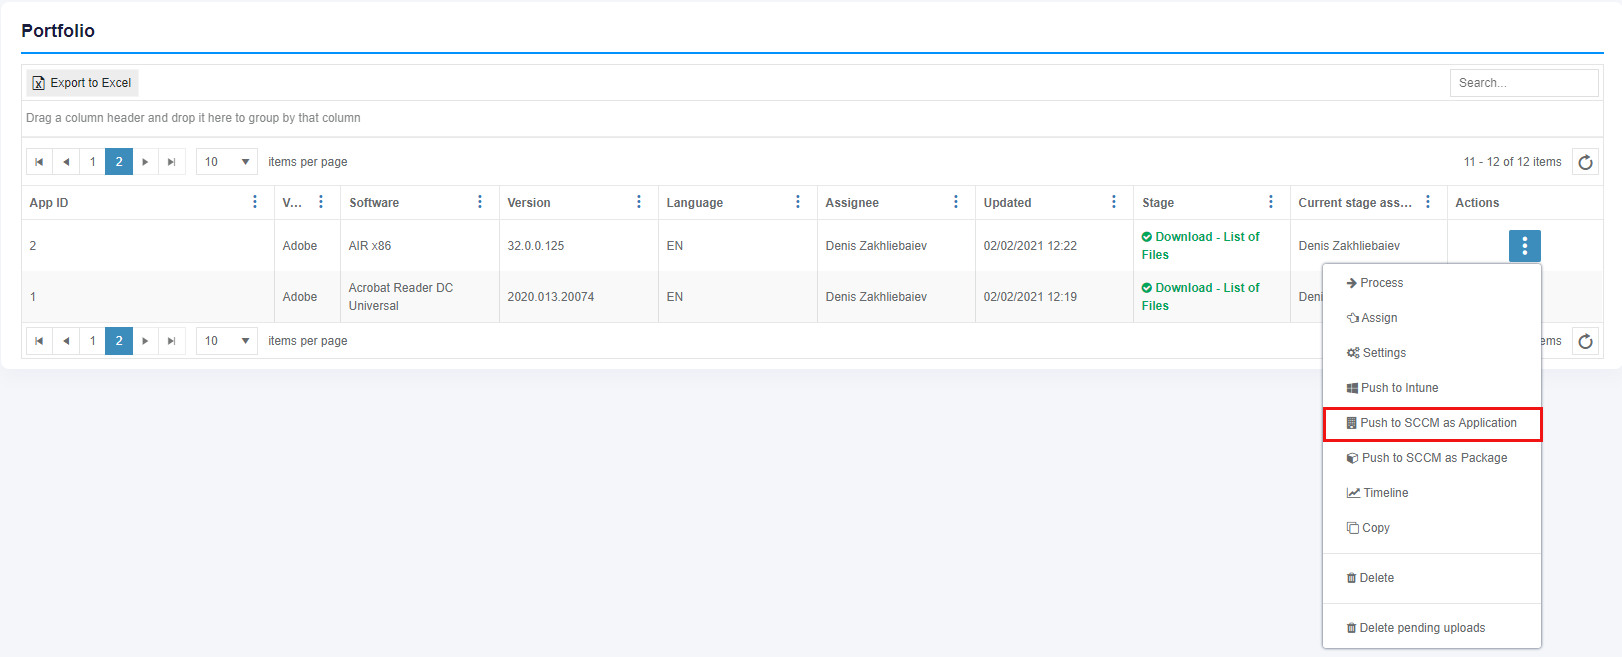
Apptimized shows the following screen when successful:
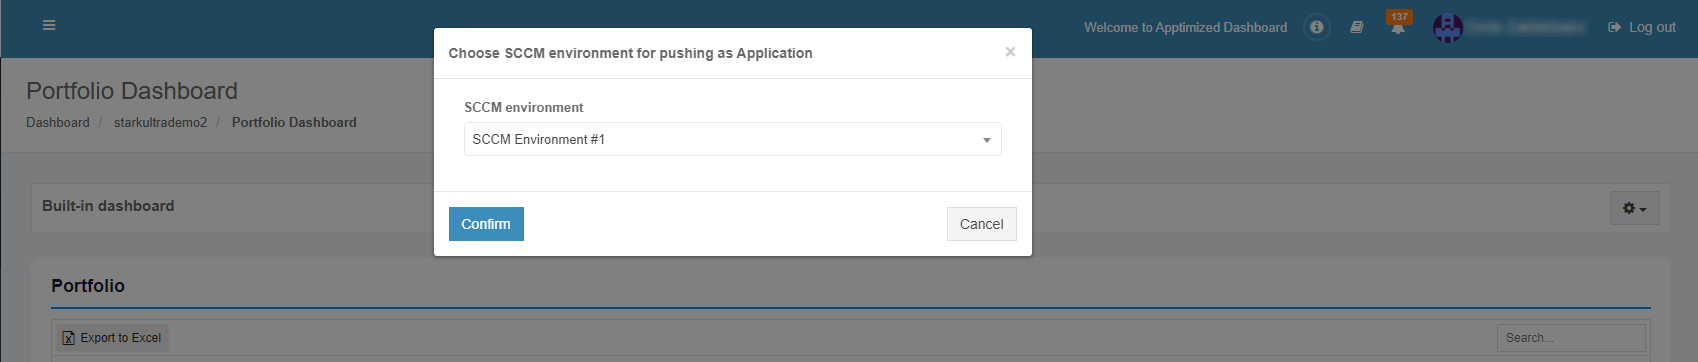
The option to continue the deploying process is available after selecting the SCCM environment and clicking the Confirm button.
Apptimized shows the following screen when successful:
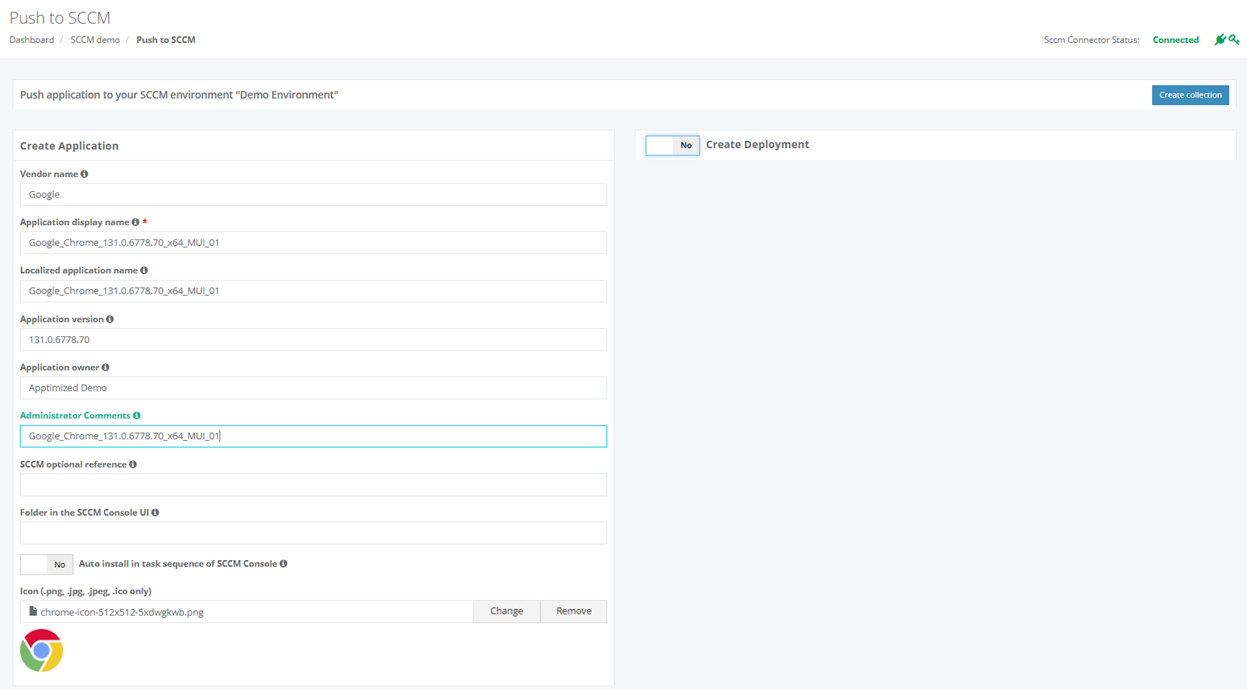
Before proceeding with application settings, ensure that the SCCM Connector is available and has a valid API key:
- SCCM Connector Status Monitor: Located in the upper-right corner of the page, this monitor displays the connection status.
- SCCM Connection Status: The status must show Connected to confirm that the connector is operational.
- Indicator Icons: Check that both the connector and key icons are green, indicating a latest connector version installed and valid API key.
This quick status check ensures that the SCCM Connector is fully functional, allowing seamless application management and deployment to SCCM.

The application inherits default SCCM project settings. . Brief field descriptions are available by hovering the info icon (![]() )
)
An application is scheduled for deployment by clicking on the Save button. Apptimized shows the following notification when successful:
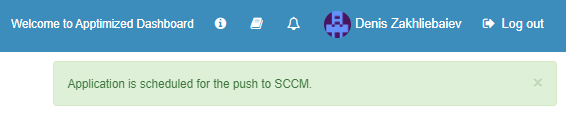
It takes a few minutes for SCCM objects to appear in the SCCM Admin Console.
Details of the deployment process components are described in the sections below.
Create the application in SCCM
The creation of applications can be enabled by Create Application switch and editing appropriate settings if required. Brief field descriptions are available by hovering the info icon (![]() ) located near every field.
) located near every field.

Table 4. Application settings
|
Settings |
Details |
|
Vendor name |
The vendor name equals the vendor field of application in the project portfolio. |
|
Application display name |
The application name equals the application field of application in the project portfolio. |
|
Localized Application name |
The name of the application to be shown in SCCM console. |
|
Application version |
The application version equals the application version of the application in the project portfolio. |
|
Application owner |
Package creator name. The default value is the name of a current user. |
|
Administrator Comments |
This term corresponds to the term Administrator comments in the SCCM admin console. |
|
SCCM optional reference |
Optional reference to the SCCM environment. |
|
Folder in the SCCM Console UI |
This setting indicates the folder for applications in SCCM Console UI. Applications can store in the main folder Applications (default) or any subfolders. |
|
Auto-install in task sequence of SCCM Console |
This setting corresponds to the setting Install or uninstall the application by default in the Connection and default configuration step (see Table 2). |
| Icon (.png, .jpg, .jpeg, .ico only) | This setting allows to Add, Change or Remove the application icon for Software Center. Icons can have pixels dimensions of up to 512×512. |
Create the deployment type in SCCM
The creation of deployment type can be enabled by Create Deployment Type switch and editing appropriate settings if required. Brief field descriptions are available by hovering the info icon (![]() ) located near every field.
) located near every field.
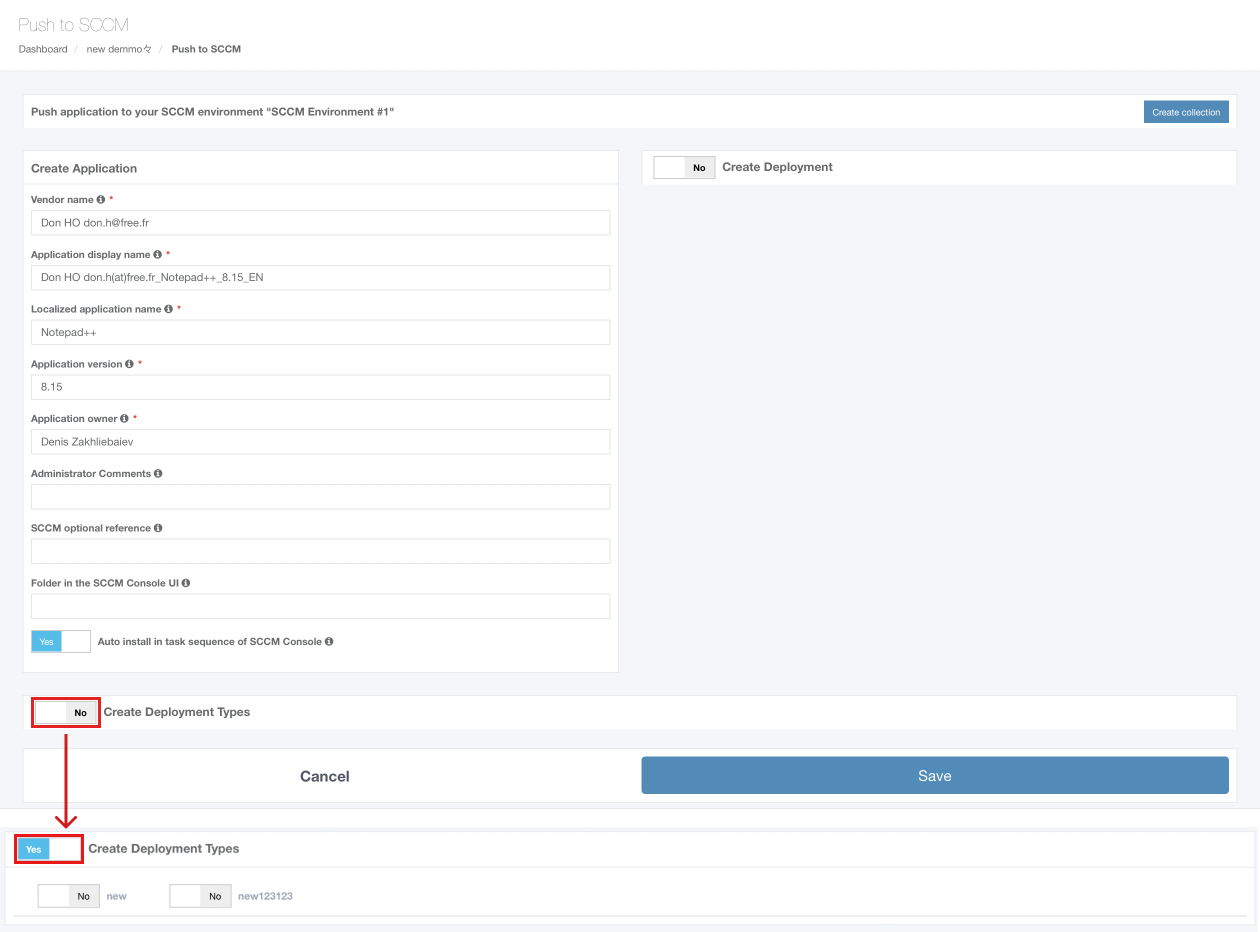
The list of created deployment type templates (see Integration > Connection and default configuration step) is available under the Deployment types block. All templates are disabled by default. A template becomes active when switched on.

To expand the deployment type template, click Yes button.
![]()
Once the Deployment Type is enabled, the Template section can be filled.
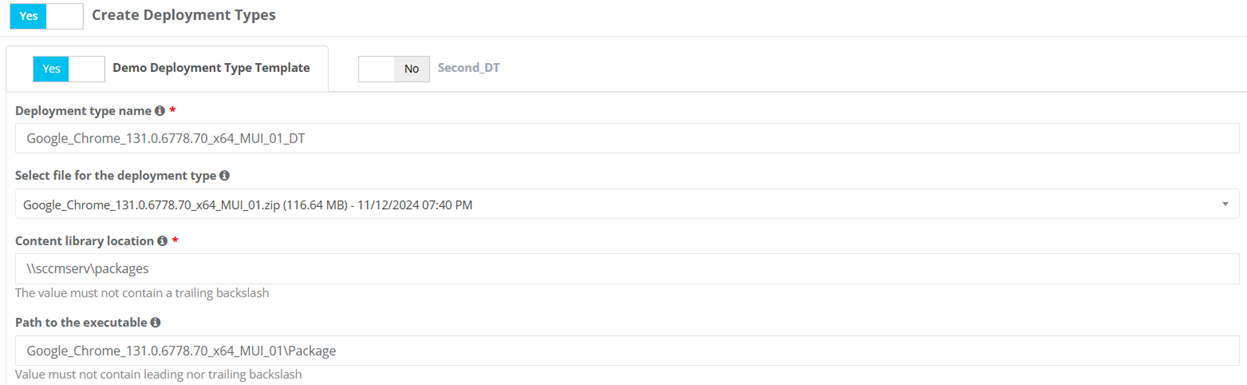
You can modify the default template settings if necessary. These settings correspond to the SCCM integration configuration.
-
Sensitive fields that contain valid values are highlighted in green.

-
If any required field is incorrect, the deployment type will be highlighted in red, and the specific fields with errors will also appear in red.


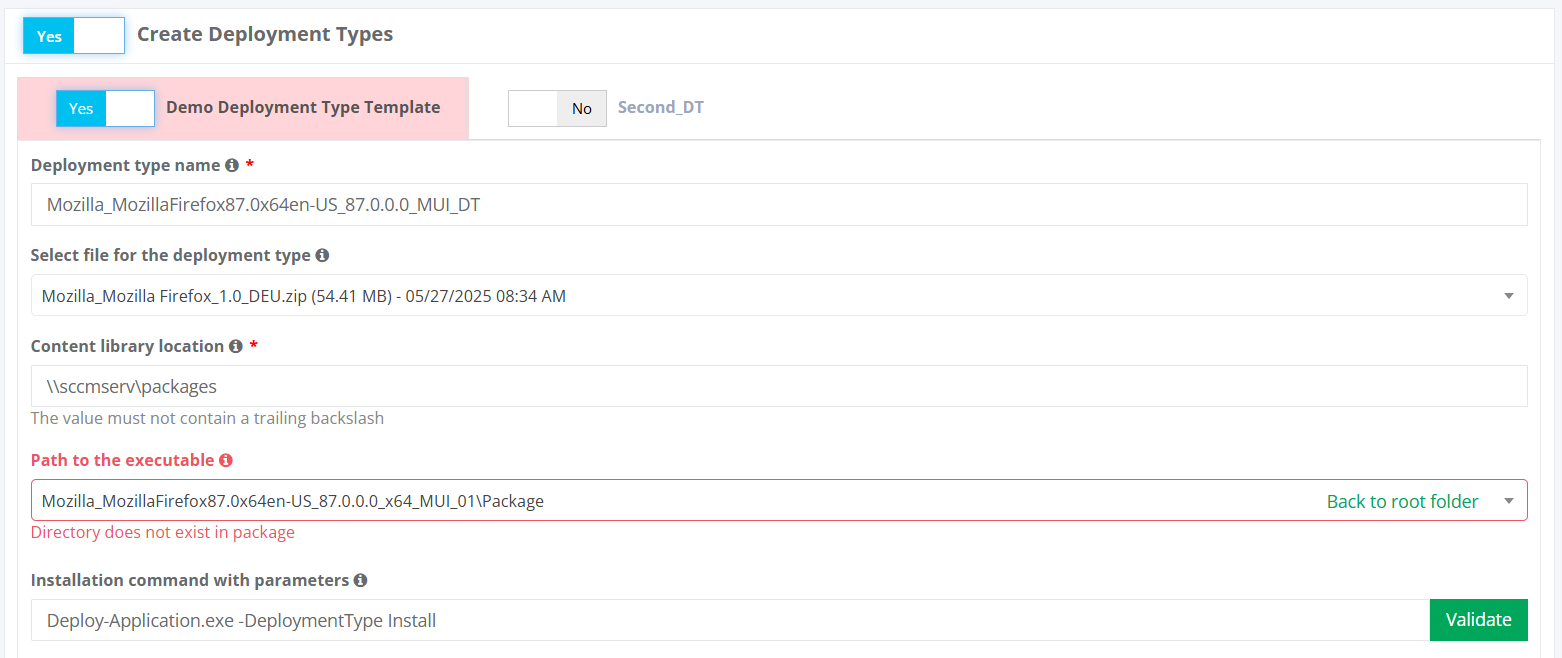
When errors are present, the Save button will be disabled and push to SCCM will be impossible.
To correct the Path to executable:
-
Click the field and begin typing the correct folder name or the name of the file located in that folder.

- Select the correct folder or file from the suggestions. The correct value will be automatically inserted.


-
If the executable is in the root directory, click Back to root folder to navigate there.

- If no executable is found at the specified path, review the available executables listed below the Installation command with parameters field.


-
Copy and paste the correct path.

-
Click Validate.

Once all required values are valid, you can proceed with pushing to SCCM.
Create the deployment in SCCM
Creation of deployment can be enabled by Create Deployment switch and editing appropriate settings if required. Brief field descriptions are available by hovering the info icon (![]() ) located near every field.
) located near every field.
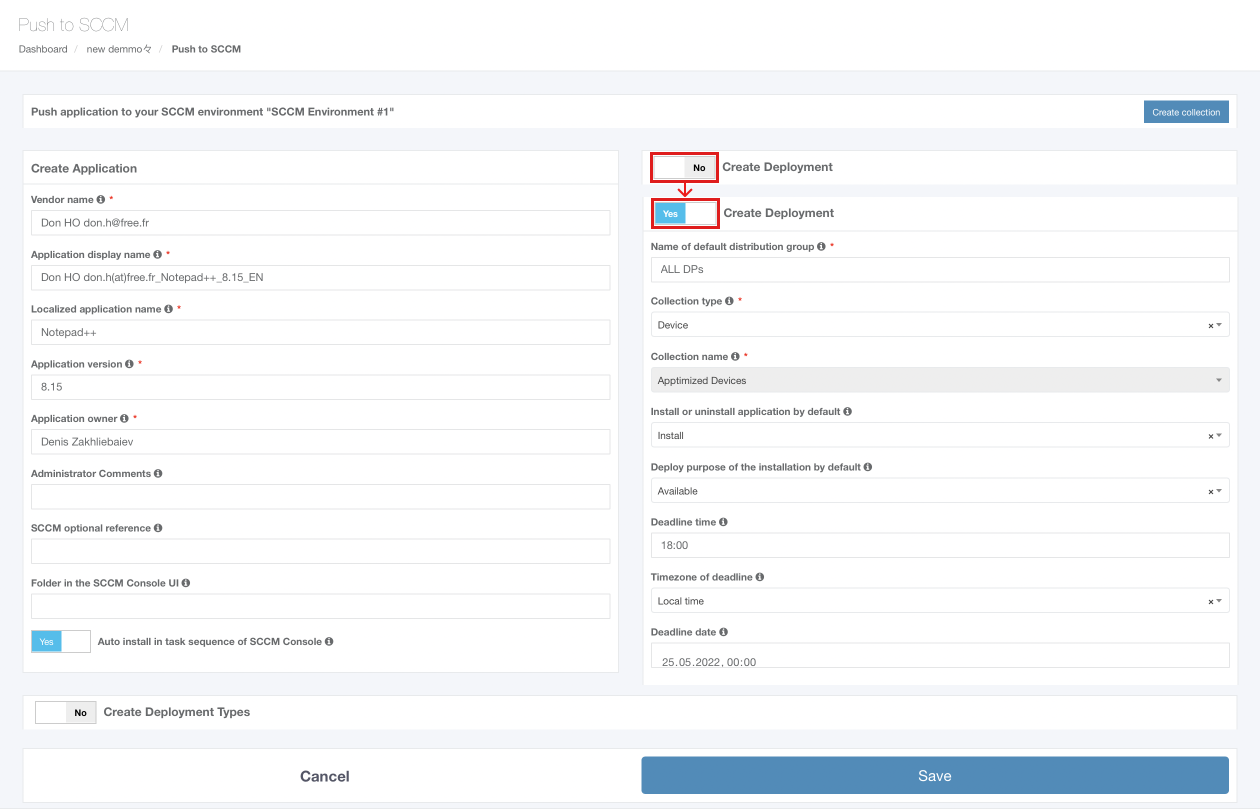
Table 5. Deployment settings
|
Settings |
Details |
|
Name of default destribution group |
This setting corresponds to the setting Name of a default distribution group шn the Connection and default configuration step (see Table 1). |
|
Collection type |
This setting corresponds to the setting Collection type in the Connection and default configuration step (see Table 1). |
|
Collection name |
This setting corresponds to the setting Collection name in the Connection and default configuration step (see Table 1). |
|
Install or uninstall the application by default |
This setting corresponds to the setting Install or uninstall the application by default in the Connection and default configuration step (see Table 2). |
|
Deploy the purpose of the installation by default |
This setting corresponds to the setting Deploy purpose of the installation by default in the Connection and default configuration step (see Table 2). |
|
Deadline time |
This setting corresponds to the setting Deadline time in the Connection and default configuration step (see Table 2). |
|
Time zone of deadline |
This setting corresponds to the setting Time zone of a deadline in the Connection and default configuration step (see Table 1). |
|
Deadline date |
This setting sets the deadline date for the application installation. The default value is set to the current date. |
Push to SCCM as Package
Deployment starts from the project portfolio.
The application should have a package file produced during the Packaging step (Factory or Self-Service). If the required file is missing, Apptimized shows the notification.
After locating the application in the list, the deployment process can be triggered by clicking the extended menu in the Actions column and selecting Push to SCCM as Package.
.png)
Apptimized shows the following screen when successful:
The option to continue the deploying process is available after selecting the SCCM environment and clicking the Confirm button.
Apptimized shows the following screen when successful:

The package name option is the only option that requires manual verification and confirmation. The package inherits default SCCM project settings. . Brief field descriptions are available by hovering the info icon (![]() )
)
Note. Max length for a package name is 50 symbols.
The package is scheduled for deployment by clicking on the Save button. Apptimized shows the following notification when successful:
.png)
It takes a few minutes for SCCM objects to appear in the SCCM Admin Console.
Details of the deployment process components are described in the sections below.
Create the package in SCCM
The creation of applications can be enabled by Create Application switch and editing appropriate settings if required. Brief field descriptions are available by hovering the info icon (![]() ) located near every field.
) located near every field.

|
Settings |
Details |
|
Manufacturer |
This setting equals the vendor field of application in the project portfolio. |
|
Version |
This setting equals the version field of the application in the project portfolio. |
|
Language |
This setting equals the language field of application in the project portfolio. |
|
Сomment |
This setting enables setting the optional description for the package. |
|
Source file |
This setting enables the selection of the package that will be deployed under SCCM. |
|
Where unzip package source |
This setting corresponds to Where unzip package source setting under Project Settings > Integration > SCCM > Package template. (see Table 4) |
|
Use package name for the folder name |
This setting corresponds to Use package name for the folder name setting under Project Settings > Integration > SCCM > Package template. (see Table 4) |
|
Source path |
This setting corresponds to Source path setting under Project Settings > Integration > SCCM > Package template. (see Table 4) |
|
Folder for package in Sccm Console |
This setting corresponds to Folder for package in Sccm Console setting under Project Settings > Integration > SCCM > Package template. (see Table 4)
|
|
Windows user name for folder path in SCCM Console |
This setting indicates the user name of user under Windows OS for folder path in SCCM Console.
|
|
Remove default User account |
This setting corresponds to Remove default User account setting under Project Settings > Integration > SCCM > Package template. (see Table 4)
|
|
Add account access |
This setting corresponds to Add account access setting under Project Settings > Integration > SCCM > Package template. (see Table 4)
|
|
Group name |
This setting corresponds to Group name setting under Project Settings > Integration > SCCM > Package template. (see Table 4)
|
|
Permission access level |
This setting corresponds to Permission access level setting under Project Settings > Integration > SCCM > Package template. (see Table 4)
|
|
Set security scope |
This setting corresponds to Set security scope setting under Project Settings > Integration > SCCM > Package template. (see Table 4)
|
|
Security scope |
This setting corresponds to Security scope setting under Project Settings > Integration > SCCM > Package template. (see Table 4)
|
Create Program(s) in SCCM
The creation of applications can be enabled by Create Program(s) switch > enabling switches of all created programs under the Project settings (link) and editing appropriate settings if required. Brief field descriptions are available by hovering the info icon () located near every field.
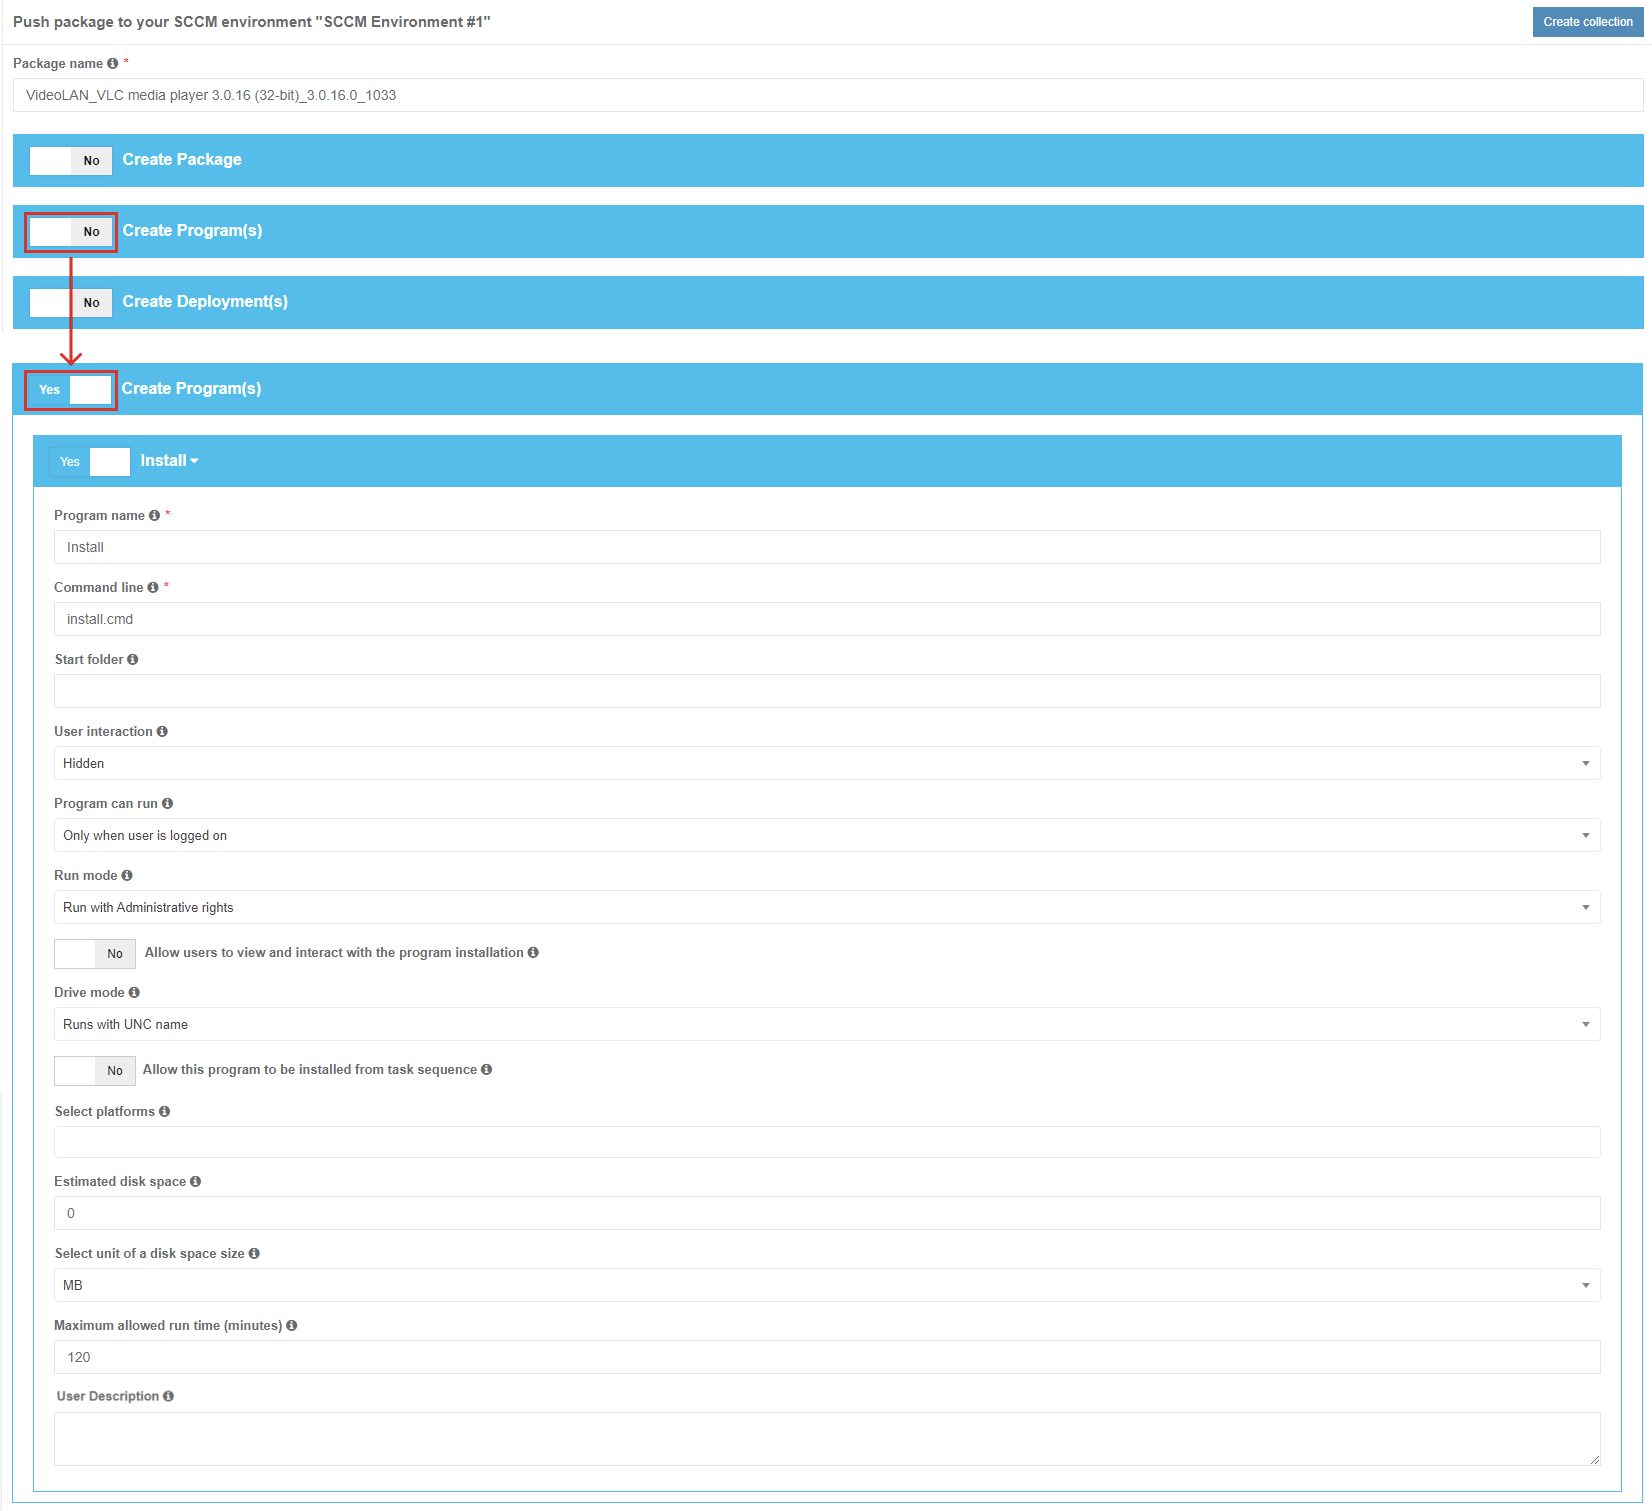
The settings description is available under Project Settings > Integration > SCCM > Package template > Create program button (see Table 5).
Create Deployment(s) in SCCM
The creation of applications can be enabled by Create Program(s) switch > setting the distribution group name > enabling switches of all created deployments under the Project settings (link) and editing appropriate settings if required. Brief field descriptions are available by hovering the info icon () located near every field.
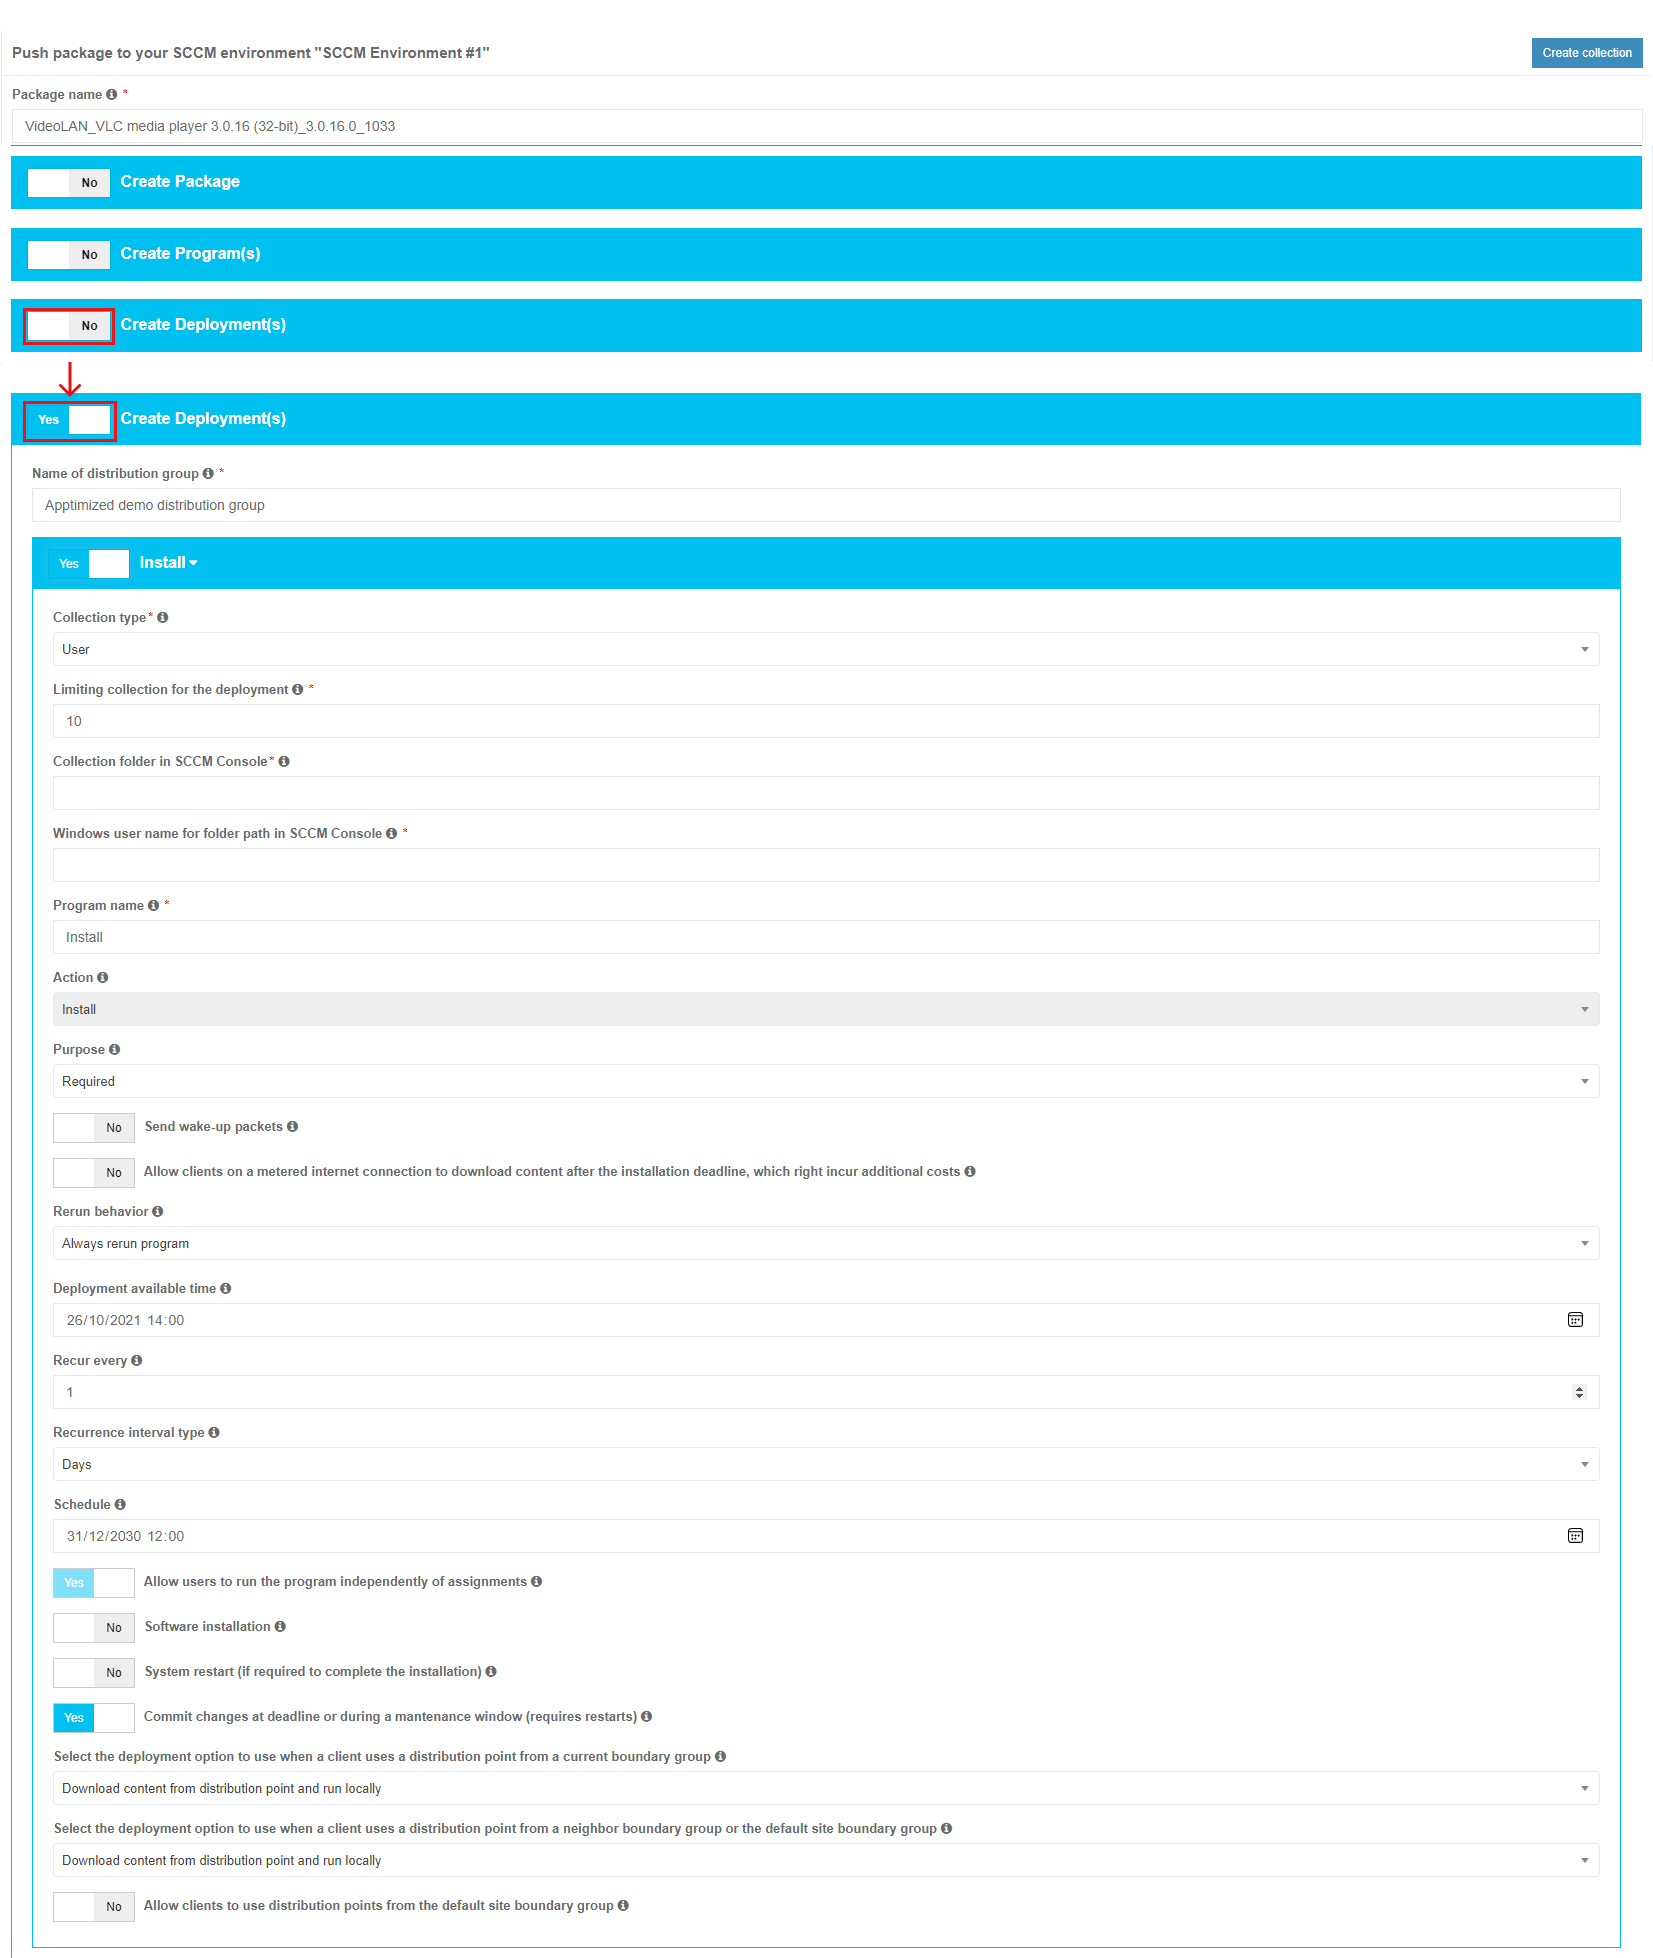
The settings description is available under Project Settings > Integration > SCCM > Package template > Create deployment button (see Table 6).
Import from SCCM
SCCM application import starts from the Import submenu of the workflow item in the menu of a project.
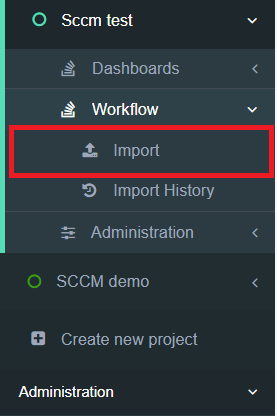
The option to start the import is called “SCCM Import.”
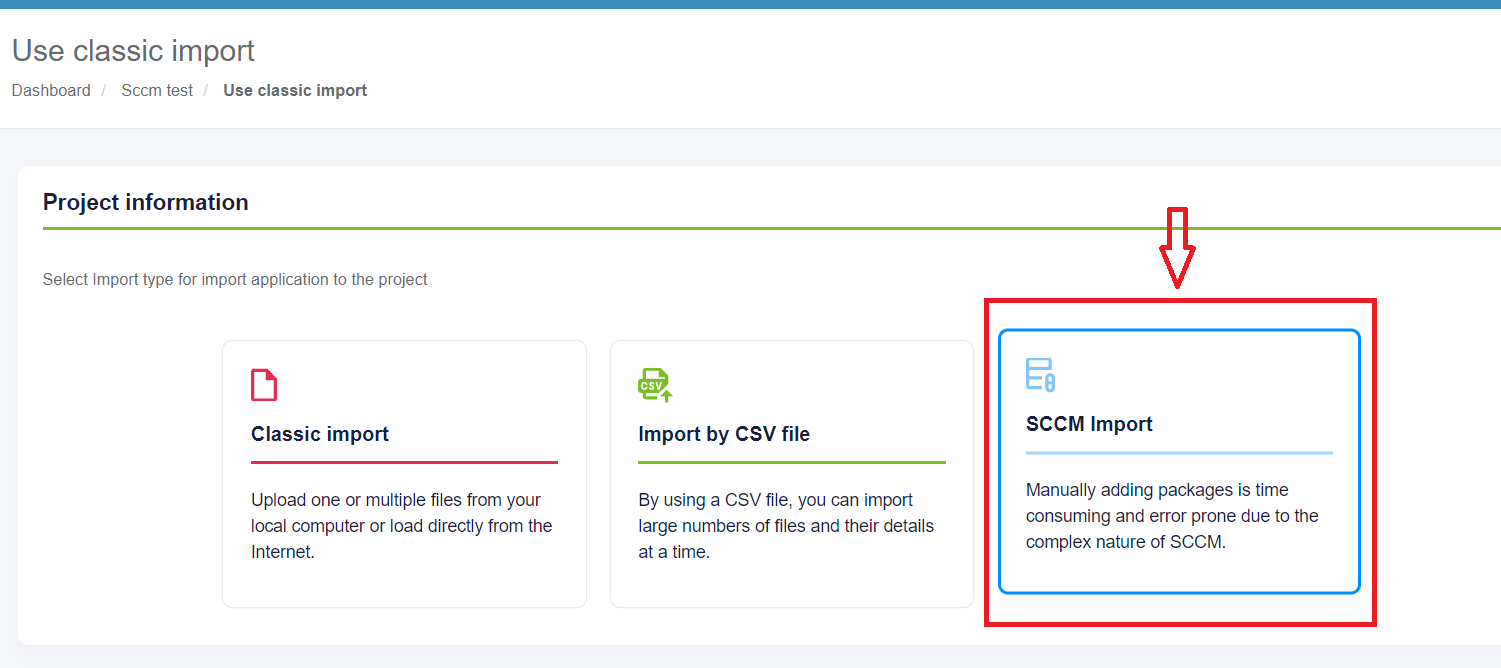
The initial preparation process may take a while.
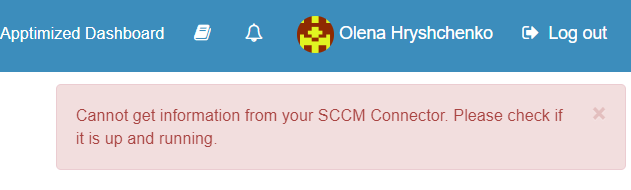
In case of a connection failure, Apptimized shows the following message:
Single import session imports a single folder. For example, one of the following folders import in the scope of import session: root folder Application or folder Test 1 or folder bis_628.
The checkbox All applications always relates to the current folder. The screen below shows the import of contained in the root Applications folder.
Applications can be excluded from import by unticking checkboxes in front of their names.
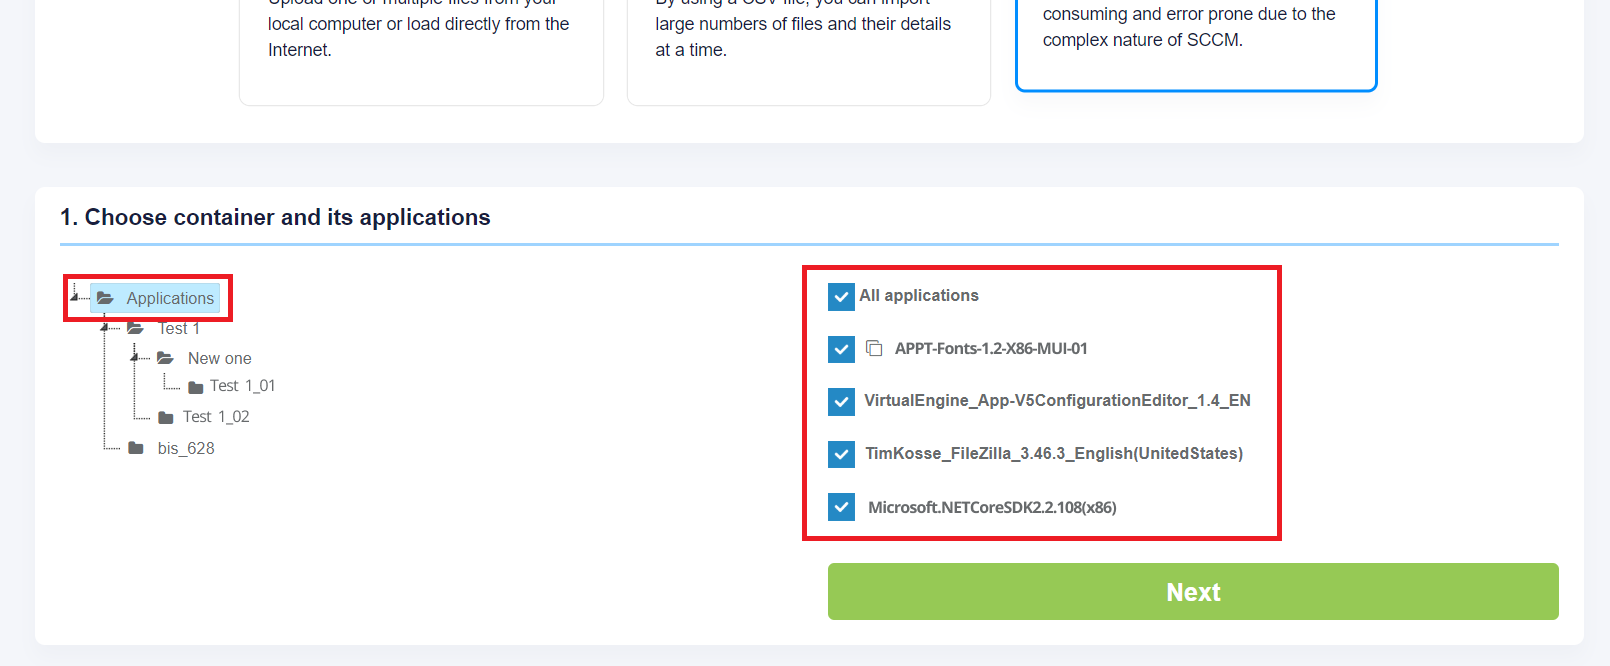
The icon below means that this application already exists in the project portfolio but can be imported for a second time. As a result, this created duplicates in the project portfolio.
The import process starts by clicking on the Next button. It takes up to 30 minutes and will depend on the number of applications and their size.
“Set metadata” shows import candidates' meta information and provides the ability to update it to desired values. All required fields have * in front of their label.
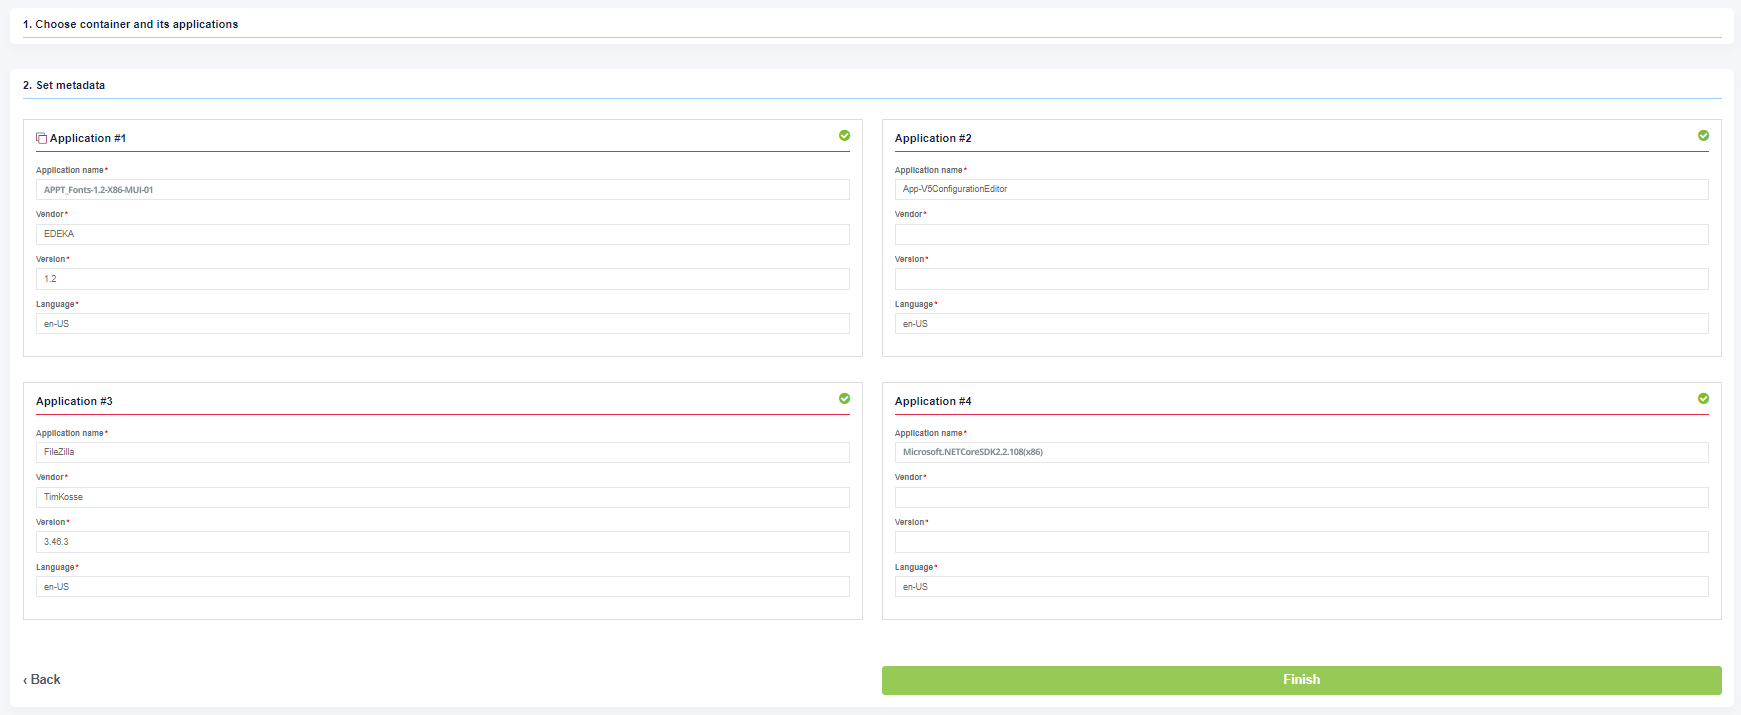
Exclude applications from the import by unticking the checkbox.
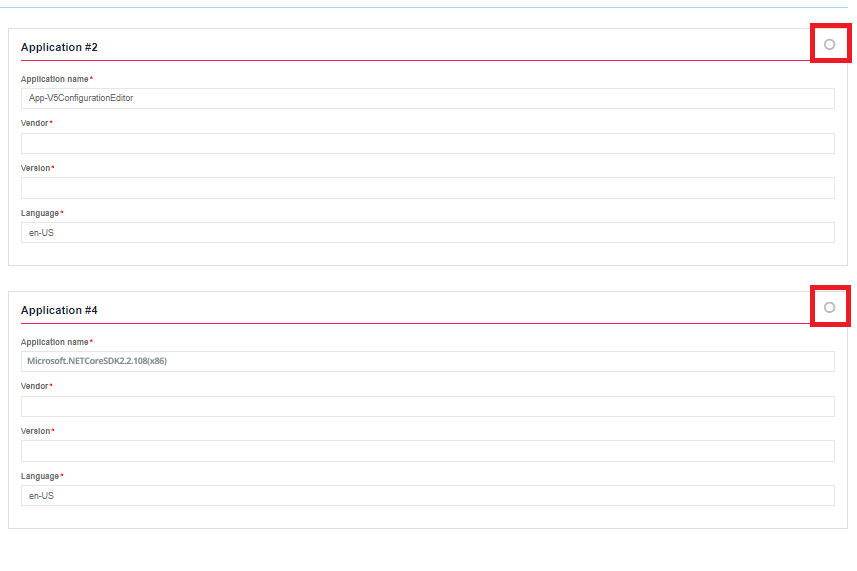
The process reverts to the initial screen by clicking on the Back button and finalizes by clicking on the Finish button.
Apptimized shows the following notification when successful:
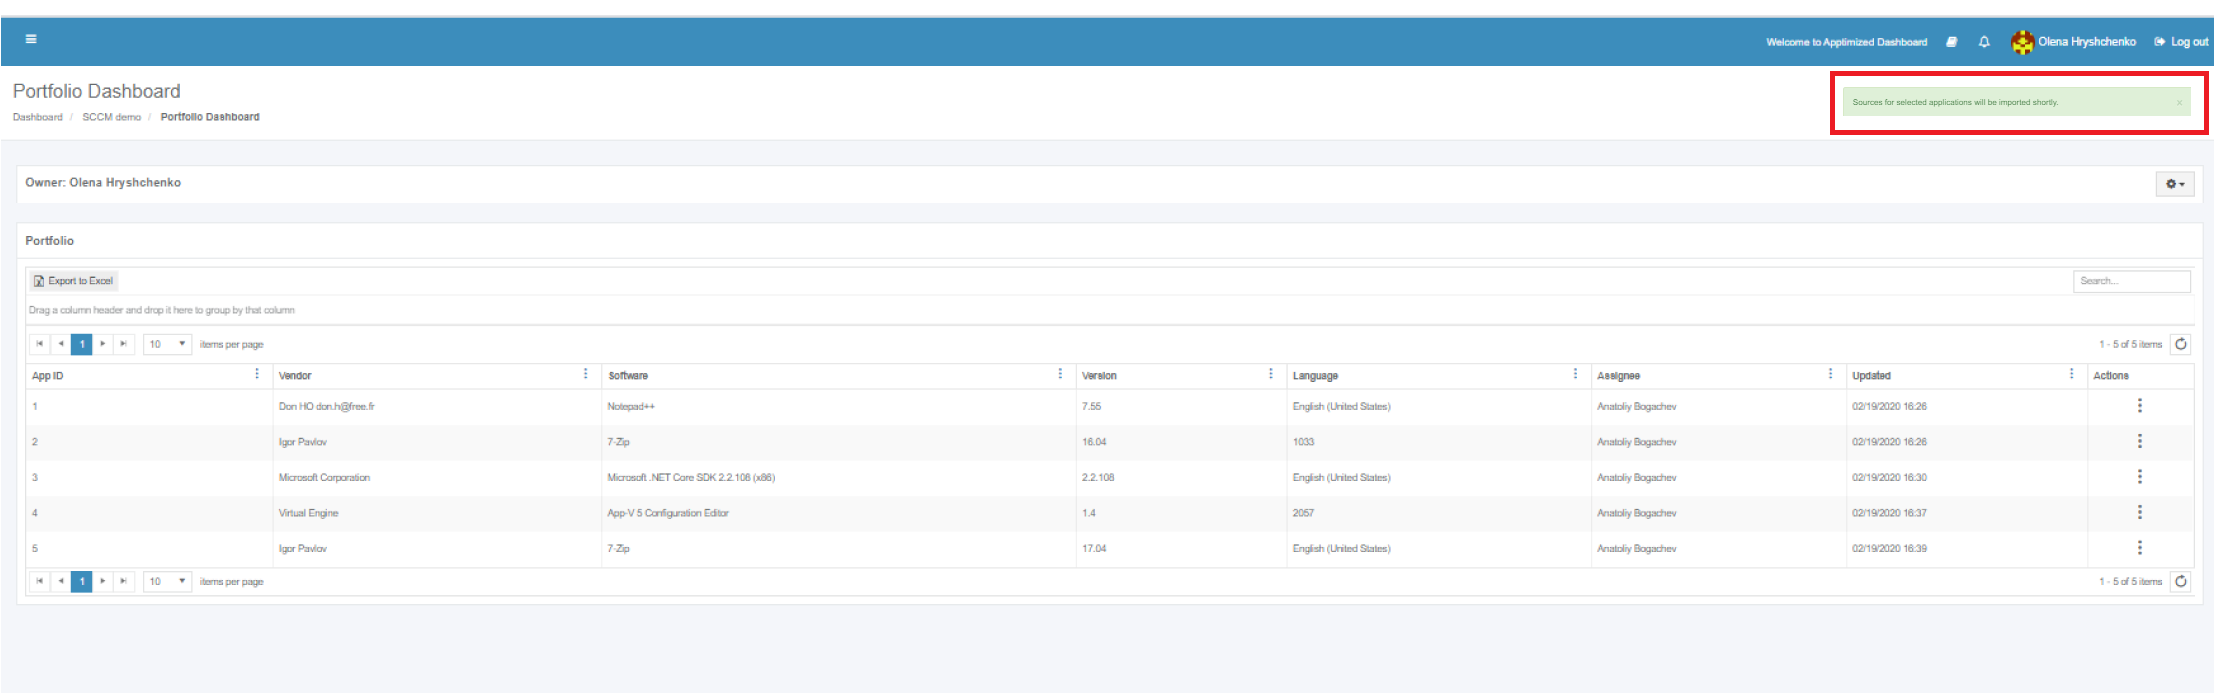
Imported applications immediately appear in the project portfolio.